Example: a secure (HTTPS) License Server with IIS
This section describes a sample configuration of AssureID LocalHost to function as a license server.
Note: There are two ways to certify the LocalHost: you can configure a self-signed certificate, or buy a certificate issued by a trusted authority.
This is a multi-step process that includes the following procedures:
- Installing IIS Manager and IIS Express
- Enabling IIS on Windows 10 and 11
- Configuring a secure website
- Configuring the self-signed certificate to localhost by either: Configuring a self-signed certificate to localhostor Purchasing a certificate issued by a trusted authority.
- Adding certifications for your connected computer
- Verifying the license server
Install IIS Manager and IIS Express
- Install IIS Manager on a computer running either Microsoft Windows 10 or 11.
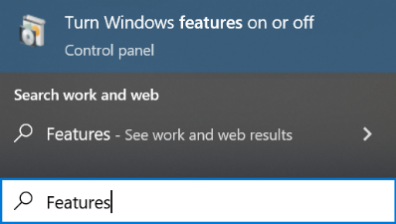
- From the Start menu, type Features, and then select Turn Windows features on or off.
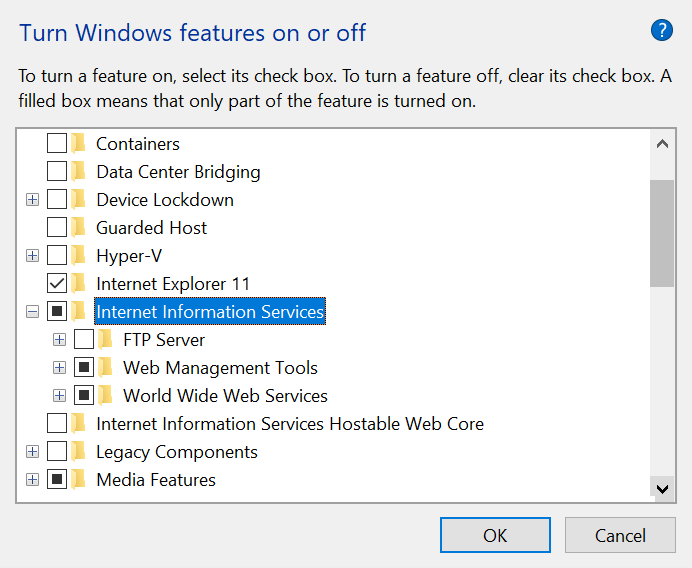
- Select Internet Information Services and then click OK.
- When the installation is complete, click Close.
- Download iisexpress_amd64_en-US.msi from the Microsoft website at https://www.microsoft.com/.
- Install IIS Express.
Enable IIS on Windows 10 and 11
-
From the Start menu, type Features, and then select Turn Windows features on or off.
-
Select the Internet Information Services checkbox, and then click OK.
-
When Windows completes the changes to enable this feature, restart your computer.
Configure a secure website
-
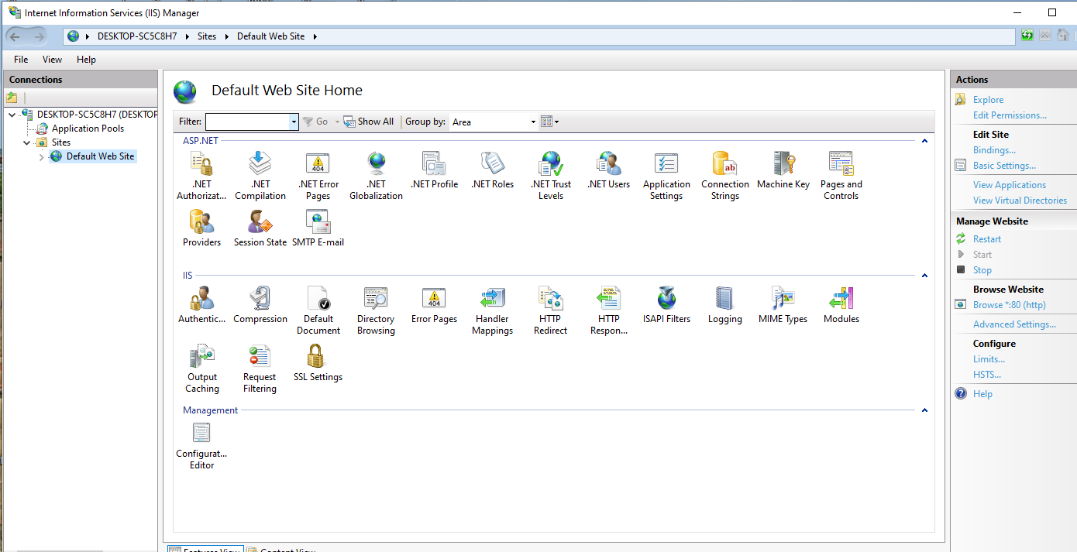
Open Internet Information Services (IIS) Manager:
-
Right-click Sites, and then select Add Website:
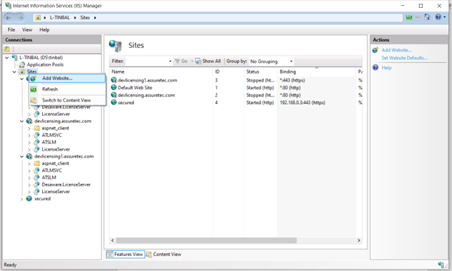
-
Configure the secure website by using the following settings shown in the Add Website window:
| Setting | Description |
|---|---|
| Site Name | Name of the site (for example, secure) |
| Physical Path | SystemDrive%\inetpub\wwwroot% |
| Type | HTTPS (Secured). HTTP (Unsecured) |
| Port | 443 (Secured). 1955 (Unsecured) |
| Select SSL certificate | IIS Express Development Certificate |
-
Click OK.
-
To edit the binding configuration, right-click secured site and select Edit Bindings.
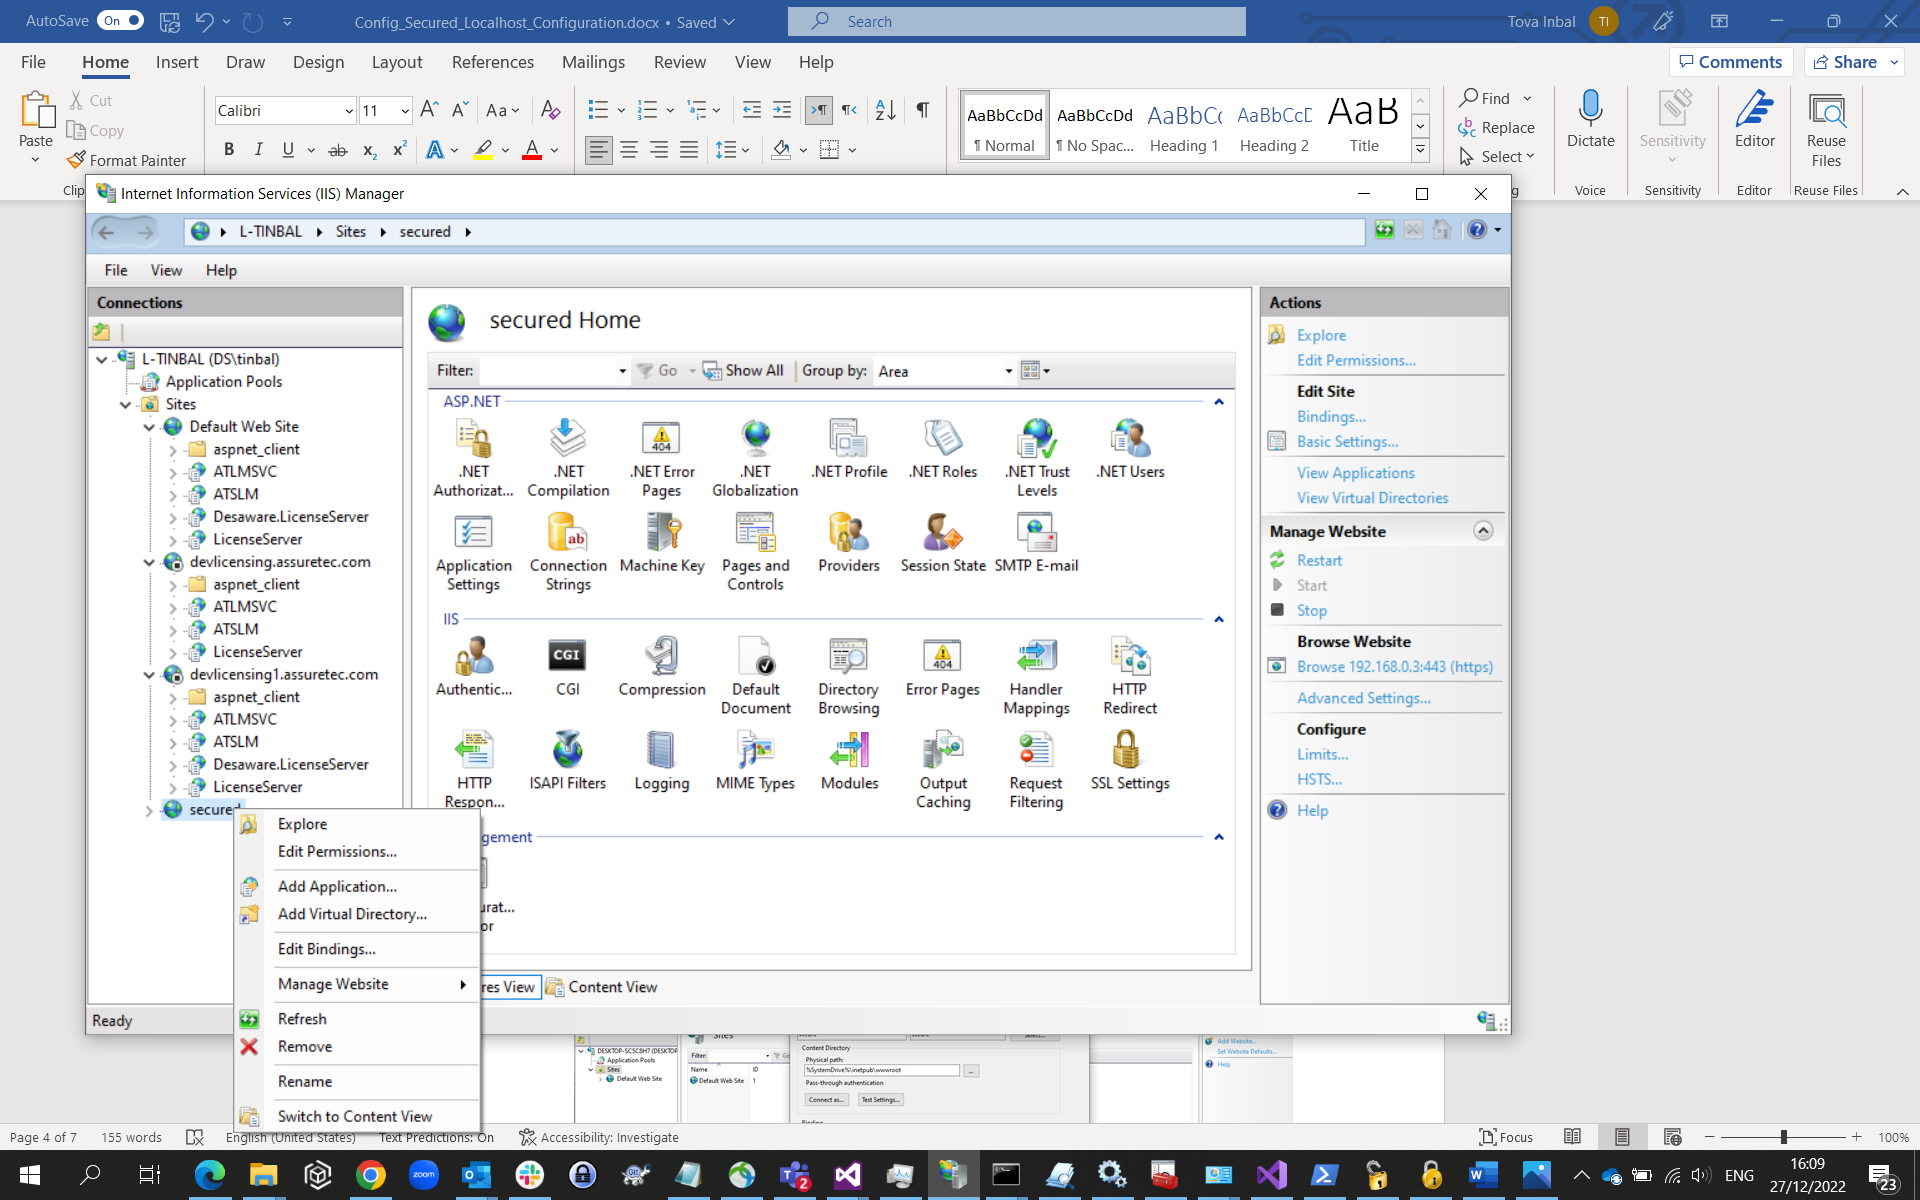
The Edit Site Binding window opens.
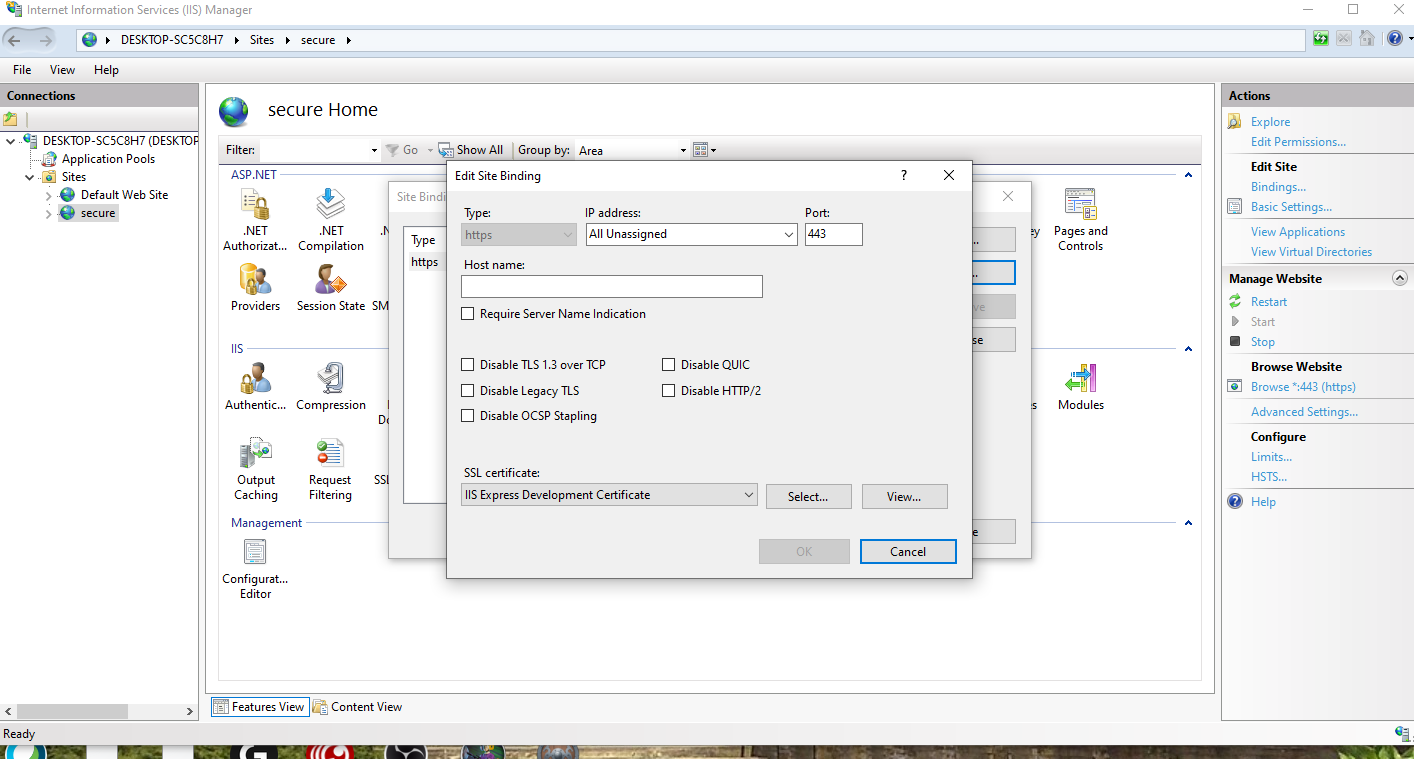
-
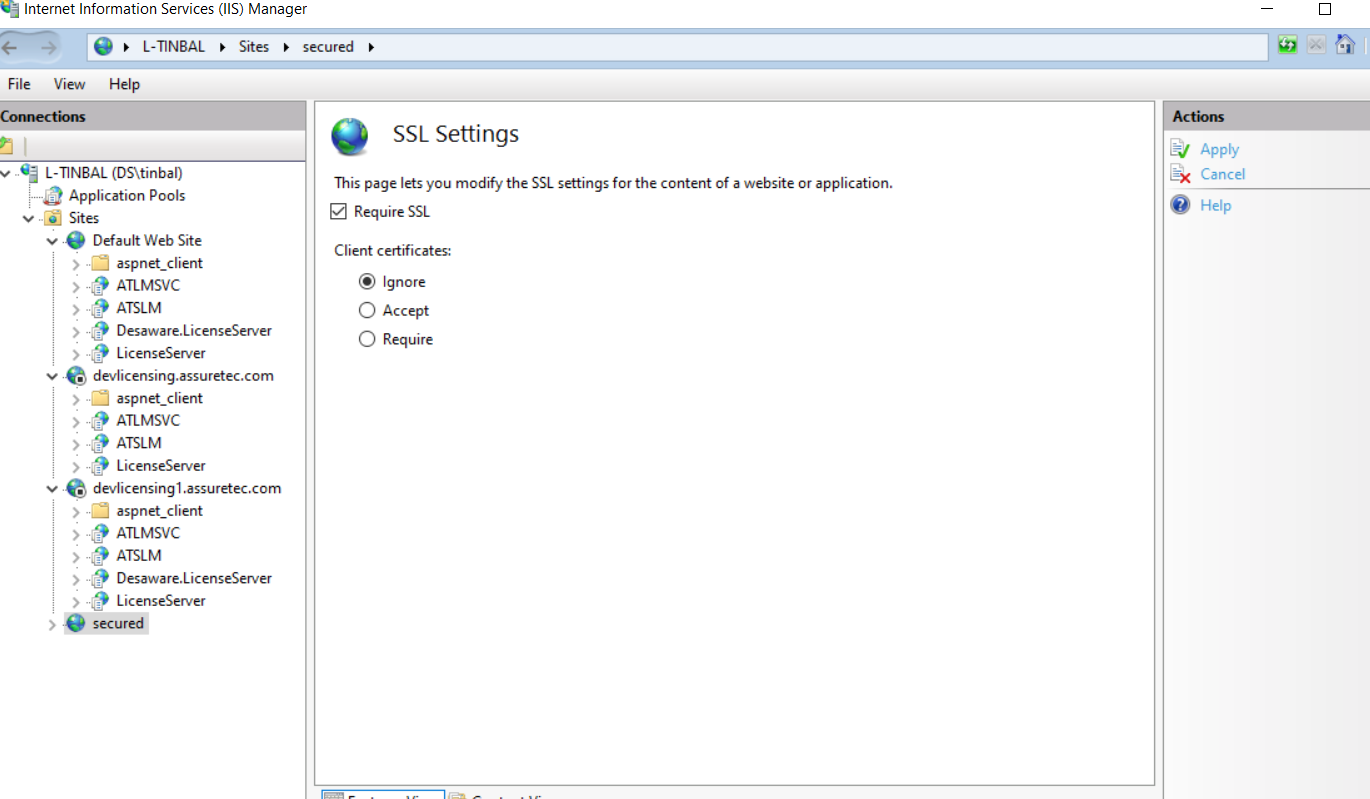
Select SSL Settings.
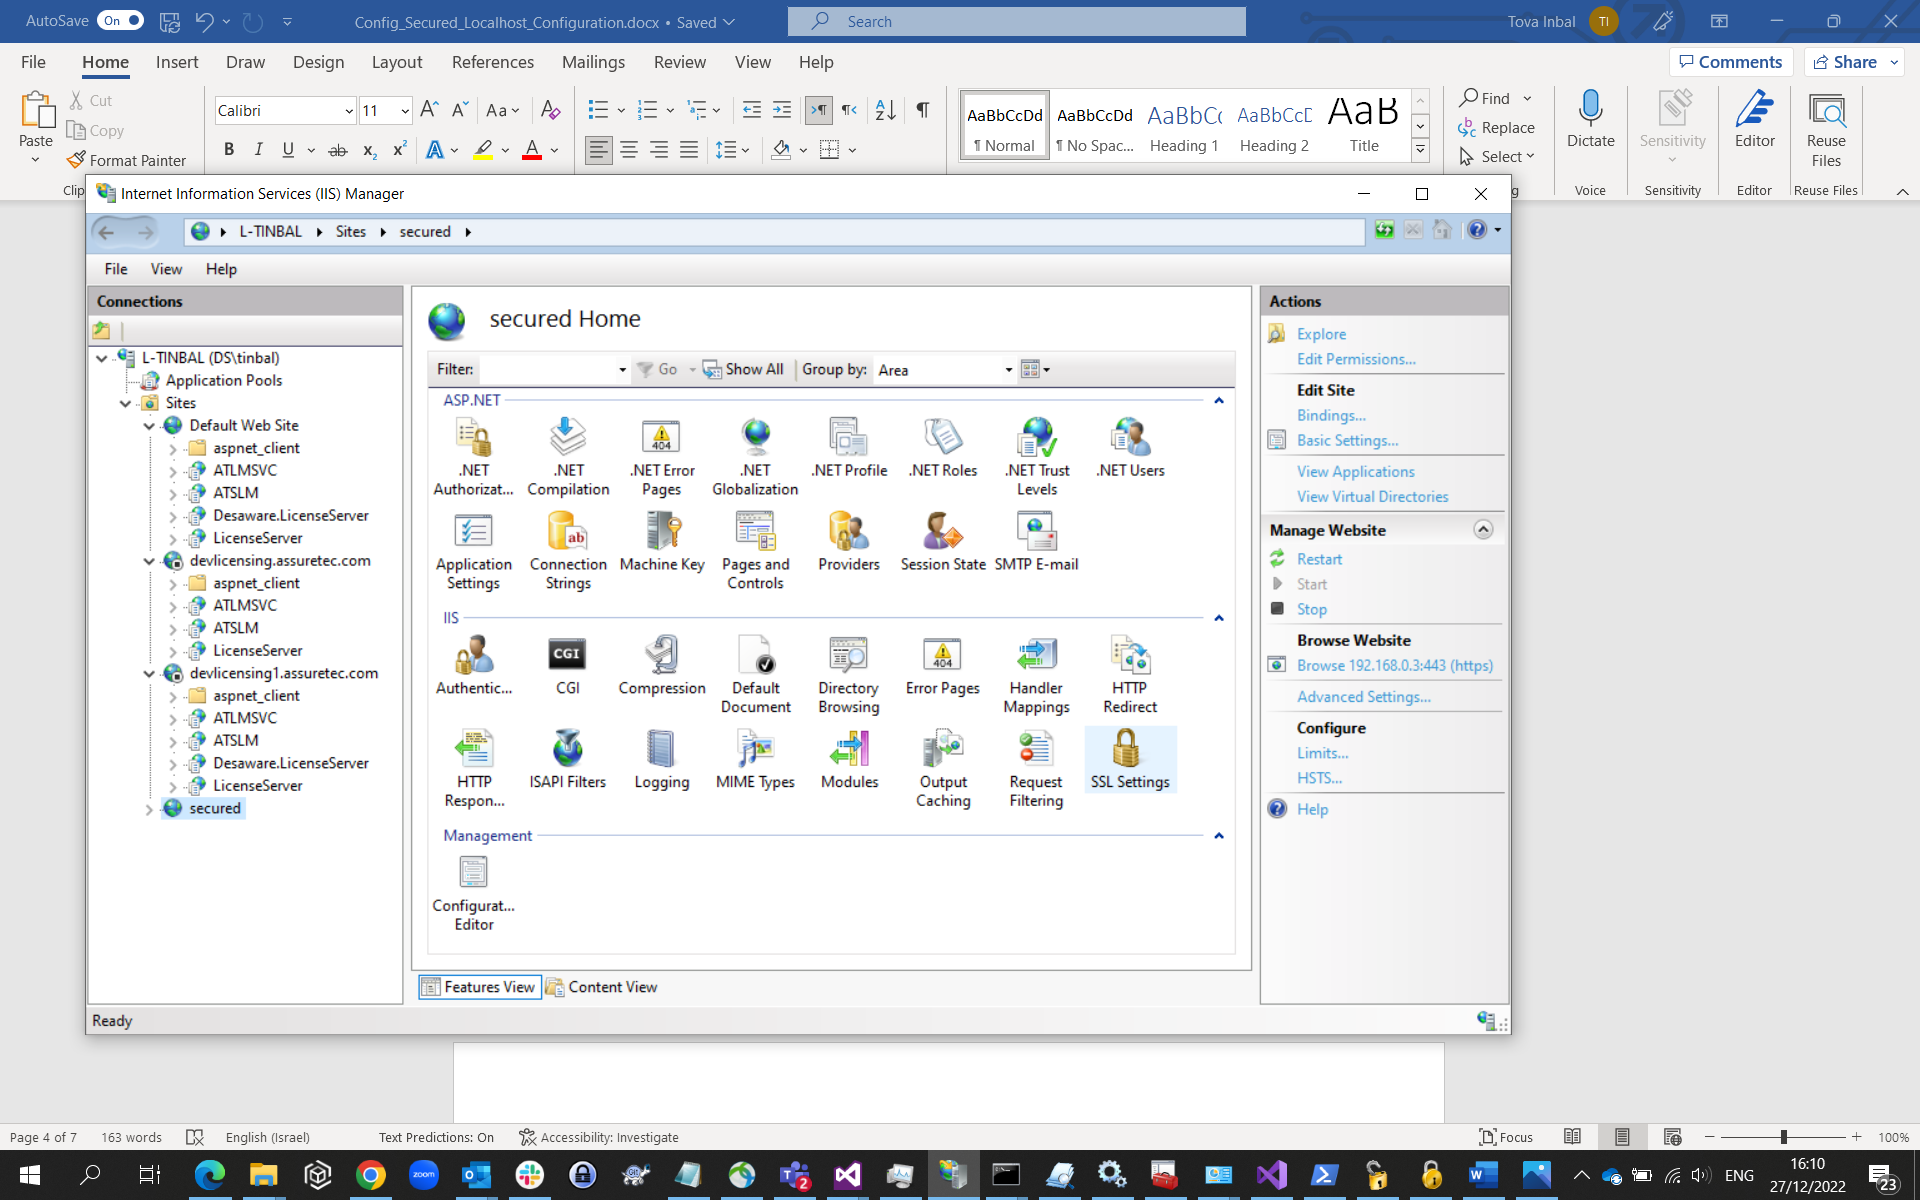
The SSL Settings page opens.
-
Specify the setting and in the Actions pane, click Apply .
Configure a self-signed certificate to a Trusted Root Certification Authority
-
Go to Start > Run and type mmc.exe.
-
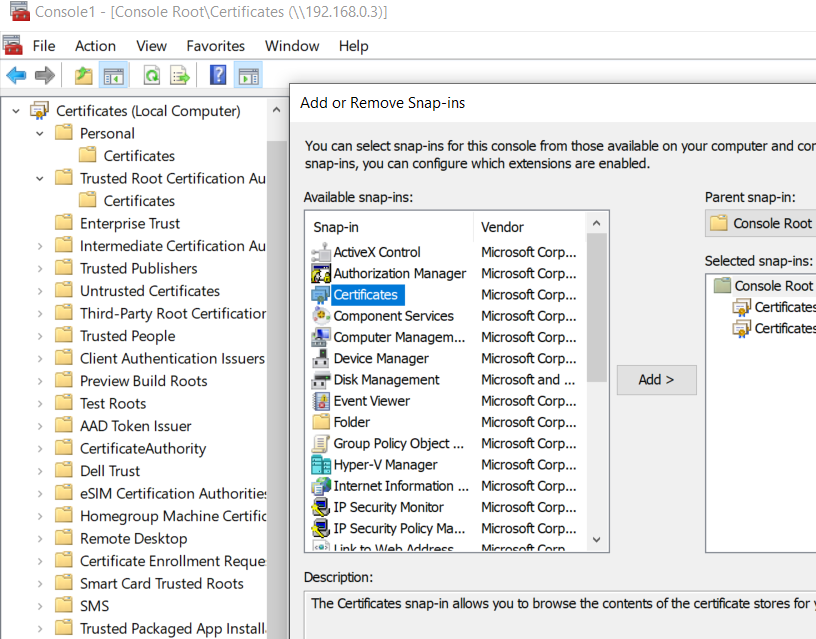
Go to File > Add or Remove Snap-ins > Certificates and click Add.
-
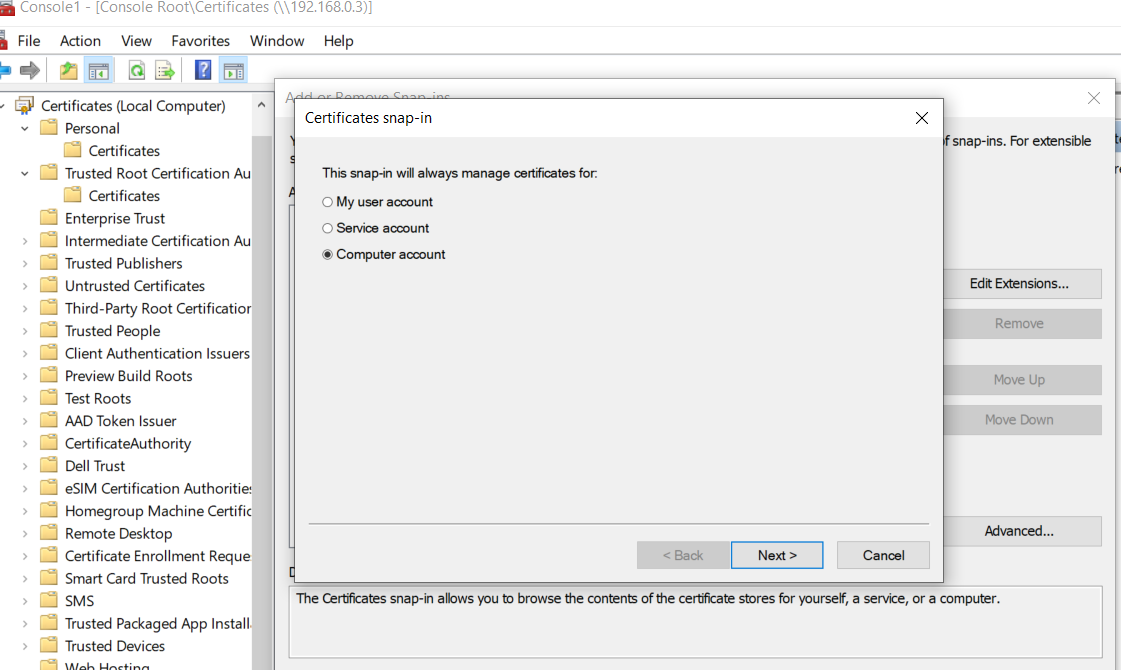
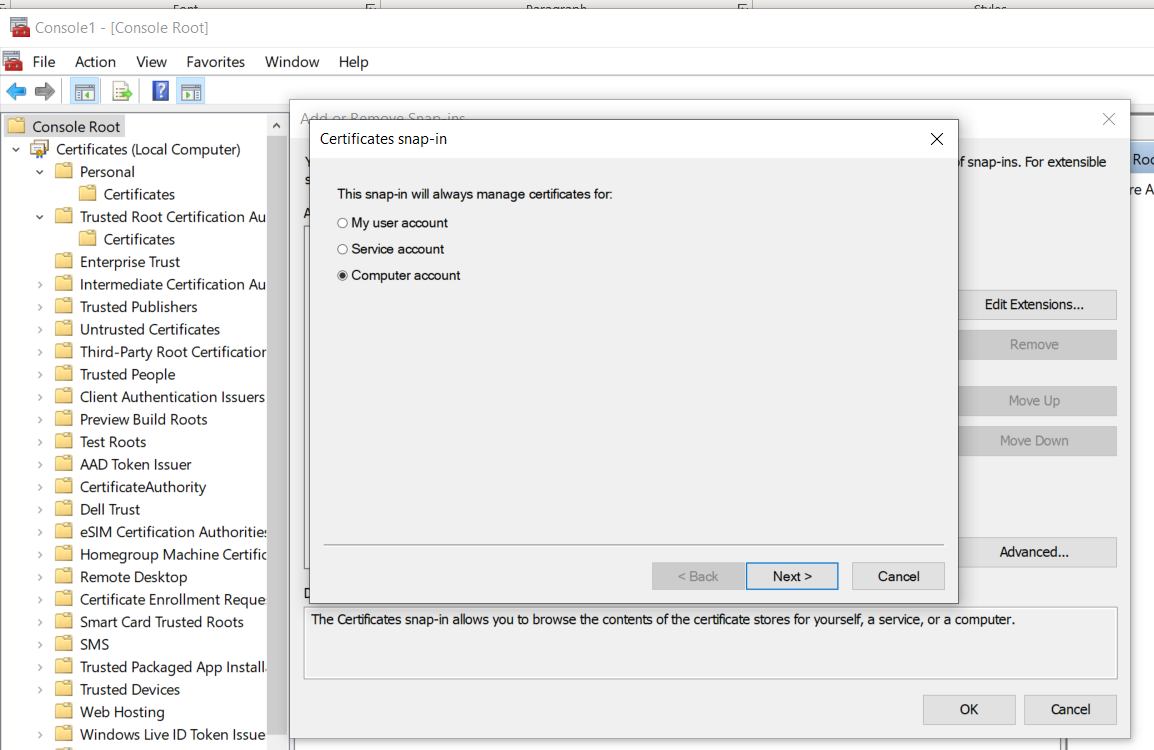
Select the Computer account option and click Next.
-
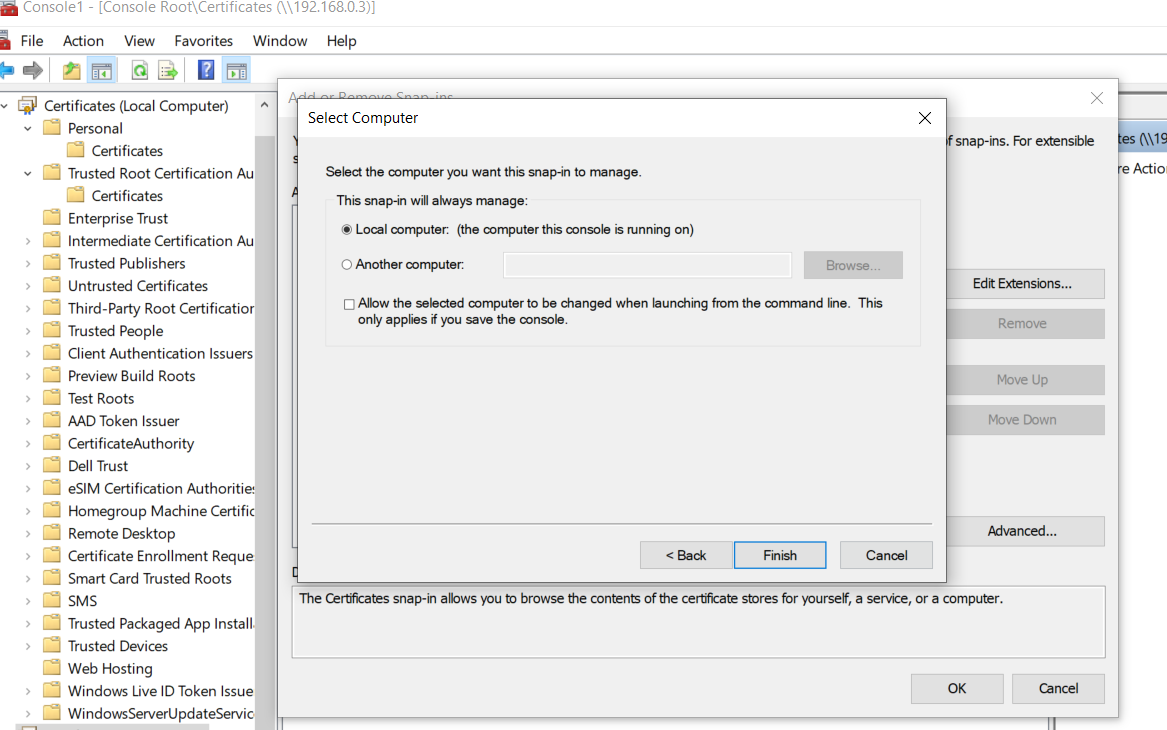
In the Select Computer window, click Local Computer.
-
Click Finish.
Add a purchased self-signed certificate from a Trusted Root Certification Authority
-
Start mmc.exe.
-
Click File > Add or Remove Snap-ins > Certificates > Add > Computer account > Local Computer.
-
Click Finish.
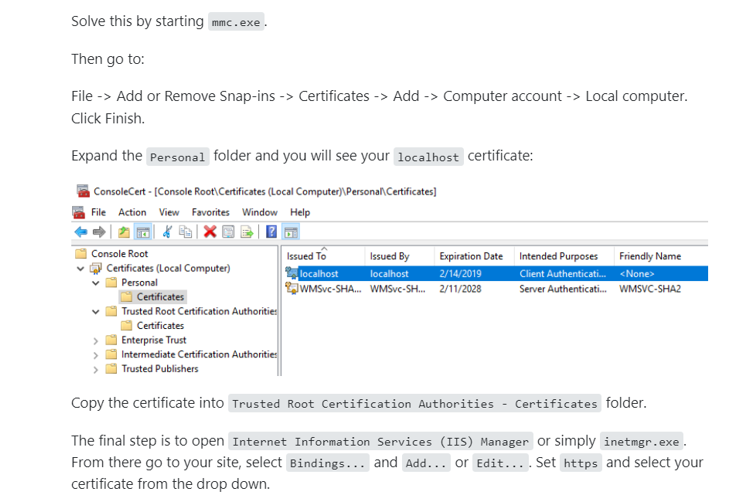
To view your localhost certificate, in the left pane, expand the Personal folder and click Certificates.
-
Copy the certificate into the Trusted Root Certification Authorities – Certificates folder.
-
Open IIS Manager or inetmgr.exe.
-
On your site, select Bindings, and then Add or Edit, and select your certificate from the dropdown menu.
-
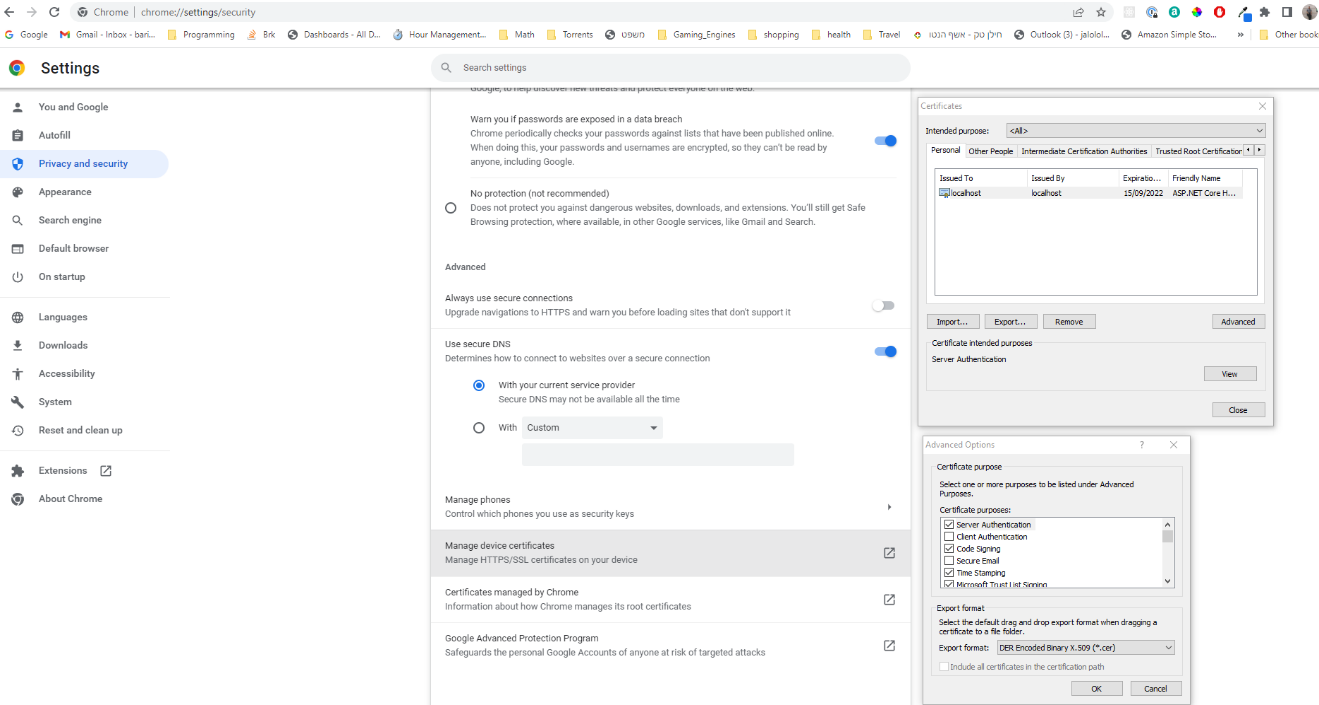
Manage the certifications at the site.
-
In IIS, browse to your secure localhost.
Verify the license installation
-
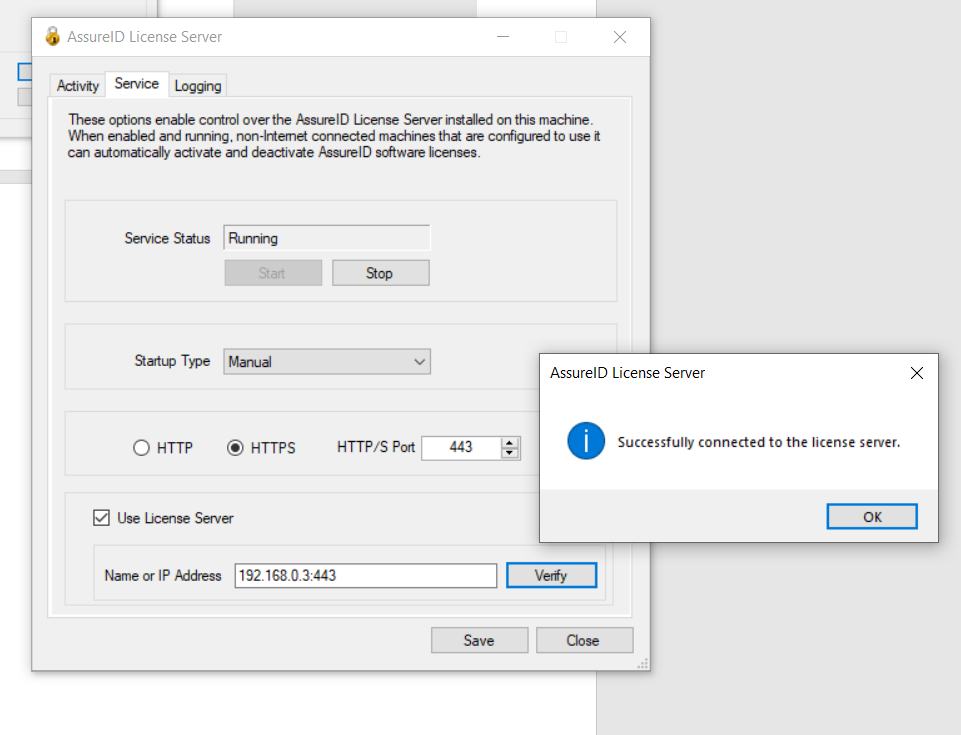
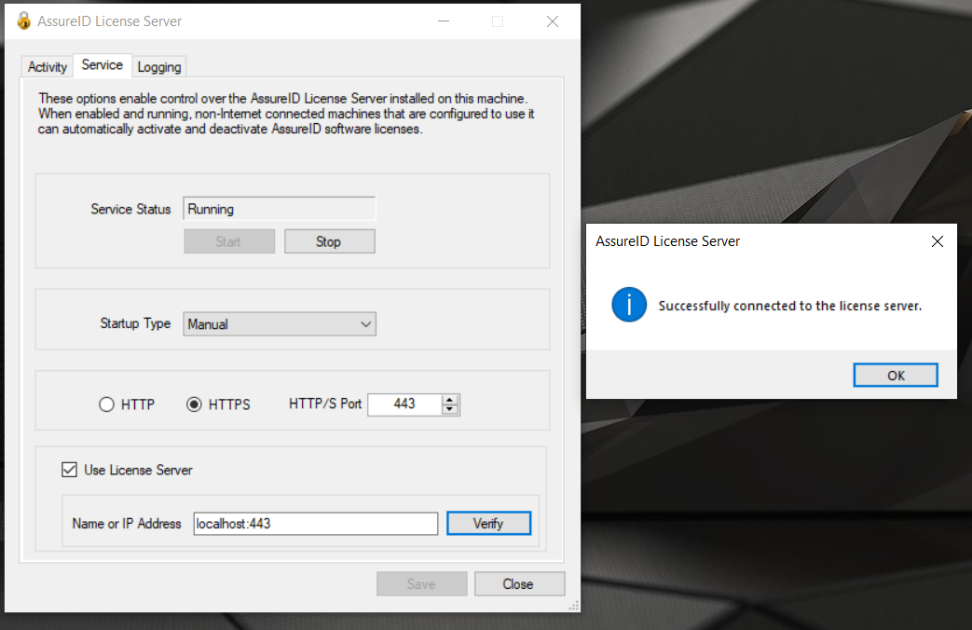
Run AssureTec.LicenseServerTray.exe to verify that your License Server was installed on your computer.
-
On the Service tab, select the HTTPS option and enter the secured site:port.
-
Click Save. If successful, a confirmation dialog box appears.
-
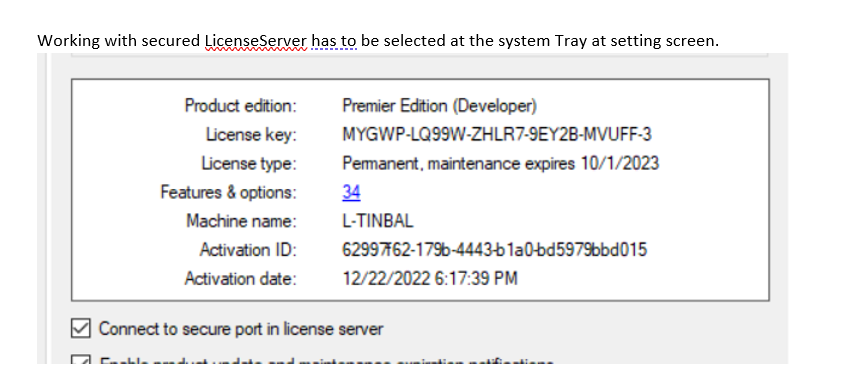
Select the Connect to secure port in license server checkbox.
Activate the license
-
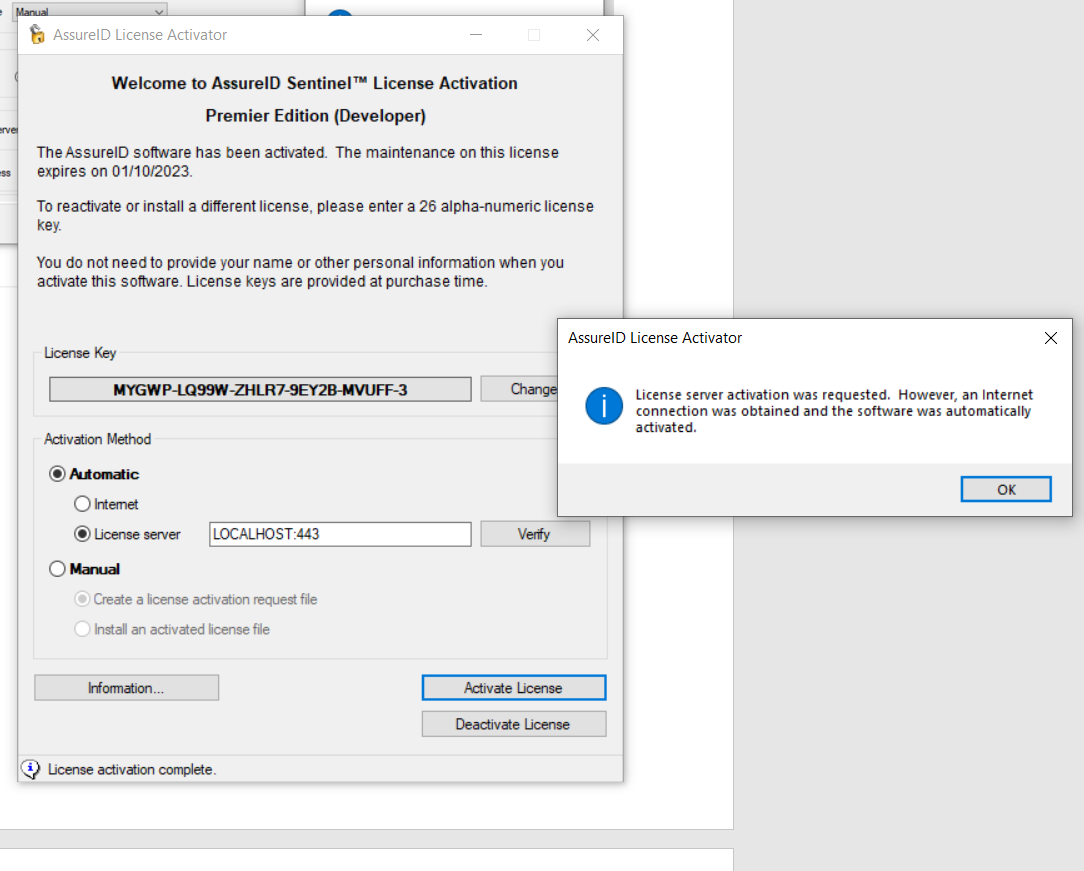
Verify that the License Activator was installed on your computer.
-
Verify the secured site:port.
-
Click Activate License.
Add certifications for your connected computer
-
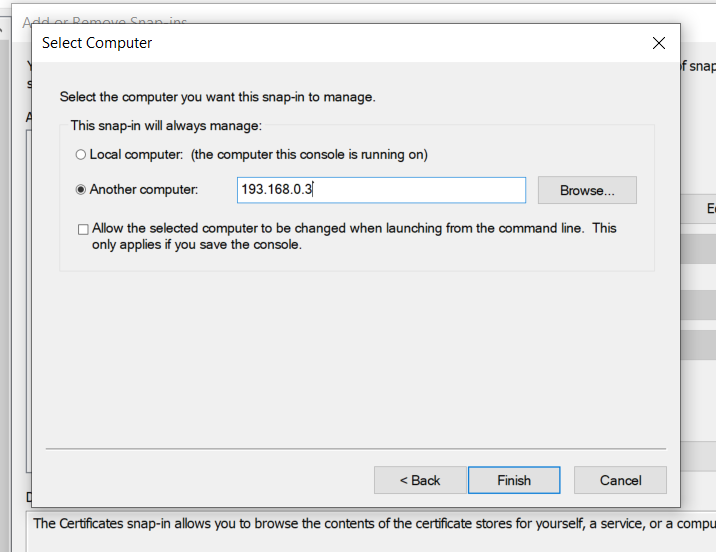
Specify the computer than you want to manage with the snap-in.
-
Click Finish.
Verify the license server
-
Run AssureTec.LicenseServerTray.exe.
-
Select the HTTPS option and enter the secured site:port.
-
Click Verify. If the license server is connected, the message Successfully connected to the remote license server message is displayed.
-
Verify that the License Activator was installed on your connected computer, and then verify the secured site:port.
-
Click OK.