

SDK reference and the AssureID Tutorial
The AssureID Sentinel SDK reference documentation is provided as online help. To access the reference documentation from the Start menu on a system that has the AssureID Sentinel SDK installed:
| To access this document | Go to: |
|---|---|
| .NET Platform SDK Reference | Start > Programs > AssureID Professional > AssureID SDK > AssureID .NET Platform SDK Reference |
| COM Platform SDK Reference | Start > Programs > AssureID Professional > AssureID SDK > AssureID COM Platform SDK Reference |
| Java Platform SDK Reference | Start > Programs > AssureID Professional > AssureID SDK > AssureID Java Platform SDK Reference |
AssureID Tutorial
Section titled “AssureID Tutorial”The AssureID Tutorial is a demonstration application that is installed with an AssureID Development License. It is used to read and report results from captured documents and can function as a Tutorial. The application works with both the i-Dentify hardware or the i-Dentify Device Emulator. The AssureID Tutorial application requires that the software is completely installed and configured prior to use.
To start the AssureID Tutorial, go to:
Start > Programs > AssureID > AssureID Tutorial
Application User Interface Language
Section titled “Application User Interface Language”The application user interface is viewable in English or Spanish. Tutorial uses Spanish if it installed on Spanish Windows. Otherwise, it uses English. To change the desired language from English to Spanish, select View > Language.
AssureID Service
Section titled “AssureID Service”When the AssureID Authenticator is started, the initial screen is empty except for the status bar, which is located at the bottom of the screen. The Status bar displays updates for the AssureID Service and Document Trigger Mode. The initial view displays either Ready or The AssureID Service is not currently running**.**
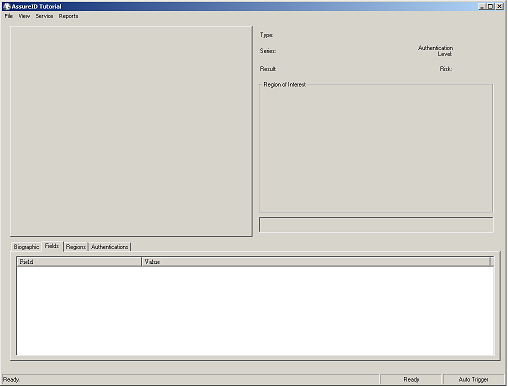
If the status bar states Ready, the application is ready to trigger documents. However, if the status bar states The AssureID Service is not currently running, the service must be restarted before attempting to capture documents.
Restart the AssureID Service
From the main menu, select Service > Restart Service**.** The status bar changes to Restarting the AssureID Service. The status bar automatically changes to Ready when the service has successfully started.
Capturing Documents
Section titled “Capturing Documents”When the AssureID Service starts, the application is ready to capture documents. If using the i-Dentify Document Reader/Authenticator, users can capture documents by inserting the document into the reader. When the capture has completed, the user must remove the document before inserting another document.
The user also has the option of triggering a document capture manually. Manual capture can be useful if a particular document needs to be captured repeatedly with either the reader or emulator. To manually trigger a document capture, select Service > Trigger Now from the main menu, or press Ctrl+T.
Under most circumstances, the best practice is to keep the Auto Trigger menu option in the “checked” state. If checked, documents are automatically captured when inserted (or when the emulator tool’s navigation button is pressed). If the Auto Trigger option is not checked, documents are not captured until the user selects the Trigger Now menu option. To enable the Auto Trigger option to automatically capture documents (when inserted), click Service > Auto Trigger from the main menu or press Ctrl+A. If documents are not captured when inserted, verify that the Auto Trigger option is selected.
Document Results Display
Section titled “Document Results Display”As a document is captured, the results of the AssureID Sentinel capture, read, and authentication processes are displayed within the application.
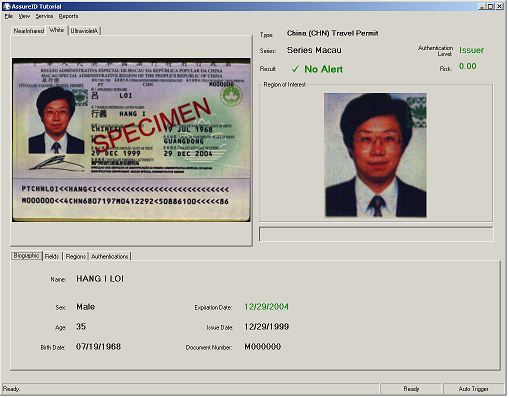
The application is divided into the following areas:
- Document Image - displays captured images of the document under one or more light sources (such as white light, near-infrared, or ultraviolet). The number of images and light sources vary among document types because only the relevant light sources are captured for a given document type.
- Document Type - displays the type of document as classified by the AssureID Document Library.
- Document Series - displays the series of the document as classified by the AssureID Document Library.
- Authentication Level - displays the authentication of document as classified by the AssureID Document Library.
- Result - displays the result of the authentication process.
- Region of Interest - displays a selected region clip from the document. The Region of Interest is linked to the Fields, Regions, and Authentication tabs. To view a region image clip, select the Fields, Regions, and Authentication tab and click a name. The clip associated with the name will be displayed in the Region of Interest area.
- Region of Interest Value - displays the text value that was read from a region (via OCR). When a field name is selected in the Fields tab, the associated text value read from that region is displayed in the Region of Interest Value field.
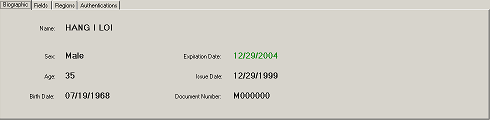
- Biographic - displays field names and values for the document. The field values available can vary among document types.
- Fields tab - contains either text or an image extracted from a document. The Fields tab displays field names and values for the document. The fields listed will likely vary between different document types. To change the Fields tab font, select View > Fields > Font from the main menu. You can choose to display the field information in “tree” form by selecting View > Fields > View from the main menu.
- Regions tab - displays the image regions extracted from the document. The region name contains detailed information about the document location, OCR confidence, and position. To view a region clip on the document, select a region name. You can change the display of the Regions tab font by selecting View > Regions > Font from the main menu.
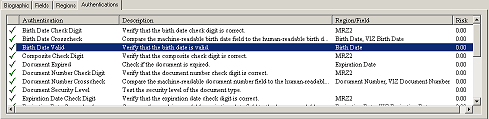
- Authentications tab - displays the authentication results for the document. Authentications are tests run on a document to determine its authenticity and risk. Each authentication listed indicates the type of test performed, the region or field it relates to, the risk value associated with the test performed, and whether the authentication passed or failed.
Security Panel
Section titled “Security Panel”The Security Panel hides information displayed from the last document transaction after the Tutorial has been idle for a specified amount of time. To enable it, select View > Security Panel > Enable Security Panel from the main menu. To specify the idle time duration, select View > Security Panel from the main menu, and then select the setting.