

i-Dentify Device Emulator
This section describes how to configure the i-Dentify Device Emulator to work with AssureID Sentinel.
Note: The i-Dentify Device Emulator is available only as part of the AssureID Sentinel Developer installation.
Configure the i-Dentify Device Emulator
-
Create a folder called EmulatorSamples in the following location: C:\Users\Public\Public Documents\My AssureID Data.
Note: If you changed the data path during installation, create the EmulatorSamples folder in that location.
Note: Copy the samples to the EmulatorSamples folder before you launch the application. The Device Emulator does not recognize samples added post launch until the user either closes and restarts the application, or manually refreshes the list of available samples.
-
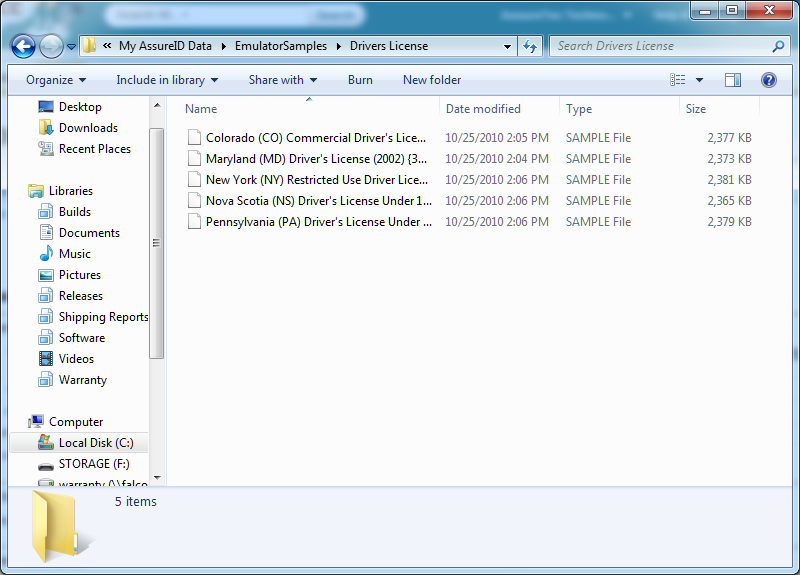
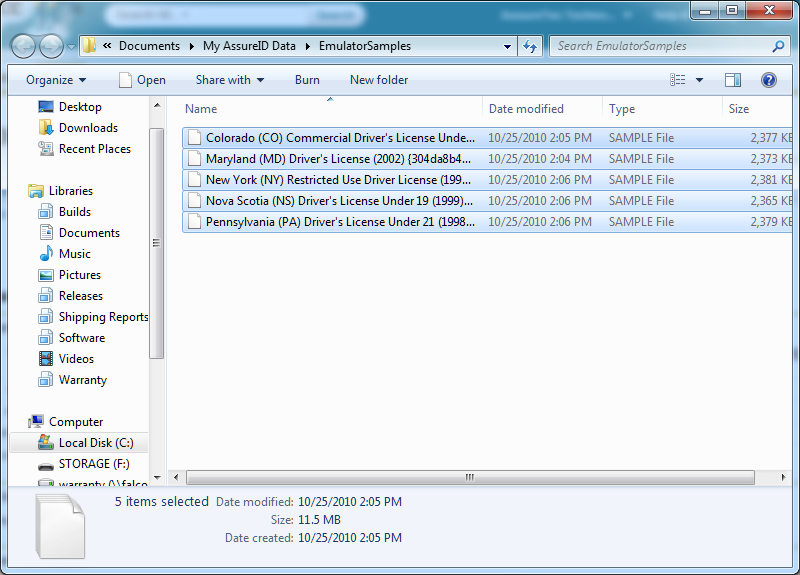
Copy the document samples to the newly created folder. A set of emulator samples is available on the support website in a .zip file, under Download, and you can copy its contents into the folder. The emulator now allows for .sample files to be copied to the EmulatorSamples folder, and for the .sample files to be nested (placed) inside other folders:
Example 1: Sample files copied directly to the EmulatorSamples folder:
Example 2: Sample files nested inside other folders in the EmulatorSamples folder:
After the emulator samples have been added, you can launch the AssureID Sentinel applications (such as the AssureID Tutorial). The i-Dentify Device Emulator tool must be running at the same time to control the emulator.
Launch the i-Dentify Device Emulator tool: Start > AssureID > Tools > i-Dentify Device Emulator
i-Dentify Device Emulator
Section titled “i-Dentify Device Emulator”The user interface features four control buttons (from left to right):
- Previous Sample - Go to the previous sample
- Next Sample - Go to the next sample
- Select Samples - Select samples available in the EmulatorSamples folder
- Options
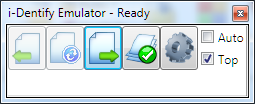
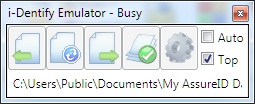
Under the row of buttons is the optional status bar. The status bar shows the name of the current (most recently processed) sample. The sample name is clipped in the main window; however, you can display the full name as a tooltip by hovering over the text. The title bar of the application also shows the status of AssureID Sentinel (for example Ready or Busy).
The Options dialog box enables you to configure the application as follows:
- Emulator Samples Directory – specifies a directory other than the default EmulatorSamples directory (requires that you restart the AssureID Sentinel service)
- Icon Size – changes the size of the icons to either large or small for the application
- Show Status – shows the document name being processed as well as the AssureID Sentinel status
- Default – returns all options to their default value
To process sample documents, select the samples to use. Click the Select Samples icon (a stack of documents with a check mark). Clicking Select Samples opens a dialog box that scans the specified samples directory, and then displays the resulting documents available for use.
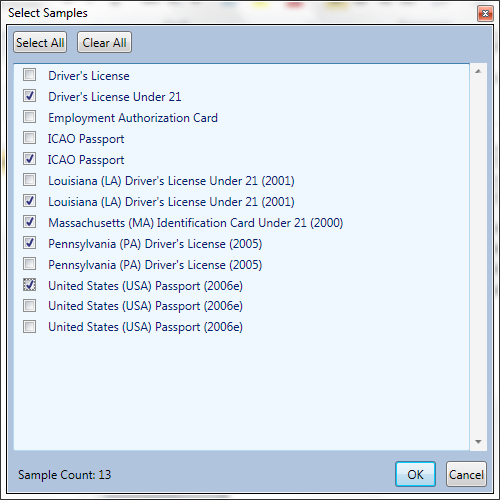
You can check the box next to each sample that you would like to use or click Select All to select all the available samples for use. After you select the samples to use, highlight a sample to start with by clicking on an entry, and then click OK. This tells the emulator where to start in the list of samples and to begin to process the sample(s).
Note: Only samples that have been checked for use will be processed when you click Previous and Next in the emulator.
At any time, you can check the Auto check box on the main emulator window. This option automatically advances to the next available document sample as soon as the current document transaction is complete. If no transaction is currently running, checking the Auto checkbox starts processing samples. After the list of available samples has been processed, the application automatically disables the Auto check box.
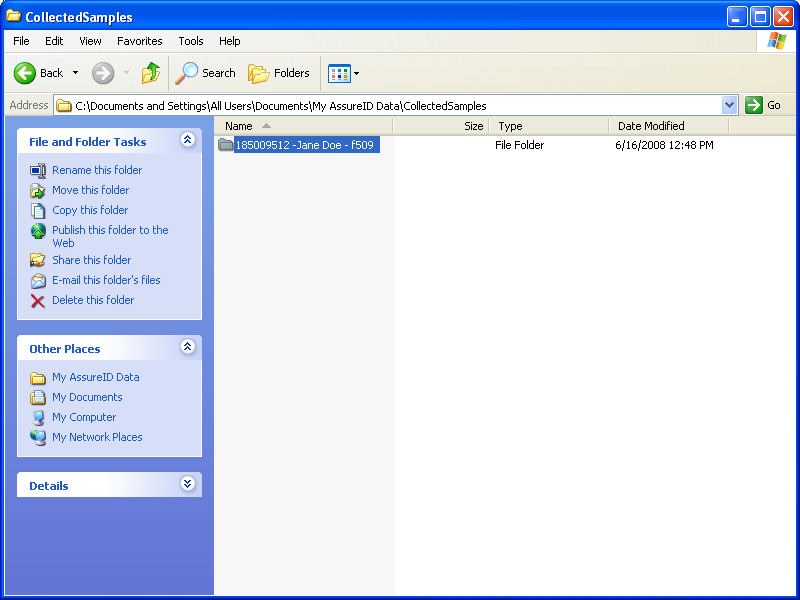
Note: You can run only one instance of the i-Dentify Emulator at a time.
The i-Dentify Emulator creates a log file of its activity, which is used, when needed, for support instances. This log file is written to the same logs directory as the AssureID Sentinel Service and other components of the AssureID Sentinel Platform (see file locations).
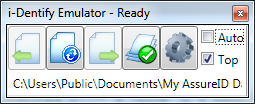
For Legacy Samples (samples consisting of multiple image sources such as white.bmp, or UltravioletA.bmp), sample document folders must be copied in their entirety from the location that was specified in the Sample Collector application to the EmulatorSamples directory. For instance, the following image shows a folder called 185009512 -Jane Doe - f509 located in C:\Documents and Settings\All Users\Documents\My AssureID Data\CollectedSamples.
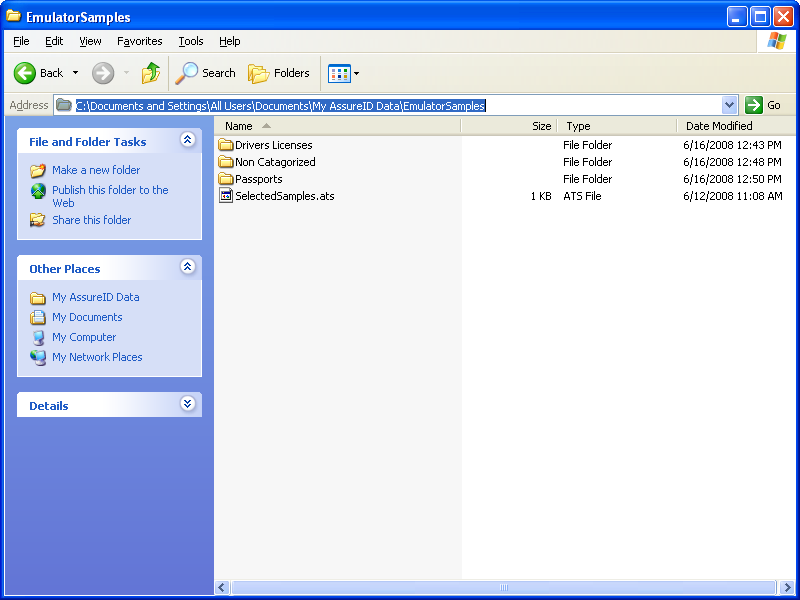
The path under which sample documents would be stored for the Device Emulator is C:\Documents and Settings\All Users\Documents\My AssureID Data\EmulatorSamples .
The folder 185009512 -Jane Doe - f509 must be copied in its entirety to the EmulatorSamples directory, as seen in the following image:
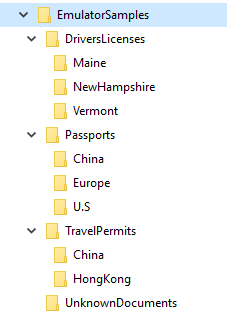
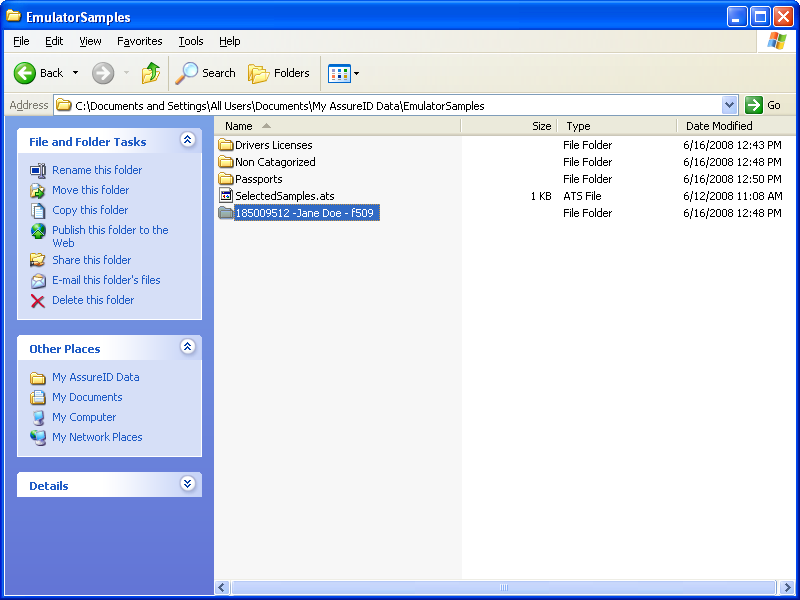
Organize samples below the EmulatorSamples directory in a logical order. Doing so helps you find and use different samples easily. The following is a sample EmulatorSamples directory structure.
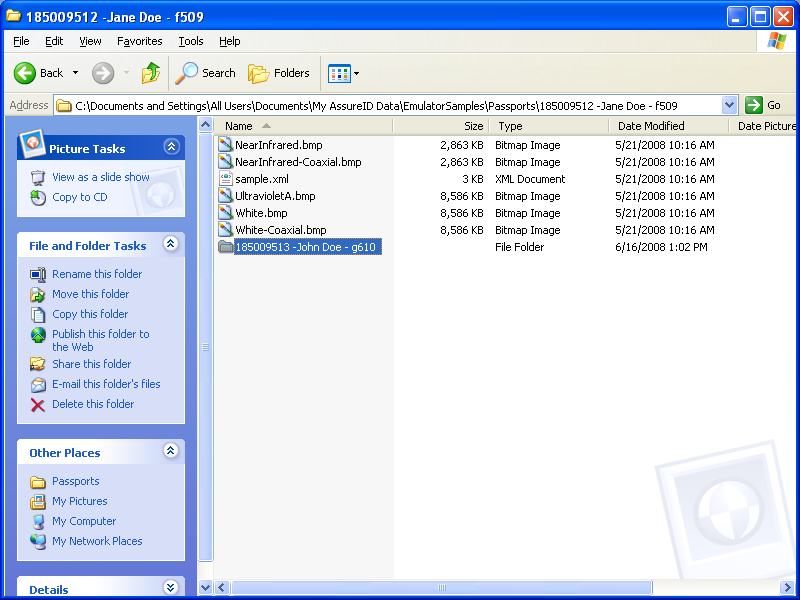
Do not place sample document folders beneath other sample document folders. For instance, the folder 185009512 -Jane Doe - f509 located beneath the organizing folder ..\Passports\Europe\ should contain only the files created by the Sample Collector for 185009512 -Jane Doe - f509 . If you have a sample document called 185009513 – John Doe – g610, place it directly under ..\Passports\Europe\ .
Correct:
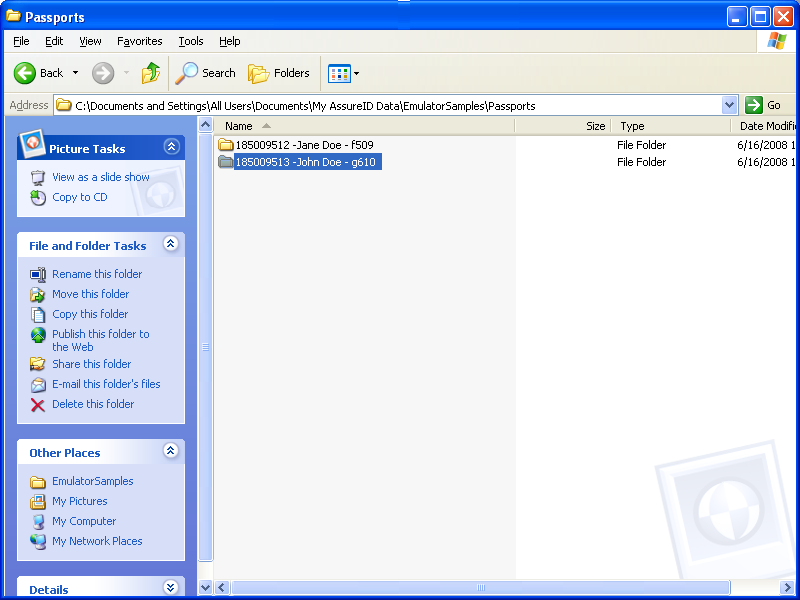
Incorrect: If you are using document samples that have not been captured with the Document Sample Collector or Reveal ID application, to ensure that the document samples are compatible with AssureID Sentinel, use the following guidelines.
- Place samples in the same directory structure as those document samples collected by the Sample Collector. For example: you have a folder called Drivers License, and beneath this folder is another folder that contains the sample images called 2008 CA John Doe Drivers License.
- Name the sample images correctly, depending on the source. In this example, a user has a 2008 California Driver’s License. The images captured in bitmap format include NearInfrared, Infrared, Ultraviolet-A, and White (visible) light. The file names of each of the images should be as follows:
| Format | Bitmap file |
|---|---|
| NearInfrared | NearInfrared.bmp |
| NearInfrared Back | Back-NearInfrared.bmp |
| Ultraviolet-A | UltravioletA.bmp |
| White (visible) | White.bmp |
| White (visible) Coaxial | White-Coaxial.bmp |
| White (visible) Back | Back-White.bmp |
- Minimize compression if storing images as .jpg.
- If an image was captured at 400 DPI resolution, then the resolution for that image should be set to 400 DPI and not, for example, 300 DPI. This ensures a better chance of compatibility with the Device Emulator. Resolutions can be set using your preferred image editing application/suite. Consult that software’s application guide(s) for information about setting the resolution.