

Reveal ID settings
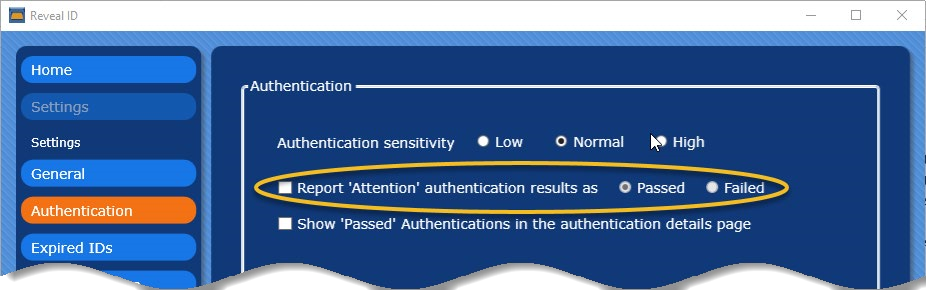
On the Settings page, you can configure the general settings, duplex mode capture, and general application preferences. In some cases, you must select the checkbox that precedes a setting to change its options. For example:
| Reveal ID setting | Description |
|---|---|
| General | |
| Allow non-administrative users to view and modify application settings | Enables permission for non-administrative users to modify the Reveal ID settings DEFAULT is enabled |
| Automatically clear ID data after [x] seconds | Enables clearing the results of the scan from the computer screen after a specified time. DEFAULT is 120 seconds. Note: If this setting is not enabled, the results from the scan will remain visible on the screen until you either close the Reveal ID window, click the Home button, or scan a new document. |
| Enable contactless chip capture | Enables the capture of data located on a contactless chip. DEFAULT is enabled |
| Enable duplex. (two-sided) capture | Enables the capture of data from a two-sided document. DEFAULT is enabled |
| Automatically prompt user to retry if scan is unsuccessful | Enables a notification prompt to retry the scan if it was initially unsuccessful |
| Automatically launch application at startup* | Enables an Administrator to set Reveal ID to launch automatically at startup |
| Create desktop shortcut* | Enables an Administrator to create a shortcut to Reveal ID on the desktop |
| Authentication | |
| Authentication sensitivity | Specifies the level of authentication sensitivity to use: Low | Normal (DEFAULT) | High |
| Report ‘Attention’ authentication results as | Specifies to report an Attention result as either Passed (DEFAULT) or Failed |
| Show ‘Passed’. Authentications in the authentication details page | Indicates whether to show the Passed authentications on the Details page |
| Expired IDs | |
| Accept expired IDs | Specifies whether to accept expired IDs. Enabled by DEFAULT. |
| Report IDs that will be expiring within [x] as | Specifies to report IDs that will expire within a specific timeframe (in days | weeks | months | years), and whether to report them as Attention or Passed. Specified in days by DEFAULT and reported as Attention. |
| Age Verification | |
| Report bearers less than [x] years as | Specifies whether to report an ID that describes a bearer of greater than or less than a specified age as either Attention or Failed. DEFAULT is 21 years and reported as Attention. |
| Pop-up | |
| Enable display of pop-up results windows when application is minimized | Enables displaying the pop-up Results window and specifies when and how the window is displayed and for how long. By DEFAULT, the pop-up window is displayed when an ID is Inserted, the animation effect is Fade in, the location is Bottom right, and the display duration is 120 seconds. |
| Display Fields | |
| Select the fields to be displayed in the application | Specifies one or more fields to display. By DEFAULT, the Full Name, Age and Birth Date, Expiration and Issue Dates, Sex, and Address check boxes are enabled. |
| Sample Collection | |
| Allow ID samples to be saved | Enables document sample file collection used by GBG Support to troubleshoot a particular document Enabled by DEFAULT. Note: The .sample files are proprietary, encrypted GBG files that contain important information about a particular transaction, including document type, document result, and other identifying features on an ID. |
| Automatically collect ID samples | Enables the automatic collection of samples for either all IDs or a specified type of ID |
| Save samples to: | Specifies the path to the location where samples will be saved. Click Select to open the Browse For Folder window, or click Show to open File Explorer. The DEFAULT file location is: C:\Users\Public\Documents\My AssureID Data\Reveal ID\Samples |
| Transaction Reports | |
| Allow transaction reports to be viewed and saved | Enables viewing and saving transaction reports. Enabled by DEFAULT. |
| Automatically save transaction reports | Specifies whether to automatically save transaction reports of scanned IDs (either all, some, or none) as non-encrypted, PDF files. These files may contain information such as document images and biographic data. You also can set permissions to allow administrators to access the data if it is retained for marketing or other internal processes. |
| Save reports to: | Specifies the path to the location where transaction reports will be saved. Click Select to open the Browse For Folder window, or click Show to open File Explorer. The DEFAULT file location is: C:\Users\Public\Documents\My AssureID Data\Reveal ID\Reports |
| Restore Defaults | Restores all settings back to the original default settings |
| Restore Defaults | Note This action cannot be undone. |
*Requires Administrator privileges
Setting authentication sensitivity
Section titled “Setting authentication sensitivity”This setting is only applicable if the license key used is an Authentication license. By default, Authentication sensitivity is set to Normal and the Attention authentication results are reported as Passed. The results will vary based on the sensitivity setting:
- Very Low - Provides a very low fraudulent document detection rate and may significantly reduce the rate of authentic document rejection
- Low - Passes more documents, but may not catch as many fraudulent documents.
- Normal - The recommended setting for AssureID Sentinel.
- High - Catches the greatest number of fake documents; however, it may also fail some authentic documents.