The multitenancy feature will allow our clients to restrict data access to specific user groups whether under the same region or not. Users will be able to map a database to particular LDAP user groups.
In order to use the Multitenancy Data Management feature users should make sure that the IEOS backend is up and running as usual by following the installation and configuration steps mentioned above.
Before installation please make sure that IIS is stopped.
Installation
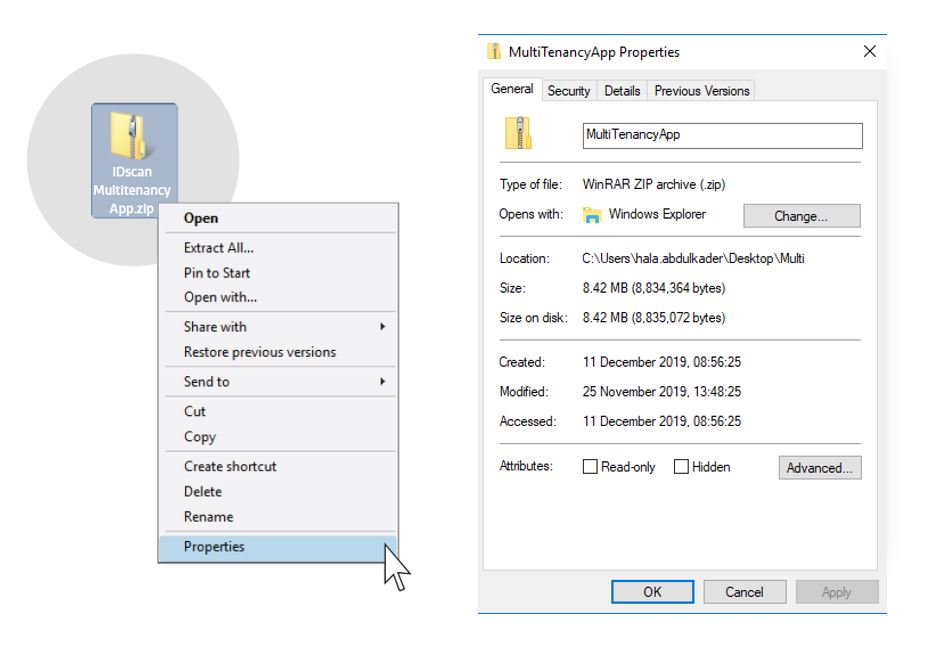
Users must start by checking if the Multi Tenancy App file is blocked or not by right clicking onto the folder, and choosing Properties as shown in the below figures:
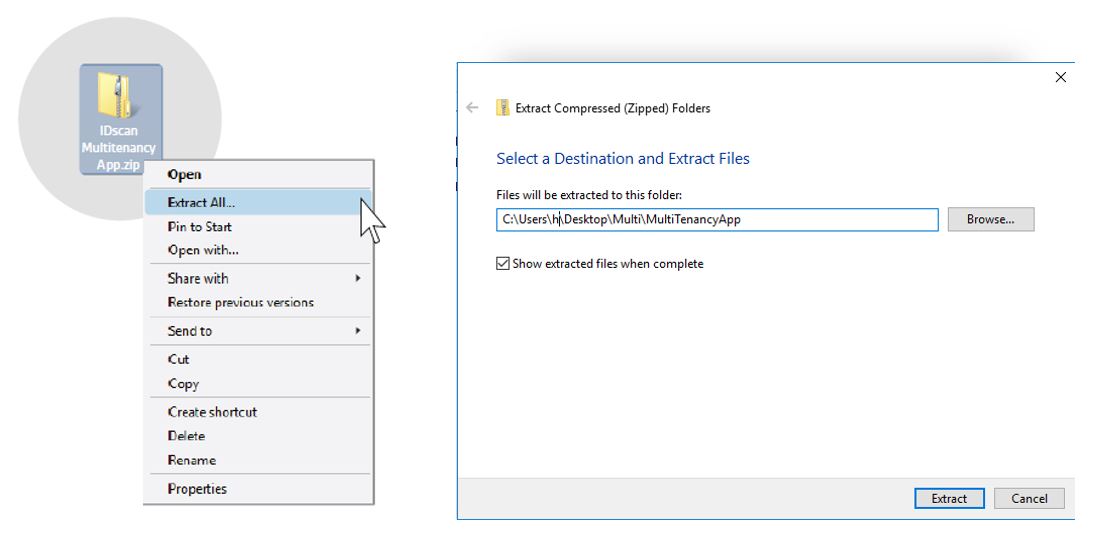
The file would now have to be extracted by clicking onto Extract All.
Users will then be asked the path which they would like the Multi Tenancy App to be extracted into:
Once Extract is clicked, a password pop box will appear where users are required to type the password of the app and click OK. The password will be provided in the release email. This will now extract the folder in your chosen path as shown below
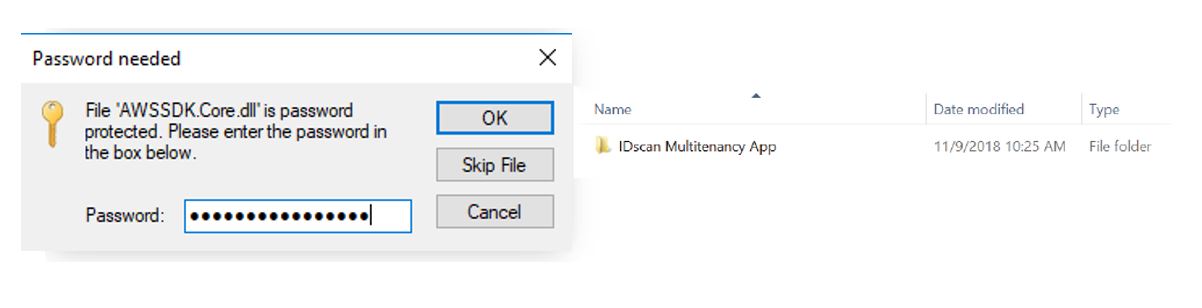
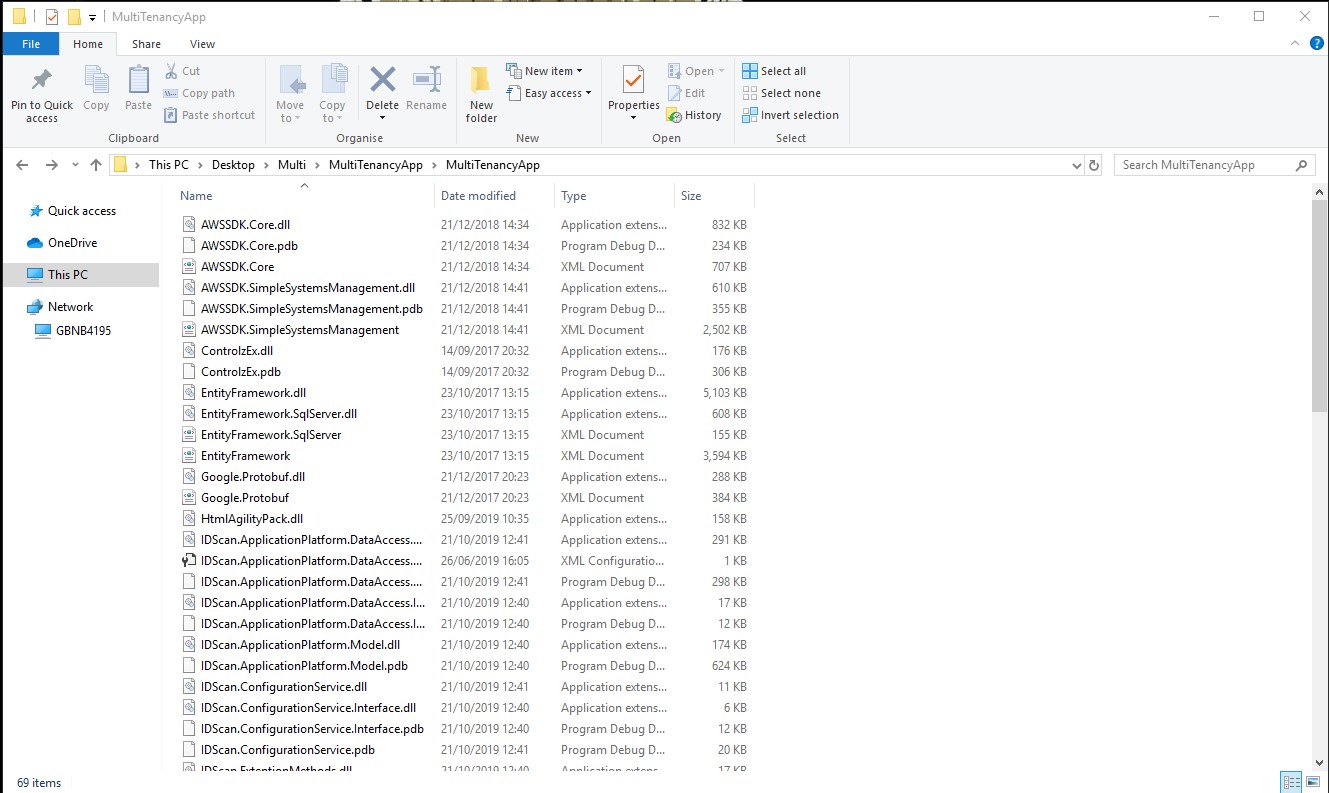
Once inside the folder users will be able to see many components within:
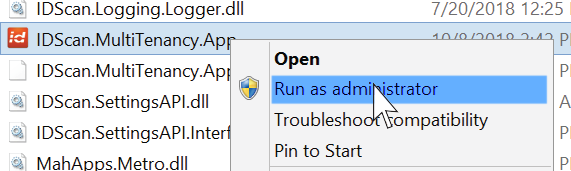
Users should now find the IDScan.MultiTenancy.App, right click and choose ‘Run as Administrator’ as shown in the below figure:
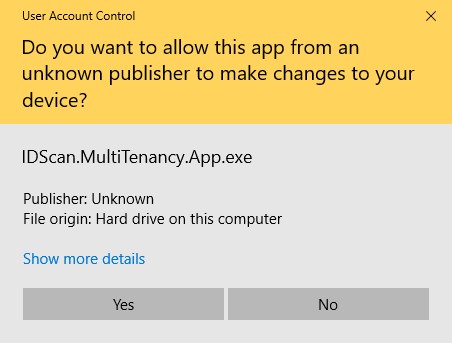
Note: The multitenancy app is an exe file so therefore it is very important users RIGHT CLICK onto the app and RUN AS ADMINISTRATOR.
If prompted with an UAC then please click ‘Yes’ as shown below:
This will now complete your installation.
Note: .NETFRAMEWORK 4.5.2 and .NETFRAMEWORK 4.7.2 should be installed in order to be able to use the app.
Configuration
Please note that the following key should be added to web.config file multitenancy application may crash.
<add key="UseEncryption" value="true" />The value of this key should be the same with the one in Multi.config file.
Users will now have to activate the multitenancy setting key from the BackendSettings.xml file located in the below path in order to start with the configuration changes for this feature: C:ProgramDataIDScanEnterpriseBackendSettings.xml
Once the xml file is accessed users would have to change the default value of false to true for the Multi-tenancy Enable setting key as shown below:
<Setting Key=’MultiTenancyEnabled’ Value=’false’/>To
<Setting Key=’MultiTenancyEnabled’ Value=’true’/>*If this key is left at false then the on-boarding application will use the default on-boarding database.
Configuring Database
Users will have to configure a database for saving the mapping between the tenant databases and other user groups to be able to use this feature.
After the backend settings xml file has been configured users will also have to update the web.config file found under the below path:
C:inetpubwwwrootIDscanEnterpriseSvcWebconfig.xml
There will be two additional configs as shown below. The first config is the SQL connection string and the second is the Oracle connection string as shown below:

Please note that this connection string is for a new database with one table for mapping user groups to the connection strings of tenant databases.
The IEOS Multitenancy DB will contain only one table called dbo.MultiTenancyMapping.
If users do have more than one tenant database, then they do not need to add each of them into this web.config but it must be added into the Multi-Tenancy app which will be in the upcoming points.
Multi Tenancy App
Users will have to use the Windows application to map the LDAP groups to the tenant database connection strings. Users will have to run the IDScan Multi Tenancy App to map the LDAP user groups to the tenant databases. However, please note this application does not create the tenant databases. So the tenant databases will have to be created using the scripts provided by your TAM and only then should it be mapped to the LDAP groups specified.
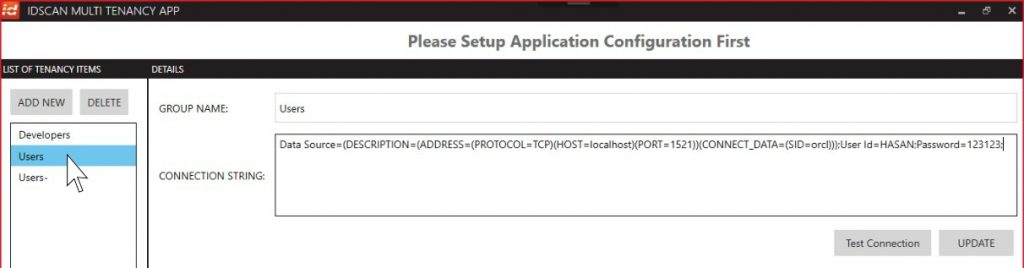
Once the application is launched you will be presented with the homepage as below:
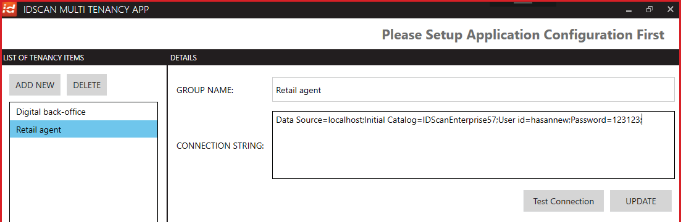
In order to add new groups users will have to click onto the “ADD NEW” button to create a new mapping between the LDAP group and a tenant database. The group name should be a valid LDAP AD group name (for ex: IDscan-Dev) and the tenant database connection string should also be provided as shown below:
Users will be able to create as many group-database mappings as needed.
When a user logs in, then they will be connected to the database that the LDAP group they belong to is mapped to.
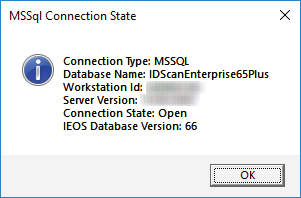
To ensure the connection string is accurate, you can click on Test Connection to test connection to the tenant database as shown below:
You can use the DELETE option to delete a group-database mapping.
- Multiple user groups can be mapped to the same DB by duplicating the connection string.
- The group-database mapping is checked every time the application wants to make a database connection.
- If a user belongs to multiple groups, then they will be connected to the database of the first group in alphabetical order (ascending).
- There is no need to define the schema name. If multi-tenancy is enabled, just define connection string and the schema name will be detected automatically.