Before installation please make sure that IIS is stopped.
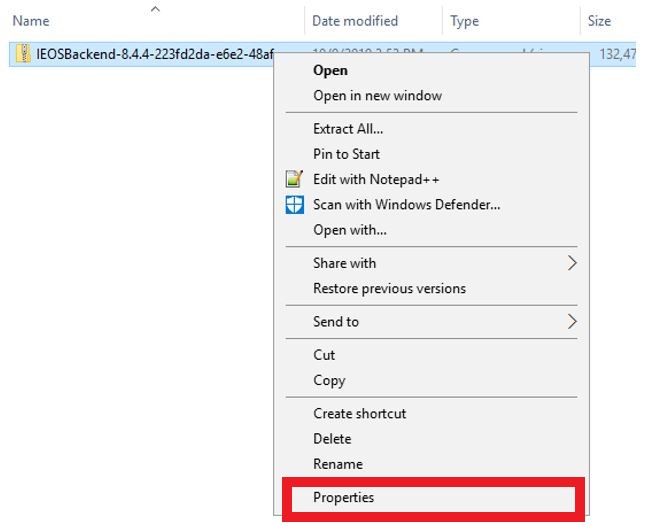
To begin the installation of the IEOS, please right click onto the IEOS zip file and choose the ‘Properties’ tab down the list as shown below:
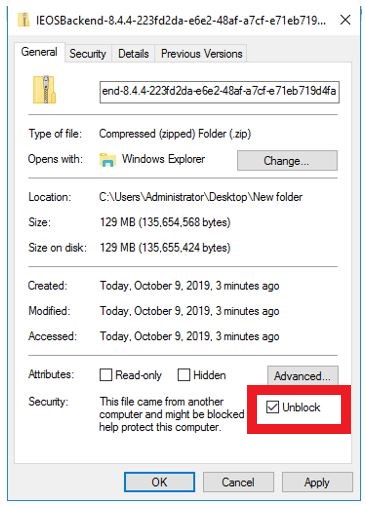
You will then be presented with the properties of the IEOS component, which you would have to click onto ‘Unblock’
Click “Unblock” on the properties of the IEOS component window, then click ‘Apply’ button and press ‘Ok’ for the changes to be made as shown below:
Once the zip file has been unblocked extract the file by right clicking onto it and select ‘Extract All’ to begin the extraction.
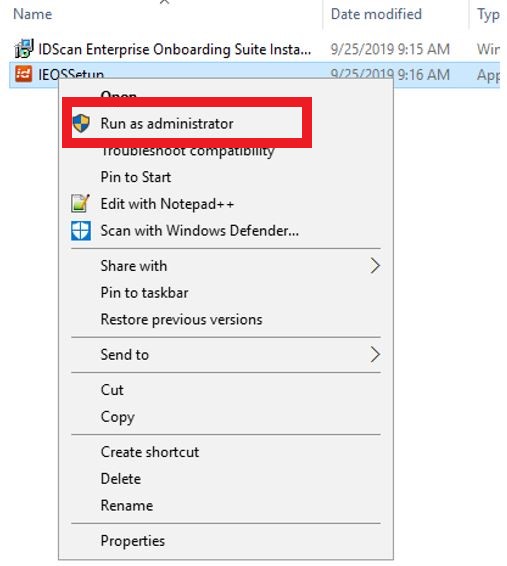
Once the extraction is completed, a further installation screen with both msi and exe download options is shown. If presented with both it is essential to install the exe file by right clicking onto it and pressing ‘Run as administrator’:
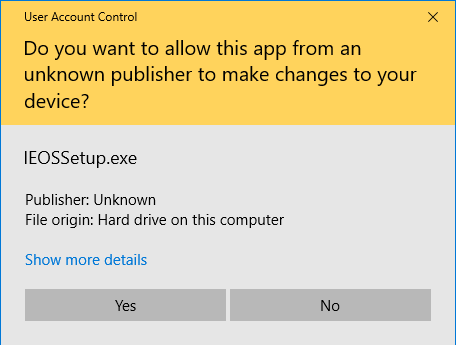
If prompted accept the User Account Control pop up message by clicking on ‘Yes’ in order to continue
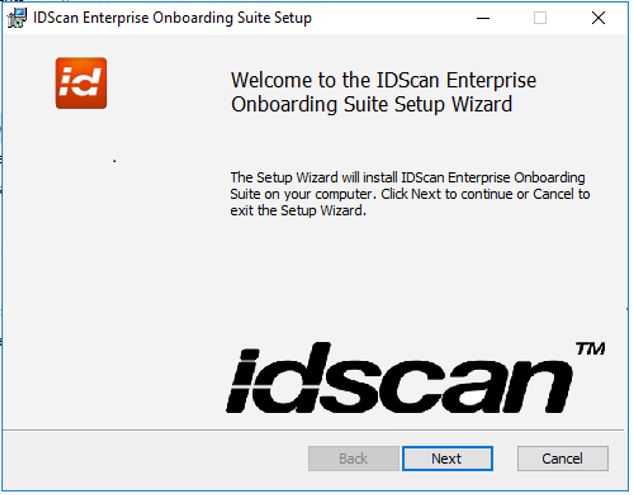
Click “Install” on the IDscan Enterprise Onboarding Suite Setup Wizard to begin the process:

Then click the ‘Next’ button:
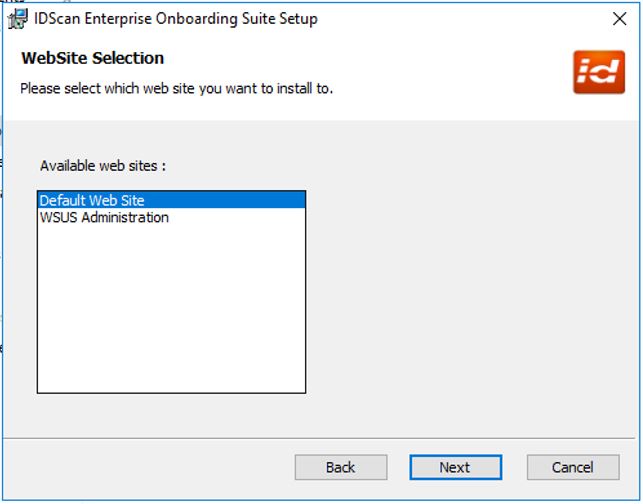
On the next screen, choose ‘Default Web Site’ as shown below and press ‘Next’:
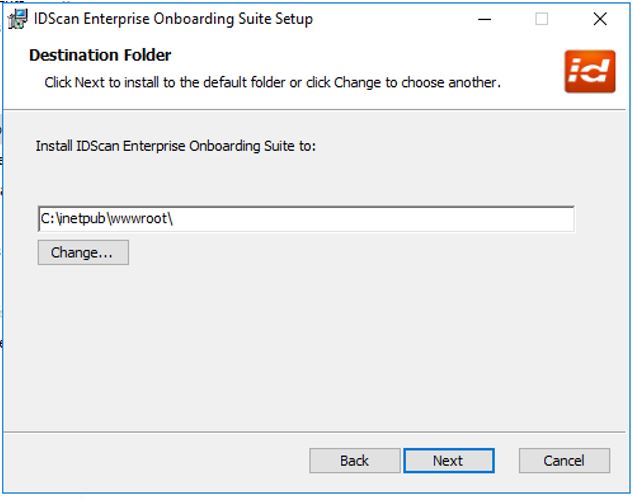
The next screen sows the destination for the folder to be installed, click ‘Next’ to carry on with the installation process:
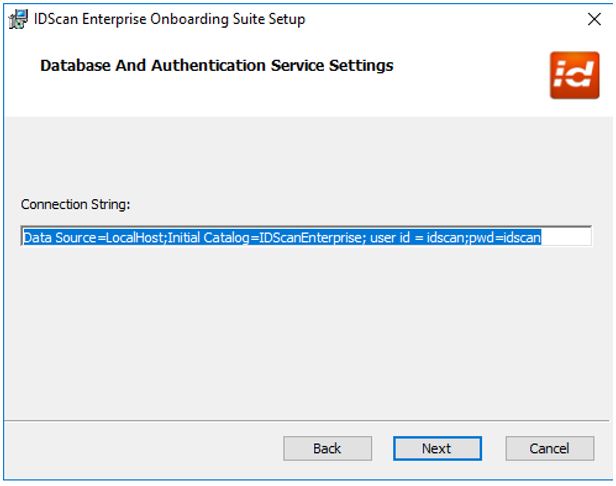
You will then be shown and given the option to fill in the Database and Authentication Service Settings which is essential for the scanning and testing environment to work well.
Note: this information can also be edited from the Configuration file. Setup will not make a connection to the database at this stage.
Fill in the ‘Data Source, Initial Catalogue, User ID’, and ‘Password’ you should also finish off this Connection String with a; sign then click ‘Next’ as shown below:
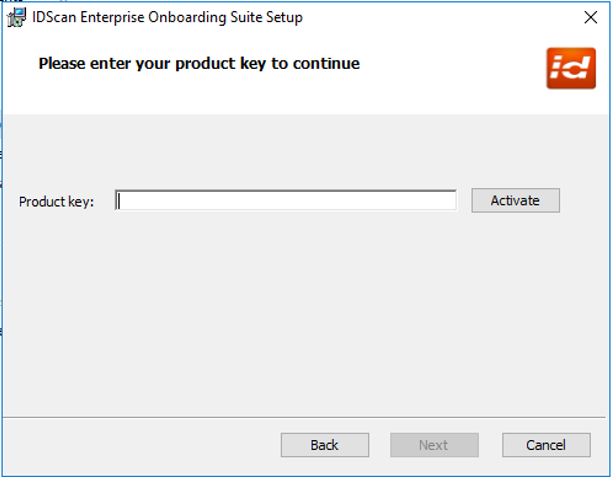
The next screen prompts to enter the product key. Please copy the IEOS product key from the appropriate file in the release email and paste it here.
The product key depends on a type of edition; basic, compact or full which are further divided as an edition version with FaceMatch or without FaceMatch. The status of the key determines whether the Face Match feature of our backend is available or not.
To check whether the entered Product Key is valid or not click on the ‘Activate’ button. This feature checks the validation of the key at the beginning of the installation.
After clicking on the ‘Activate’ option the ‘licence is valid’ message appears on the “License Information” pop up window that also contains the edition version (basic, compact or full) and expiry date of the product key you have just validated.
The window below shows the pop-up message of a ‘Compact Edition’ product key:
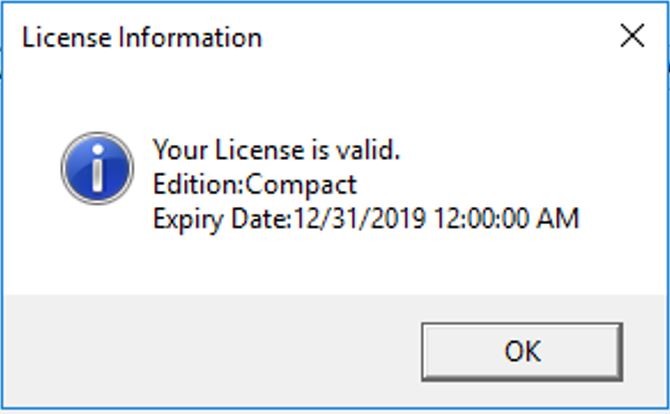
Once either of the above pop-up messages appear this means that the product key is validated and the installation process can be continued by clicking the ‘OK’ button.
This then presents the following screen, allowing you to finalise the last installation steps.
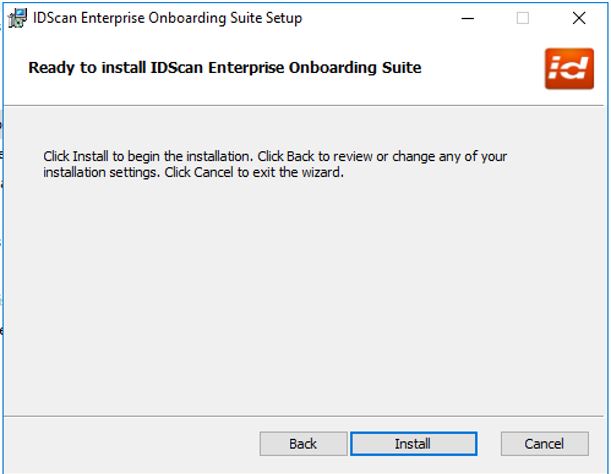
Click ‘Install’ button once the installation process has completed the following Finish Setup Screen is shown below:

A final pop-up message shows the status of the setup process of the Onboarding Suite Setup Wizard as shown below. Click “Close”.
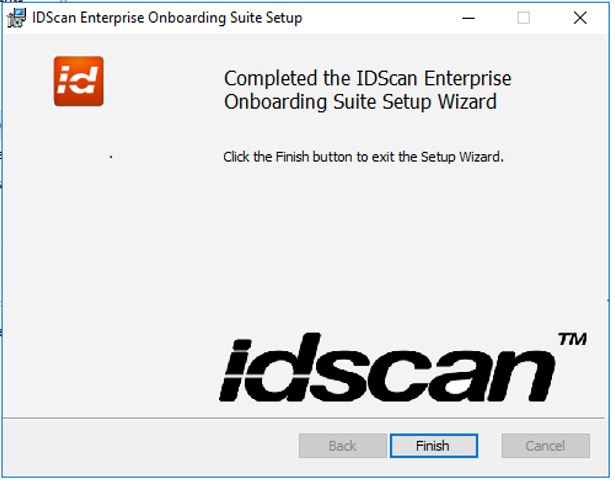
The “Setup Successful” message as shown above indicates the successful completion of the IEOS Setup Wizard Settings installation process