Under the Object Explorer see the ‘Security’ tab and right click onto it to choose the ‘New’ – ‘Login’ options as shown here:

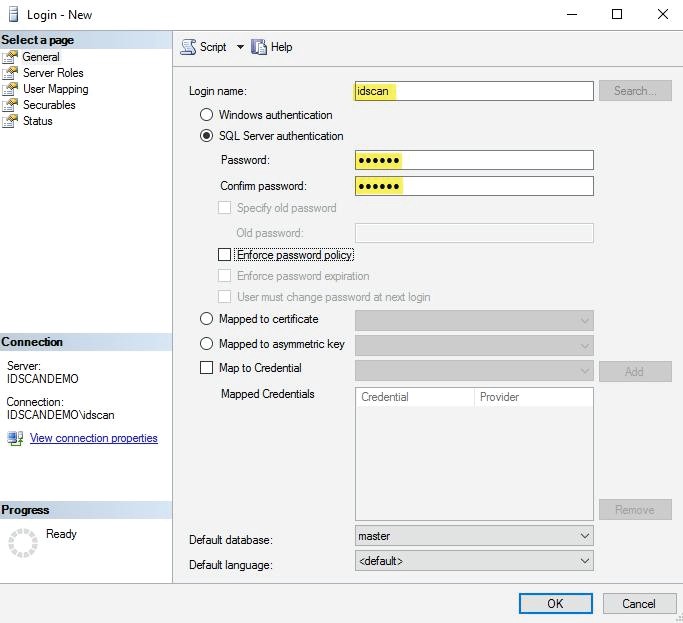
Please enter the Username and Password, which is the same as the Backend Installation in the Connection String as shown below:

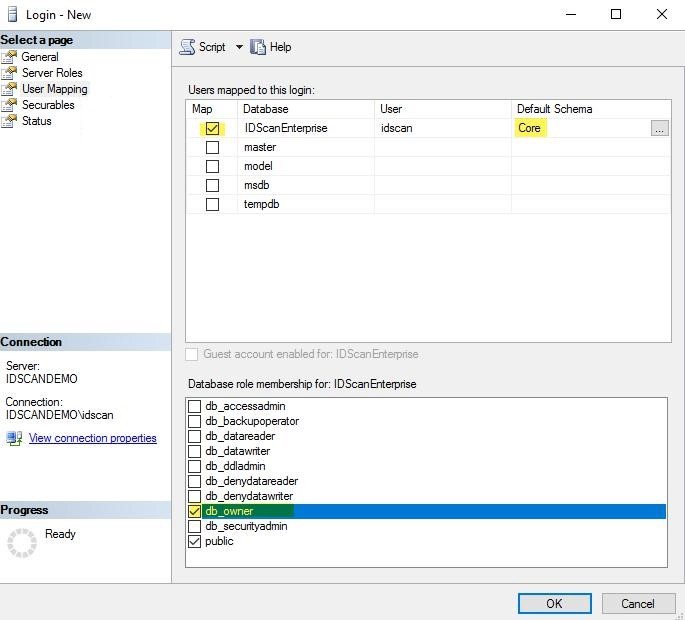
Please choose the ‘User Mapping’ option from the drop down menu on the left hand side under the ‘Select a Page’ pane.
Once the page has appeared select the box for ‘IDscanEnterprise’, choose the ‘Default Schema’ as ‘Core’ and Database role as ‘db_owner’ as shown below:

A user who has server level permission ‘Create Any Database’ should create the application database on your enterprise database server.
- Use the database creation script.
- After creating the database, create a new DB user (Windows user or SQL user) with Read/Write permissions.
- If you used Windows User to access the database, you need to go to IIS and set the application pool identity to the same windows account credentials.
- Grant this windows account read
permissions at:
- “C:\inetpub\wwwroot\IDscanApp”
- And “C:\inetpub\wwwroot\IDscanEnterpriseSvc”
- And also “C:\WINDOWS\Microsoft.NET\Framework\4.0.30319 \Temporary ASP.NET Files”