This section allows Administrators to define the path to be taken by their clients when onboarding, a process referred to as the customer journey.
Journeys can be defined in many ways depending on the device used to onboard the customer, the steps required for successful completion and the application used to undertake the journey (Browser, File Upload or Mobile App)

There are a number of different headings and options under the Onboarding Journey section:
| Name | The description given to the named journey |
| Channel | The capture channel used for this journey, includes: Capture Studio, Web, Mobile |
| ID Front Side | Should the front side of the ID be captured (toggle On/Off) |
| ID Back Side | Should the back side of the ID be captured (toggle On/Off) |
| PoA | Proof of address, should the proof of address be captured (toggle On/Off) |
| Liveness | Should Liveness testing be enabled (toggle On/Off) |
| Facematch | Should Face Match testing be enabled (toggle On/Off) |
| Capturing Media | This is directly linked to the Journey channel defined above, once that stream is chosen then there are options below on capturing media: A. Journey channel: Capture Studio Capturing Media: Scanner / File Upload B. Journey channel: Web Capturing Media: Scanner / File Upload / Web Camera C. Journey channel: Mobile Capturing Media: Camera |
| Nfc | To enable the NFC option an additional license is required. This is only available for Mobile journeys. |
By default, three journeys are provided:
- Capture Studio Journey Definition
- MJCS Journey Definition
- Web/WJCS Journey definition
Note: The default Web/WJCS Jouney Definition is retained despite a new version of the IDScan Web SDK being available. This has been retained to accommodate backwards compatibility for those customers running earlier versions of WJCS.
New Journeys can be added by clicking on “Add Journey Definition”

Enter your preferred Journey Name (Free-form text), Journey Channel (Capture Studio, Web or Mobile) and Capturing Media (Specific to your choice of Journey Channel).
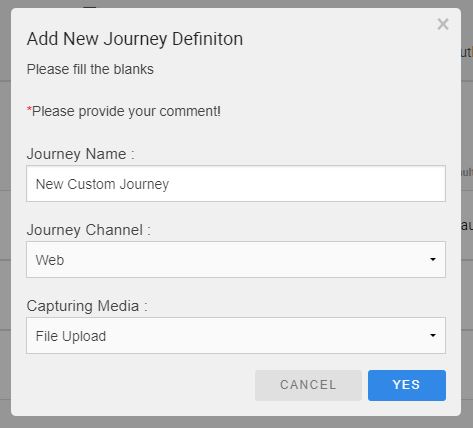
Confirm your configuration and select “OK” to save your Journey configuration.Your newly defined Journey will be listed alongside the defaults.

Once the new Journey Definition has been created you can customise the Journey based on your preferred customer path by enabling/disabling the Journey Steps using the toggle switches. Journeys Steps are enabled/disabled immediately once the selection is made and no additional “save” action is required.
Note: Journeys may be created at will and there is no limit to the amount of Journeys Administrators can configure. Please consult Professional Services for further information on how to link newly defined Journeys to your Website or Mobile Application.