The Journey Container is the main class; it is how you configure, initialise and use the web SDK.
This guide will go through the configuration of the Journey Container and some of the parameters available to the Journey Container and what they do.
Configuring the Journey Container:
 new window.GBG.Idscan.JourneyContainer({
             backendUrl: "https://product.idscan.cloud:443",
             container: "#root",
             token: 'Access token goes here',
             journeyDefinitionId: 'Journey Definition ID goes here',
             cameraOptions: {
                 minimum: {
                     horizontal: 400,
                     vertical: 800,
                 },
                 ideal: {
                     horizontal: 1080,
                     vertical: 1920,
                 }
             },
             defaultInputProvider: "FILESYSTEM",
             dictionary: translationDictionary,
             templates:  overrideTemplate,
             onJourneyEvent: onJourneyEventPro,
             smartCapture: {
                 workerScriptUrl: "./ides-micro.eb86309d23aefaad372b.js",
                 asmScriptUrl: "./idesmicro_asm.js",
                 timeout: 5000
             },
             additionalData: [{
                 "Name": "Test",
                 "Value": "testdata"
             },
             ]
         }).initialize();
Backend URL:
backendUrl: "https://backend.url.here:443",
Backend URL is the URL provided to you by GBG; it is the URL to your IDscan Environment.
Container:
container: "#root",
The container is the location in your website/web application that you would like the IDscan SDK to be inserted.
<div id="root"></div>
In this example, the SDK is injected into a <div> with an id of root
Access Token:
token: 'Access token goes here',
The access token authenticates the SDK, so there is no need for the login view, and this view will be skipped/ignored.
To generate a token, you can follow the API guide found here
Below is an example of calling the above API (please note the below is just an example using the fetch method in JavaScript, it is not a recommendation on how you should implement).
The below code was generated by using Postman for the token API, and then added to it is a call to the SDK to pass the token in.
var myHeaders = new Headers();
 myHeaders.append("grant_type", "password");
 myHeaders.append("Content-Type", "application/x-www-form-urlencoded");
 myHeaders.append("Content-Type", "application/x-www-form-urlencoded");
 myHeaders.append("Cookie", "visid_incap_2269699=W4MQufwYSn2Nar9+dmqs26tcmV4AAAAAQUIPAAAAAACb9zxVFCIbdNskOMMQ4Ubv; incap_ses_867_2269699=Pt8UG18uYmt/GlAELjUIDJwP1l4AAAAA4Dtj2Np/nthnEO12PBX/Yw==; token=c48KRvJZgxfZd-vtmcGJjtsTgVhR_xb7jMbTgKpyB35hfbOiG13_obdqBruifpdOZOiaUa9PmFbjeU6PHumEfZzhzIavuWhA5GKbRJZQHtUvQxd8A_GbT7vTJu0CVQ0FKjp24smZhxvtGnXCF7UY8XT-vpVA2nb0SuN5xvyrSKQVsxAYy9a1gChfpIhZLeV18WpR1fX0Svzg1F4qdWjAKiRIj5C1P7bGIXUexq-yyEGLmpE4e7fdrCwm6_QP7v7vmrqsR7_v_Wv_Iyn7t4MPivvmNNVdwMbSqEtbUsWQhzWb7NwMknyTh3LvNBPUWS8_2bQWskRc2u6jgDEv1Ji3ZClIXexc8D0EZScklzJfEu9nivSH9jNjF7XGKZcZY7hzIDsS_R4StWbWES2LpadKsRH-Anm_jCzG6ZYUHFkon0g06KwGvp0z50IkImtDtGyTX_Tw7QEpWV_wdeAcpJuJtNaM47aLD2sZvnNksk9mIUV3B_WlZja1pudHSeMML8V-x0tXeXrix1IIkk9cv8q1UjHN-u-dGKmJ9f9x4mYoCz2OLg1TatglyTZKbv_NiyUa; csrftoken=dPRyav2MAipUkxngYYmo05qKndTUaGbXuPLlhePsN5HyFL56ivNXaB%2BSvwVR5uYtoloGWk6Dh%2FD6%2FXu7aHhrW7IAi6CfWyq%2FnrJwAMqLcmGFI1HEjQxxUVyUyuXNF%2FxmB06vACNd6uktl1D%2BJJcwWdt5E463LeHMwNf8edAaNNLoMhjiBRqGcvSCf1KWLe2C%2FvuZJBSQALNE2V3MSwf%2BNuiOjLQ5naNLESQNhh9EPPKoN4YUnVi1EeDzSho21tf88qkao7kb5uBUMRAEm%2FajDYoWuMutlU4AMySOR0H7LZFiSBinFONmLiBH1t%2BOr8j%2BXy6BLvpxPd%2B6tu4cHoV%2ByFsQbWivCe3rP1UXxNRiEiHhBGWhhwswYM3%2FrnfrL0Nl7jNTLw0XS5oDI1qztVgMsmTboLf%2FJp25pKjKHgr8xxY0H5Wh2FVJPepCrz93jQUNcOcw1hm3w77tGP2Tfzxvm88kLngxoj23ISiCOPHLRMwJO99upP%2BZVPRCjX3EUQsDuGyYRSi5HP%2BQbfHRQTZjv0dS9PLRrmGCw3aTwAY7Z5FxAt9zHoR%2BF2m%2BvwpqDaEzI8aWHyaiBSNO5LaZ0wmLgKcTUw6ICISCS4EBSQGCq6XEJThsLTRkWt5yQYGjMzjo9pKBKl%2FGGpW4tifMmcD67MmegQPH%2FFniD6IowcnfzCO6DdQC69u7DQucDYfgKLJcaKfriKyEtipoVGI%2F5jkLC3x5eJcQum5jQZNafIPLqaiKMyTjruuklJB8V7GP6uoDqbCGbPxTT8SXCF0LSLVd4%2B4HNADfOCI6MFkTocL0%2BOGhjn4lDOqRIwu6%2BkaCestjez5MMU2GhlIyHWygxtf09w%3D%3D; incap_ses_868_2269699=CL9PHMP5Myv94ruynsILDM5s114AAAAApZCarYlgY05mCq8ThrQGYg==");
 var urlencoded = new URLSearchParams();
 urlencoded.append("grant_type", "password");
 urlencoded.append("username", "USERNAME_HERE");
 urlencoded.append("password", "PASSWORD_HERE");
 urlencoded.append("area", "scanning");
 var requestOptions = {
   method: 'POST',
   headers: myHeaders,
   body: urlencoded,
   redirect: 'follow'
 };
 fetch("https://product.idscan.cloud/idscanenterprisesvc/token ", requestOptions)
   .then(response => response.json())
   .then(function(token) {
       runSDK(token['access_token']);
     console.log(token['access_token']);
 })
   .catch(error => console.log('error', error));
You can then wrapped the SDK in a function and passed the token into the SDK
function runSDK(token) {
     new window.GBG.Idscan.JourneyContainer({
             backendUrl: "https://product.idscan.cloud:443",
             container: "#root",
             token: token,
             journeyDefinitionId: 'Journey Definition ID goes here',
             cameraOptions: {
                 minimum: {
                     horizontal: 400,
                     vertical: 800,
                 },
                 ideal: {
                     horizontal: 1080,
                     vertical: 1920,
                 }
             },
             defaultInputProvider: "FILESYSTEM",
             dictionary: translationDictionary,
             templates: overrideTemplate,
             onJourneyEvent: onJourneyEventPro,
             smartCapture: {
                 workerScriptUrl: "./ides-micro.eb86309d23aefaad372b.js",
                 asmScriptUrl: "./idesmicro_asm.js",
                 timeout: 5000
             },
             additionalData: [{
                 "Name": "Test",
                 "Value": "testdata"
             },
             ]
         }).initialize();
Journey Definition ID:
journeyDefinitionId: 'Journey Definition ID goes here',
The journeyDefinitionId allows you to pre-select the journey you would like to perform.
To access the list of journeyDefinitionId’s from API, you can find the API guide found here
Camera Options:
cameraOptions: {
                 minimum: {
                     horizontal: 400,
                     vertical: 800,
                 },
                 ideal: {
                     horizontal: 1080,
                     vertical: 1920,
                 }
             },
Camera options have two parameters
- Minimum – this allows you to configure the minimum allowed resolution for the input camera
- Ideal – this allows you to configure the ideal camera resolution, the SDK will try for this resolution first
Both these parameters take two additional parameters, horizontal and vertical; these are the resolutions you would like to configure.
Default Input Provider:
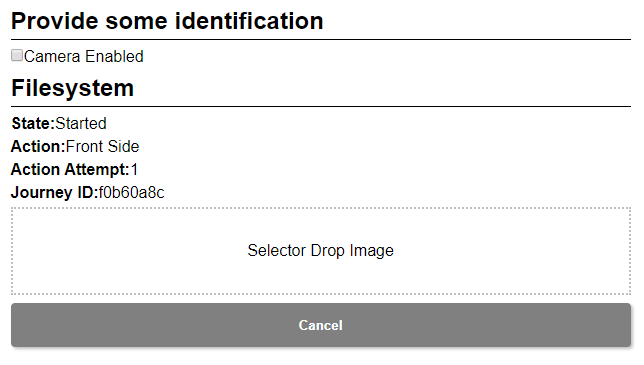
defaultInputProvider: "FILESYSTEM",
Default input provider allows you to specify what you would like the capture media to default to, for example, you can configure the Document Capture to use FILESYSTEM, this will cause this step to default to file upload instead of the camera (system default).
All input providers:
| Member | Value | Description |
| CAMERA | “CAMERA” | The customer will be presented with a viewfinder showing a camera preview with the option to manually capture a frame. Options should be provided to allow the user to control which camera to capture from based on their hardware’s capabilities. NOTE: This will require the user to allow access to the camera first using the browser’s default permissions process. |
| FILESYSTEM | “FILESYSTEM” | The customer will be presented with an input box to either select a file or drag a file into. |
| LIVENESS | “LIVENESS” | The customer will be presented with a viewfinder showing a camera preview with the option to begin the automatic capture. They will then be guided with on-screen instructions to indicate which pose should be performed. NOTE: This will require the user to allow access to the camera first using the browser’s default permissions dialog. |
| NONE | “NONE” | No input provider specified at this time. This could be because authentication is required or the results overview is being shown. |
| SCANNER | “SCANNER” | The customer will be presented with the current scanner status and instructions to allow to complete the capture process. NOTE: This will require the scanner to be set up and enabled in the configuration before it will be made available for use. |
| SMART_CAPTURE | “SMART_CAPTURE” | The customer will be presented with a viewfinder showing a camera preview with the option to begin the automatic capture. NOTE: This will require the user to allow access to the camera first using the browser’s default permissions dialog. |
Dictionary and Templates:
dictionary: translationDictionary,
 templates:  overrideTemplate,
Both Dictionary and Templates I will cover later on in this document in their dedicated sections.
On Journey Event:
onJourneyEvent: onJourneyEventPro,
onJourneyEvent triggers events, states, and meta from the SDK; these can be passed into a separate function to handle these states.
function onJourneyEventPro(event, meta, state) {
         console.log("journey Reference", state.journey.journeyReference)

         console.log("event", event);
         console.log("meta", meta);
         console.log("state", state);
         switch (event) {
             case GBG.Idscan.JourneyEvent.TRANSFER_STARTED:
                 console.log("TRANSFER_STARTED");
                 break;
             case GBG.Idscan.JourneyEvent.TRANSFER_PROGRESS:
                 console.log("TRANSFER_PROGRESS");
                 break;
             case GBG.Idscan.JourneyEvent.TRANSFER_COMPLETE:
                 console.log("TRANSFER_COMPLETE");
                 break;
             case GBG.Idscan.JourneyEvent.TRANSFER_FAILED:
                 console.log("TRANSFER_FAILED");
         }
     };
Accessing the Journey ID
console.log("journey Reference", state.journey.journeyReference)
The first thing to point out is that the state can also return the unique journey reference for the journey currently being performed. The above extract is logging this to console; however, nothing stops you from saving this for later use, example calling IDscan retrieval API to return the result of this journey.
Please note: The journeyReference is only available after the first step has completed in the journey, document upload has completed, and then this state will be created. Either you can monitor for a TRANSFER:COMPLETE event and then try access the journey reference, or continually check journeyReference to determine when it is created.
Below are the available Event/s:
| Member | Value | Description |
| AUTH_CHANGE | “AUTH:CHANGE” | Triggered when the authentication state in the SDK has changed. |
| CAMERA_CAPABILITIES_UPDATED | “CAMERA:CAPABILITIES_UPDATED” | Triggered when the observed capabilities of the devices found on this system have been updated. Note that they may not have changed; the data has just been refreshed when this has been triggered. |
| CAMERA_CHANGE | “CAMERA:CHANGE” | Triggered when the camera choice has been changed by the user. |
| CAMERA_DONE | “CAMERA:DONE” | Triggered when the camera action has finished and has been closed. |
| CAMERA_FEEDBACK | “CAMERA:FEEDBACK” | Triggered when the camera session has feedback to provide such as an image being captured, or the service rejecting an image. |
| CAMERA_PAUSE | “CAMERA:PAUSE” | Triggered when the camera action has been paused remotely. |
| CAMERA_POSE | “CAMERA:POSE” | Triggered when the service requires the user to pose for the camera. This will usually trigger several times in succession with different poses for the user to act upon. |
| CAMERA_READY | “CAMERA:READY” | Triggered when the camera and service are ready to begin. Clicking the retina__start button will begin the next section of the journey. |
| CAMERA_START | “CAMERA:START” | Triggered when the user clicks the retina__start button and transmission of frames to the remote server has begun. |
| CAMERA_STOP | “CAMERA:STOP” | Triggered when the camera session has stopped. |
| DISPLAY_PROVIDER | “DISPLAY:PROVIDER” | Triggered when the input provider has been changed and the new UI has been rendered to the specified container. |
| DISPLAY_STEP | “DISPLAY:STEP” | Triggered when the current step in the journey has changed and the new UI has been rendered to the specified container. |
| ERROR | “ERROR” | Triggered when an error has occurred in the SDK. This can be triggered for both fatal and recoverable exceptions. |
| JOURNEY_CANCEL | “JOURNEY:CANCEL” | Triggered when the current journey has been cancelled. |
| JOURNEY_CLEAR | “JOURNEY:CLEAR” | Triggered when the state of the current journey has been cleared/reset. |
| JOURNEY_END | “JOURNEY:END” | Triggered when the journey has ended naturally. |
| JOURNEY_PROGRESS | “JOURNEY:PROGRESS” | Triggered when the journey has progressed. |
| JOURNEY_START | “JOURNEY:START” | Triggered when the journey has started. |
| SCANNER_RESULT | “SCANNER:RESULT” | Triggered when the scanner has a result. It is accompanied with the results of the scan in the event. |
| SCANNER_UPDATE | “SCANNER:UPDATE” | Triggered when the scanner has an update such as a scan beginning, or processing beginning on a captured image. |
| TRANSFER_COMPLETE | “TRANSFER:COMPLETE” | Triggered when a file transfer has completed successfully. This can trigger for any file transfer including templates requested over the network and file uploads. The name specified when the request was made will be specified. |
| TRANSFER_FAILED | “TRANSFER:FAILED” | Triggered when a file transfer has failed during transit. This can trigger for any file transfer including templates requested over the network and file uploads. The name specified when the request was made will be specified. |
| TRANSFER_PROGRESS | “TRANSFER:PROGRESS” | Triggered when there has been progress in a file transfer. The values will be from 0-50 during the upload phase, and 50-100 during the download phase. This can trigger for any file transfer including templates requested over the network and file uploads. The name specified when the request was made will be specified. |
| TRANSFER_STARTED | “TRANSFER:STARTED” | Triggered when a file transfer has started. This can trigger for any file transfer including templates requested over the network and file uploads. The name specified when the request was made will be specified. |
Below are the available State/s:
| Member | Value | Description |
| ENDED | “ENDED” | The journey has ended. |
| INPROGRESS | “INPROGRESS” | The journey is currently in progress. |
| STARTED | “STARTED” | The journey has started, but there has been no data submitted. |
Smart Capture:
smartCapture: {
                 workerScriptUrl: "./ides-micro.eb86309d23aefaad372b.js",
                 asmScriptUrl: "./idesmicro_asm.js",
                 timeout: 5000
             },
To enable/use smart capture you need to link the workerScript (ides-micro) and the asmScript (idesmicro_asm) both included in the Web SDK package, it is recommended you use a timeout of 5000.
Additional Data:
additionalData: [{
                 "Name": "Platform",
                 "Value": "iOS"
             },
             ]
additionalData allows you to pass in additional data with the journey; this can be any data in the format as seen above.
This data can then be accessed in the retrieval API and will look something like the below.
"AdditionalData": [
      {
        "Name": "BranchCode",
        "Value": "1234"
      },
      {
        "Name": "CustomerNumber",
        "Value": "c1234"
      },
      {
        "Name": "Channel",
        "Value": "Postman"
      },
      {
        "Name": "UserName",
        "Value": "psc"
      },
      {
        "Name": "RequiredJourneySteps",
        "Value": "BACKSIDE,FRONTSIDE"
      },
      {
        "Name": "UnderAgeRuleResult",
        "Value": "PASSED"
      }
    ]