The IDscan Administration Portal page is the unified location for modifying and maintaining the various settings and configuration options available to Administrators of the IDscan solution. To access the journey backend settings please browse the following URL: https://(SERVER-URL)/IDScanApp
The following login page is shown:
Login with the Super Administrator credentials, which can be viewed/edited in the User Management XML file located in: C:\ProgramData\IDScan\IDScanEnterprise\UsersManagement.xml. Super Administrators have access to the full IDscan Dashboard as shown below. With these credentials the Capture Studio, Investigation Studio, Analytics Studio and Administration Portal can be accessed

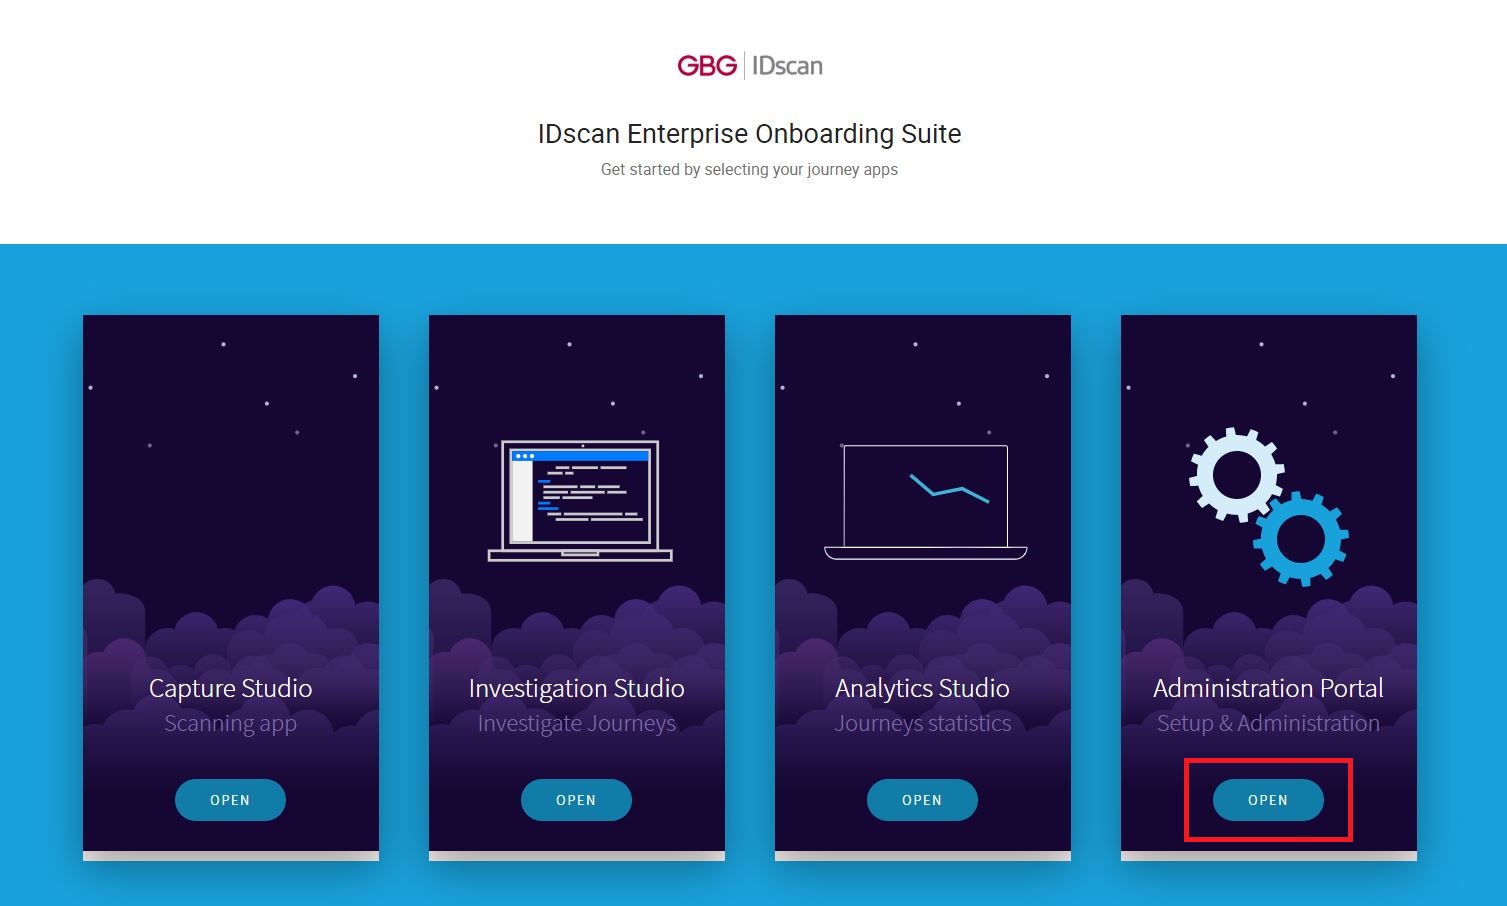
Click “Open” button on the Administration Portal icon.
If you cannot click on the “Open” Button or the Administration Portal is shaded out you may not have the required permissions to access this area.
Below you will find an overview of the most commonly used configuration options that can be modified by Administrators in the Administration Portal.
Quick Links

The Quick Links bar along the top of the page allows Administrators to navigate quickly to the relevant section of the Administration Portal.
Document Checks
Document Checks is a feature which allows to define tolerance of the library to authenticate ID documents.
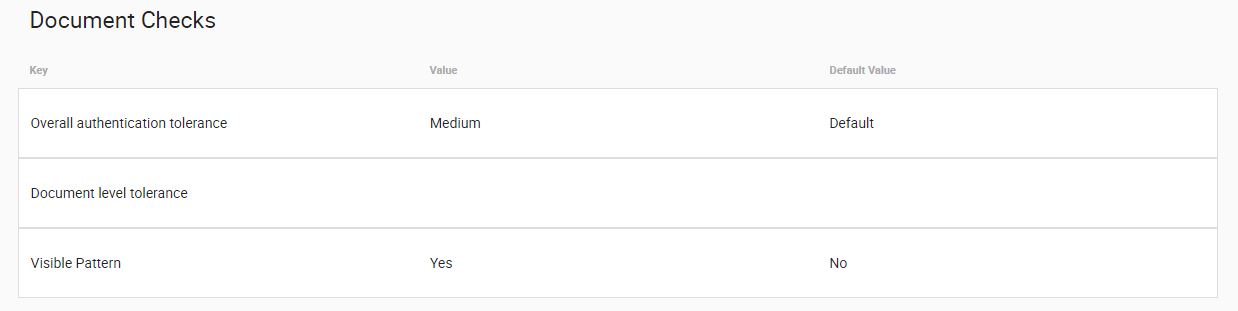
Overall Tolerance Levels can be set to Default, Medium or Strict
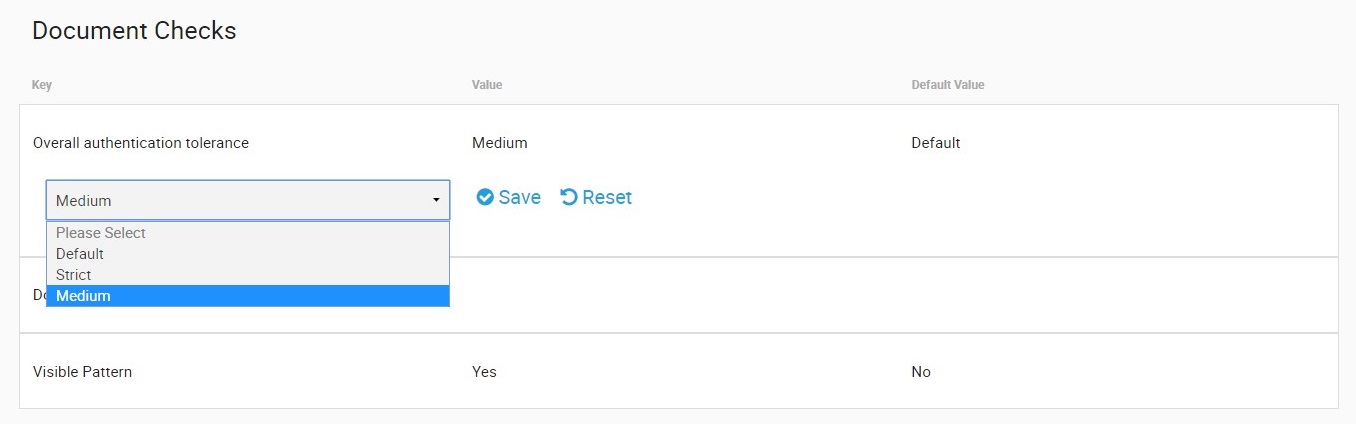
Note: The Default setting is aimed at customers who are focused on extraction of data, the recommended level is Medium where both extraction and authentication are important. The Strict level enables a very stringent authentication process, making validations checks very strict and potentially increase the number of false positives.
Document Tolerance can also be defined on a per document type level. The following section allow Administrators to select specific document types by Country and Type and set tolerance levels for that specific type of document.
Visible Pattern Check
The Visible Pattern Check ensures that expected patterns on documents are present at the time of processing. These are defined in the IDscan Document library and can range from background patterns to known security features. Visible patterns are document specific.

Onboarding Journey
This section allows Administrators to define the path to be taken by their clients when onboarding, a process referred to as the customer journey. Journeys can be defined in many ways depending on the device used to onboard the customer, the steps required for successful completion and the application used to undertake the journey (Browser, File Upload or Mobile App)
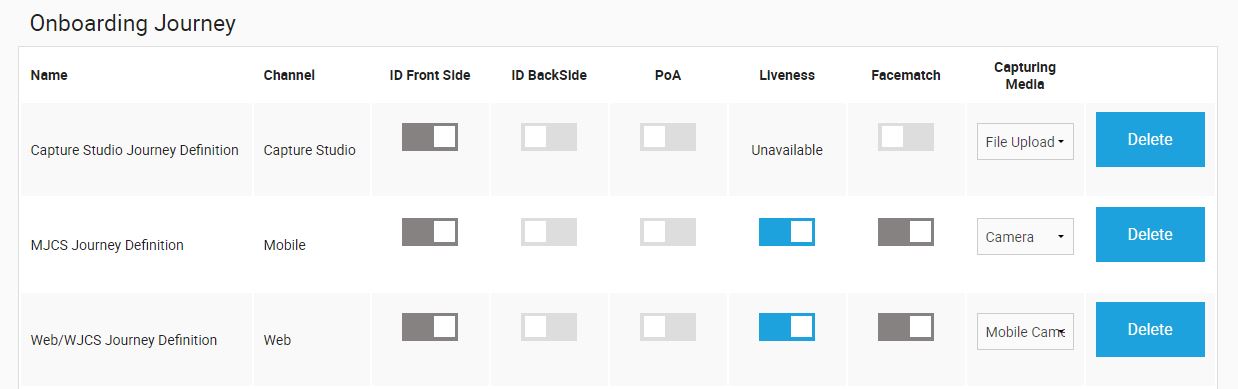
There are a number of different headings and options under the Onboarding Journey section:
| Name | The description given to the named journey |
| Channel | The capture channel used for this journey, includes: Capture Studio, Web, Mobile |
| ID Front Side | Should the front side of the ID be captured (toggle On/Off) |
| ID Back Side | Should the back side of the ID be captured (toggle On/Off) |
| PoA | Proof of address, should the proof of address be captured (toggle On/Off) |
| Liveness | Should Liveness testing be enabled (toggle On/Off) |
| Facematch | Should Face Match testing be enabled (toggle On/Off) |
| Capturing Media | This is directly linked to the Journey channel defined above, once that stream is chosen then there are options below on capturing media: A. Journey channel: Capture Studio Capturing Media: Scanner / File Upload B. Journey channel: Web Capturing Media: Scanner / File Upload / Web Camera C. Journey channel: Mobile Capturing Media: Camera |
By default, three journeys are provided:
1. Capture Studio Journey Definition
2. MJCS Journey Definition
3. Web/WJCS Journey definition
Note: The default Web/WJCS Jouney Definition is retained despite a new version of the IDScan Web SDK being available. This has been retained to accommodate backwards compatibility for those customers running earlier versions of WJCS.
New Journeys can be added by clicking on “Add Journey Definition”
Enter your preferred Journey Name (Free-form text), Journey Channel (Capture Studio, Web or Mobile) and Capturing Media (Specific to your choice of Journey Channel).
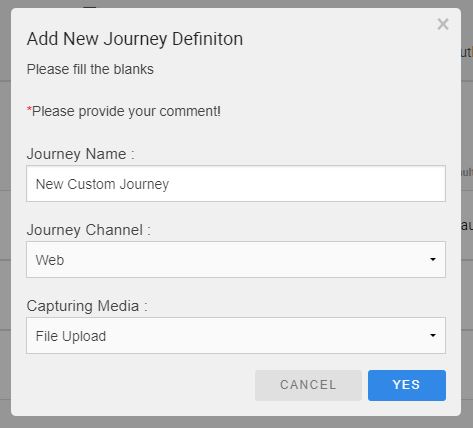
Confirm your configuration and select “OK” to save your Journey configuration.Your newly defined Journey will be listed alongside the defaults.

Once the new Journey Definition has been created you can customise the Journey based on your preferred customer path by enabling/disabling the Journey Steps using the toggle switches. Journeys Steps are enabled/disabled immediately once the selection is made and no additional “save” action is required.
Note: Journeys may be created at will and there is no limit to the amount of Journeys Administrators can configure. Please consult Professional Services for further information on how to link newly defined Journeys to your Website or Mobile Application.
Additional Journey Configuration Options
Further configuration options are available to administrators. These should be configured in conjunction with your Professional Services representative in order to ensure your are maintaining your integration correctly and to ensure your customers expectations are met correctly.
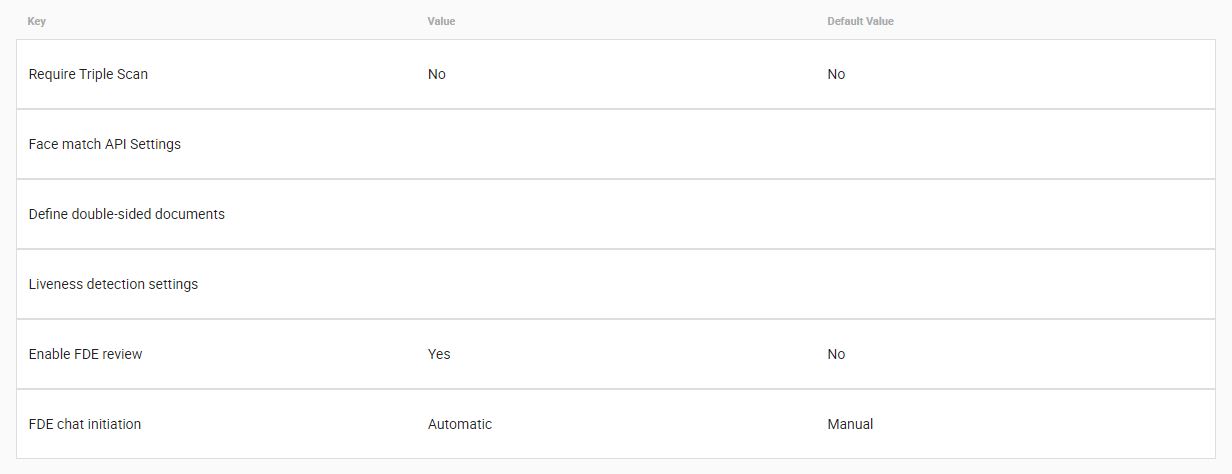
Triple Scan is a feature within the IEOS backend settings which enables the image of an Identification Card or any other document to be scanned three times. This is to ensure the utmost quality and resolution of the document. If Triple Scan feature is enabled, ‘Please Rescan’ message will be shown if the image capture is at low quality/resolution when capturing a document.
However if the image quality is acceptable then the image will be sent for the next step, if it isn’t then the message ‘Please Rescan’ will appear again (up to three times).
This feature ensures the documents are captured in the best quality possible and in turn decreases the number of ‘Not Supported’ or ‘Refer’ results that may occur due to low resolution.
To enable this feature, ensure the ‘Require Triple Scan’ switch is set to the ON position and select “Save”.

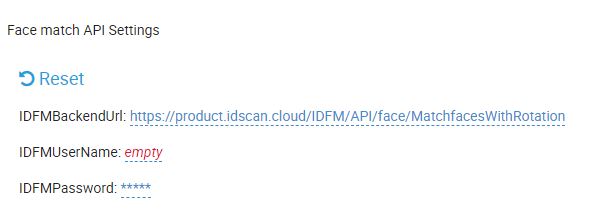
Face Match API settings can be configured to use specific URLs to link to the IDscan Face Match Service. It is highly unlikely that this would need to be configured by Administrators as the default setting would suffice in most cases. In order to have this feature enabled, please install the IDFM component. Face Match will only be available if you have requested this feature during your contract negotiation and are given an IEOS Product Key with the Face Match feature embedded. This key would be provided to you within your package release email sent by your Professional Services Consultant.
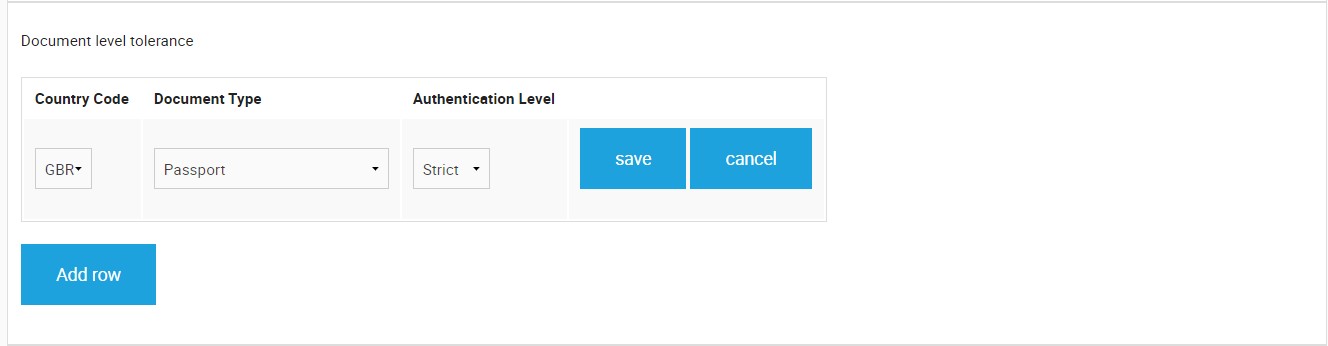
Define Double Sided Documents allows Administrators to define specific documents as double sided, and further allows for the results of the back of defined documents to be either ignored or considered. When this option is applied to a specific document, the IDscan library will prompt for the capture of the back of the document, should this be set in the journey definition, and allow for certain checks to be performed.
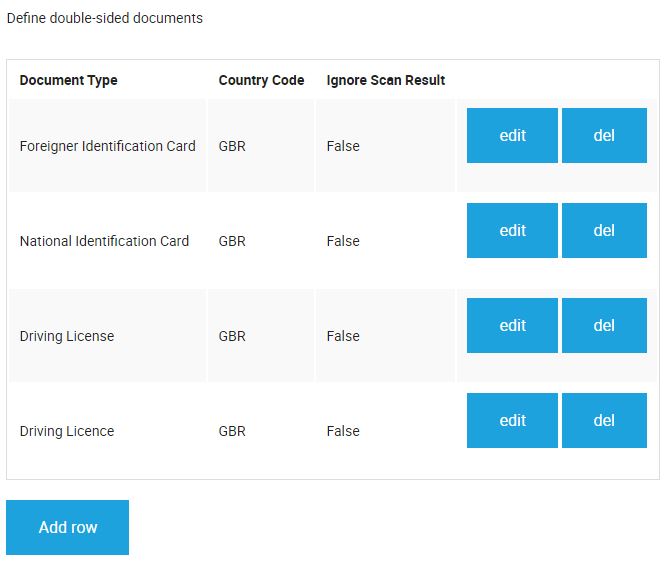
If an Administrator sets the Ignore Scan Result to “True” and the outcome of the back of the document does not pass, it does not impact the journey outcome. Certain documents may well be defined as double sided by default, however Administrators have the ability to define their own documents as double-sided by clicking on ‘Add row’ and Choosing the ‘Document Type’, ‘Country Code’ and their choice of ‘Ignore Scan Result’.
Note: This section is enabled only when the ‘Front-back Cross Check’ option is set to “On” in the Business Rules section below.
Liveness Settings allows the Administrator to configure the various configuration options applicable to the Liveness detection portion of the onboarding journey. This section is made up of three configurable options.
1. Max timeout for each action: Indicates the time (in seconds) allowable for a user to complete the gesture required
2. Number of actions to be performed: Indicates the total amount of actions/gestures required in the Liveness detection portion of the customer onboarding journey.
3. Max action failures allowed: Indicates the Maximun amount of Liveness gestures that can ‘fail’ or timeout. This option is included to accommodate those people that may struggle with specific expressions.
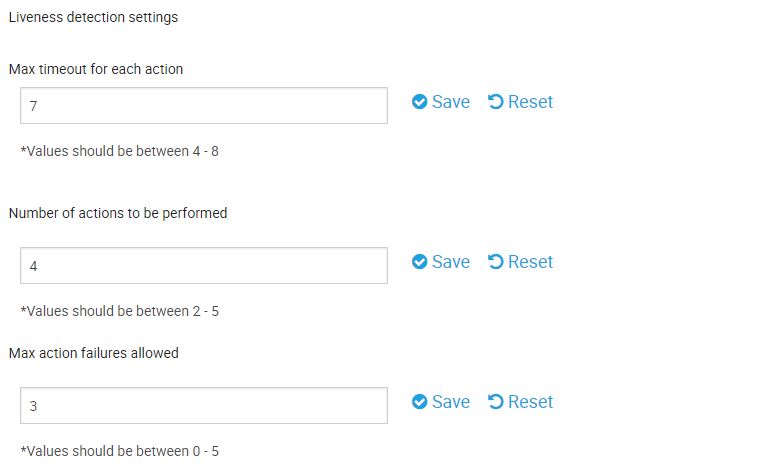
After making any changes you will need to remember to click “Save” to make sure that all changes are saved.
Enable FDE Review allows for the invocation of the Forensic Document Expert service. FDE is an ancillary service offered by IDscan which allows for documents to be reviewed by IDscans team of Forensic Document Examiners, should they be referred or Not supported. Should you be considering the use of this service, please consult your CSM or Professional Services consultant.

FDE chat initiation allows Administrators to configure whether referral of documents to the FDE operators takes place automatically (immediately once a document is referred) or via manual initiation (This process is triggered via the Investigation Studio).

Business Rules
This section allows Administrators to configure a number of rules that may be applicable to the regulatory requirements under which they operate.
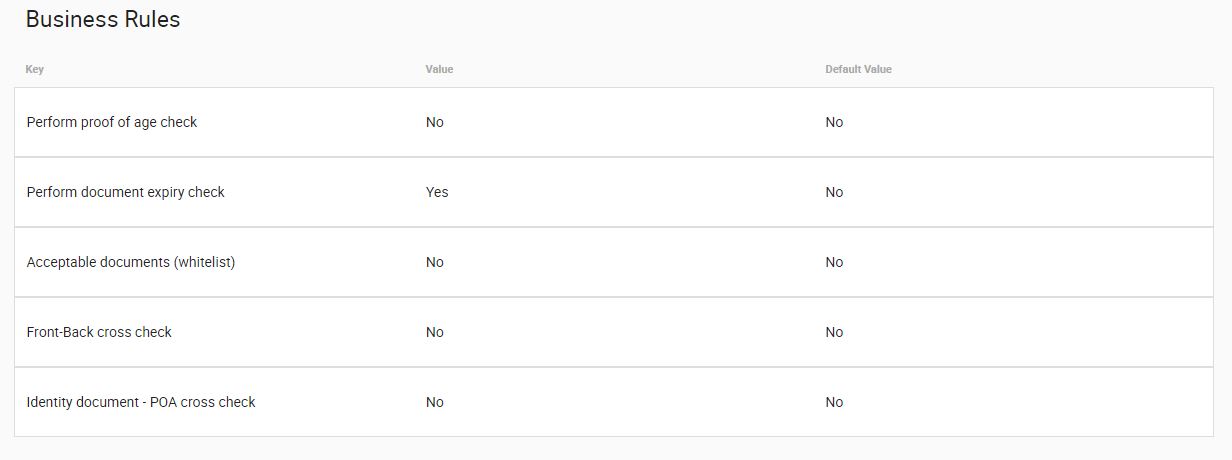
Perform proof of age check – Provides a simple check to determine whether the subject is over the age of majority. This check can be set to either Yes or No.

Perform document expiry check – Provides a simple check to determine whether or not the document has expired. This check can be set to either Yes or No.

Acceptable documents (whitelist) – Certain documents can be marked as acceptable, despite other configured restrictions. Thees documents need to be defined in a whitelist, which we refer to as the Acceptable Documents list. This features allows to only accept certain type of documents, for example, accept only UK ID’s (whitelisting).
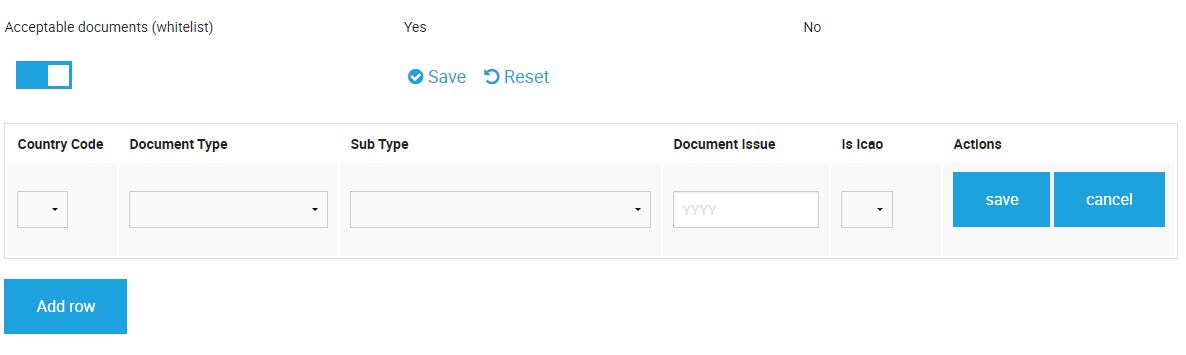
Administrators can define these whitelisted documents in this section. To include a specific document, enable the Approved Documents list by toggling the switch to the ‘Yes’ position and proceed to define your document by:
– Country Code
– Document Type
– Sub Type
– Document Issue Date
A document can further be defined as an ICAO (The International Civil Aviation Organization) compliant.
Front-Back cross check – This setting allows Administrators to enable/disable the cross checking of documents to allow for field-specific checks to take place.

Note: This setting works in conjunction with the double sided documents configuration highlighted earlier in this document.
Identity document – POA cross check – When enabled, the Identity Document – POA cross check attempts to match two addresses – the first extracted from the Identity Document scanned in the initial step of the journey, and any potential address information extracted from the Proof of Address Document.
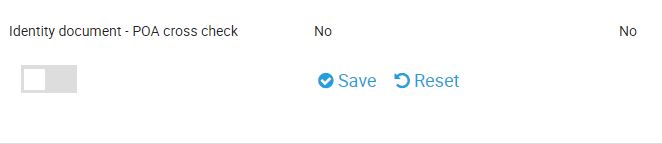
Note: This check requires high quality extraction of the Address data from the Proof of Address Document, which is not guaranteed. This check is therefore offered on a ‘best effort’ basis.
General
The General Setting section presents the ability to import any previously exported XML file that contains overall settings. Should you wish to obtain an exported XML file containing your General settings, please consult your Professional Services Consultant.

General settings include a number of configuration options that govern some of the more customizable options of the IDscan platform.
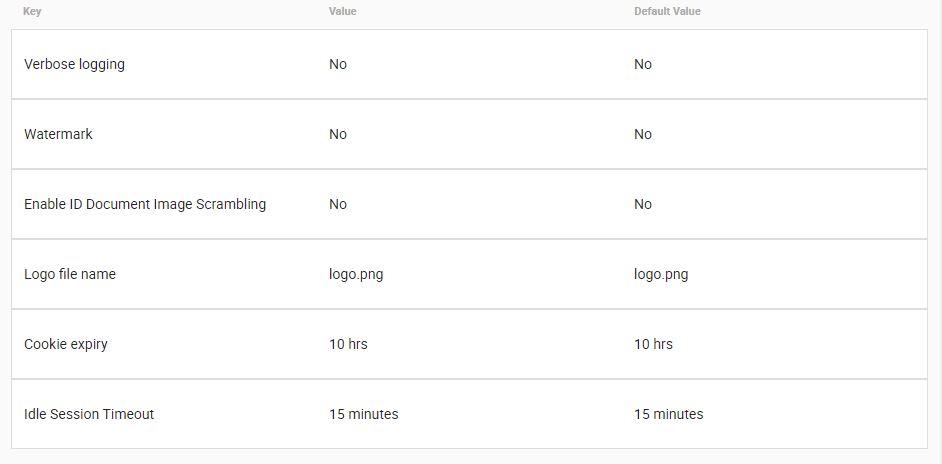
Verbose Logging – This can be set to either ‘Yes’ or ‘No’. When enabled, more extensive logging is recorded in the IDscan backend. This setting is extremely useful when troubleshooting certain issues, but is disabled by default to ensure maximum system response time.

Watermark – This can be set to either ‘Yes’ or ‘No’. When enabled, a watermark is applied to certain documents, in keeping with certain regulatory requirements.

Enable ID Document Image Scrambling – As with Watermarking above, this can be set to either ‘Yes’ or ‘No’. When enabled, Image Scrambling is applied to certain documents, in keeping with certain regulatory requirements.

Logo file name – This section allows you to define a specific file name for your company’s corporate logo. As part of the available customization options, your company Logo can replace the GBG | IDscan logo. Please consult with your Professional Services consultant to arrange this feature.
Cookie expiry – This section allows you to modify the length of time taken for a cookie to expire. While this is configurable, it is highly unlikely that any further configuration will be needed.

Idle Session Timeout – This configuration allows Administrators to determine how long (in minutes) a session in IEOS remains open. Once this time period has elapsed, and there has been no activity from the user, the system will log the current user out and present the Logon Screen once again.

Integration Webhook
Webhooks allow for tighter integration into the IDscan solution, giving administrators the option of determining certain aspects of their users’ journeys and accommodating these in their frontend configurations. In order to make use of Webhooks in this fashion, Administrators must enable this feature in the Administration Portal.
The Integration Webhook is disabled by default.
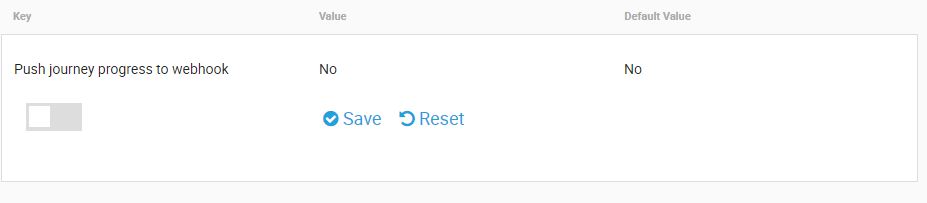
To enable the Integration Webhook, simply toggle the ‘Push Journey to Webhook’ option to the Yes position.
Click “Save” after making any changes.
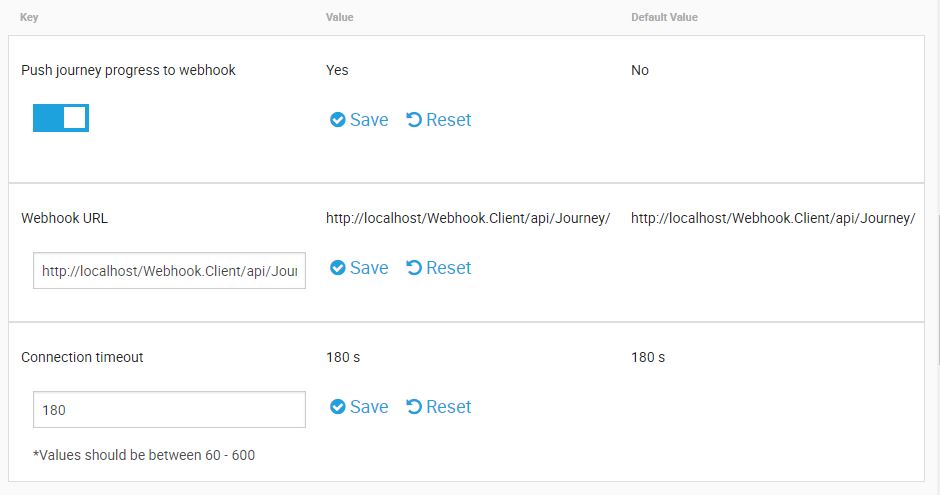
Once enabled, Administrators can configure both the Webhook URL and the connection Timeout. Should you require any further help with this specific configuration, please consult your Professional Services representative.
Audit
Auditing capabilities are built into the IDscan solution. Auditing is enabled by default

To enable Auditing, simply toggle the ‘Enable Auditing’ option to the Yes position’
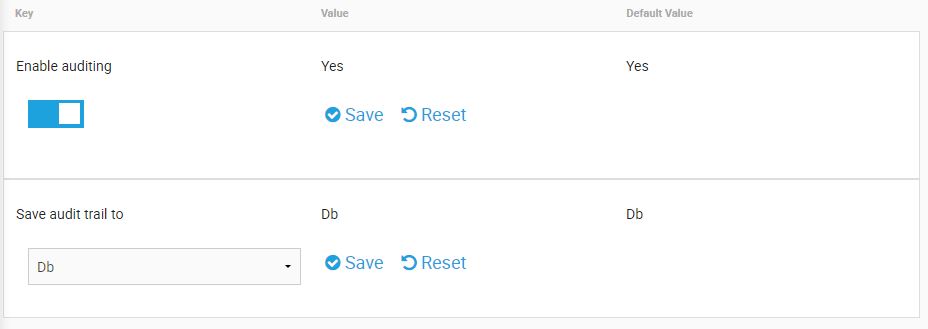
Once enabled, Administrators can configure where the Audit file is stored. Audit trails can be saved directly to the Database or to a file location. If the File option is selected, the Administrator must indicate the file path in which they would prefer the Audit file to be stored.

Authentication Scanner
This section allows Administrators to configure the setting required for using Document Scanners within IEOS. It is advisable to ensure you have consulted your Professional Services Consultant prior to making any changes to this configuration.
Note: In order to use Document Scanners with IEOS, the Terminal Integration Client must be installed and configured to run as a Windows Service. This ensures constant connectivity between IEOS and the Scanner hardware. Should you require any help with this, please contact your Professional Services Consultant.
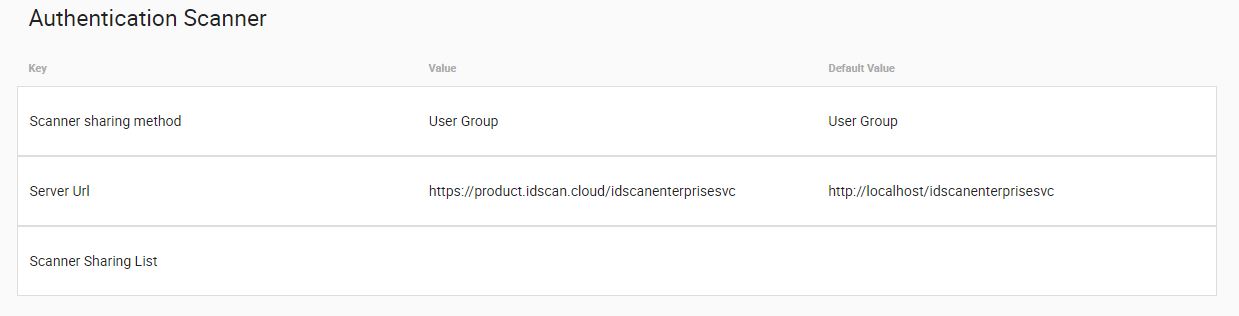
Scanner sharing method – This section allows Administrators to choose the sharing method. Options include:
1. User Group
2. Browser IP range
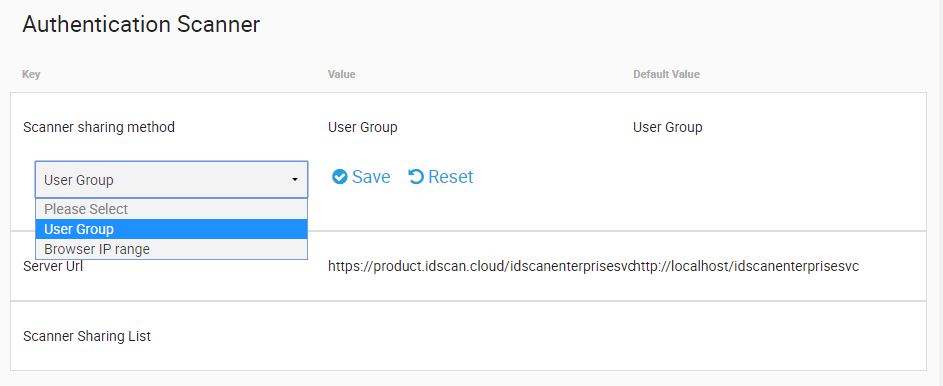
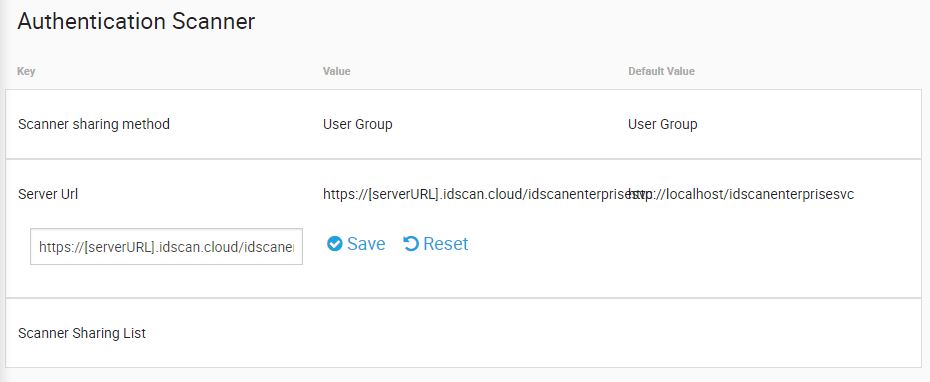
Server Url – This section allows Administrators to configure the URL of the IEOS to which the Scanners should connect. All scans completed on these devices will deliver their images to that URL for additional processing and results display.
Scanner Sharing List – In this section, Administrators have the ability to Add/Edit and Remove the various hardware scanners assigned to their network of scanning devices.

Scanners are configured at the point of first use using the unique scanner hardware serial number for each unit. Each scanner is listed according to the Site and location allowing for better reporting and device troubleshooting should the need arise.
Should you require any assistance with the setup of your Scanner Hardware, please contact your CSM or Professional Services consultant.
Note: – In order to view all three extractable views from your scanner (White Image, Infra-Red Image and Ultra-Violet Image) and have them displayed within IEOS, your environment should be switched from Compact Mode (set by default for faster processing) to Full Mode. Consult your Professional Services representative or the Helpdesk to enable this function.
This section allows Administrators to configure the various SSL and SMTP settings that will allow the IEOS server to send emails as part of its reporting capabilities.
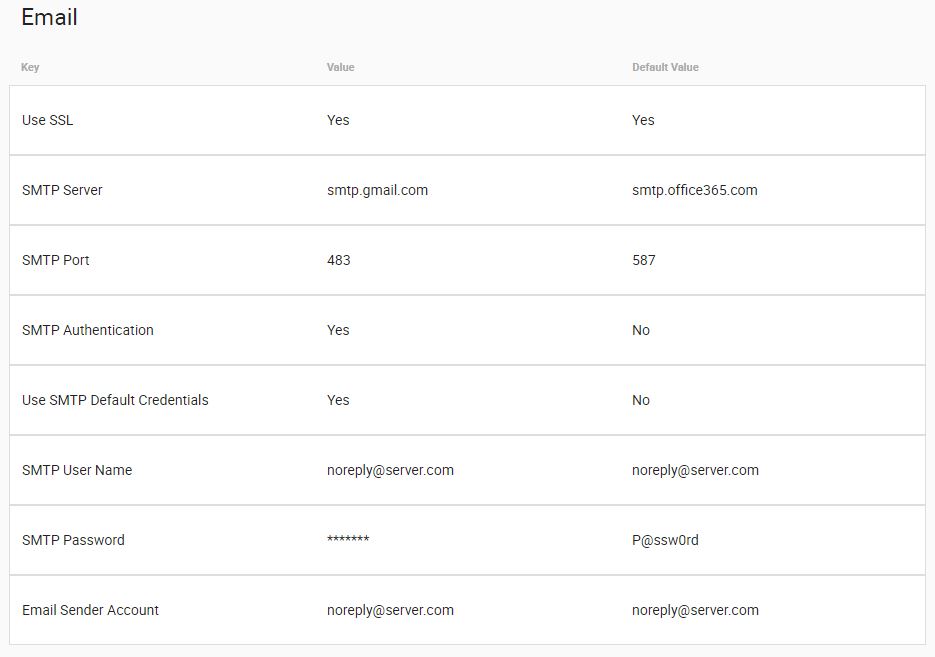
Email settings, including SMTP Server Address/Port, SSL configuration, SMTP Credentials, Sender Account and Recipient Account, etc. must be provided by your Local Network System Administrator or Internet Service Provider. IEOS will make use of the supplied Server settings when sending mail from the service.
Note: Client using the Web Services product will have these settings pre-configured, please contact the GBG IDscan Helpdesk if you need additional reporting enabled for your company. Alternatively customers using a Local Installation product will require a local account within their network.
Reporting
IEOS has the ability to trigger scheduled and on-demand reporting. In order to do this, Administrators must configure the methods of reporting and the location in which reports should be stored. Reports are exported by default, but additional configuration is possible.
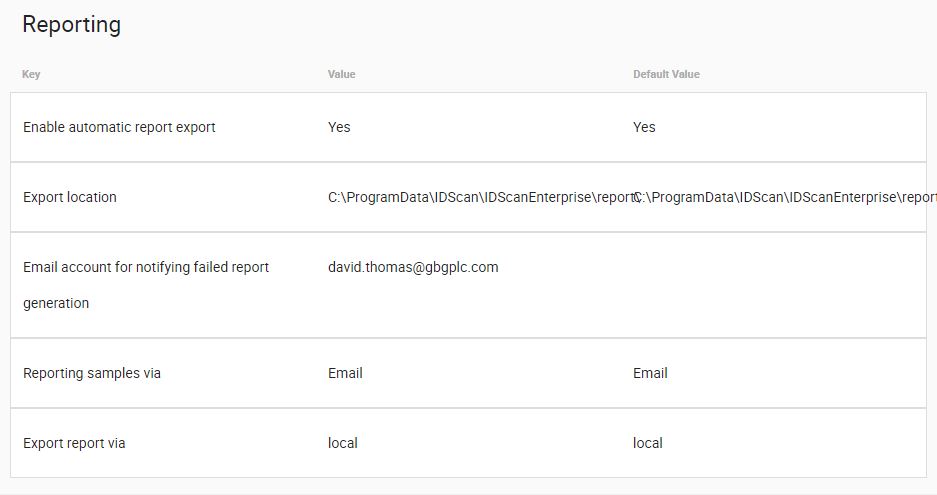
Enable automatic report export – Automatic report export is enabled by default, but this can be configured by simply setting the toggle switch to the “No” position.

Export Location – This section determines the location in which exported reports are stored. IEOS stores all exported reports in the default location, but for compliance and record-keeping purposes, Administrators may want to store these in a different location or a network file storage location.

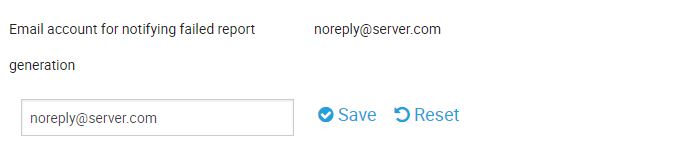
Email account for notifying failed report generation – Administrators are able to provide a more recognizable email address from which reports can originate. A no-reply email address is supplied by default, but Administrators may want to change this.
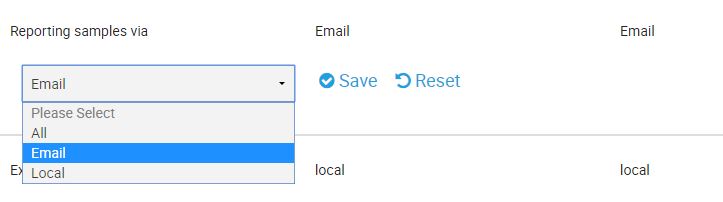
Reporting samples via – Reporting samples can be delivered locally, by email or both. This section allows Administrators to configure their preferred method of report delivery.
Export report via – By default, all reports are exported locally, but this setting is also configurable by an Administrator. Options include Email, Local and FTP.

You should now be fully set up and configured to start using our product. Should you have any further questions in relation to the Administration Portal configuration settings, please consult your Customer Success Manager or Professional Services Consultant and they will do their best in assisting you.