The installation of the integration client module is very simple.
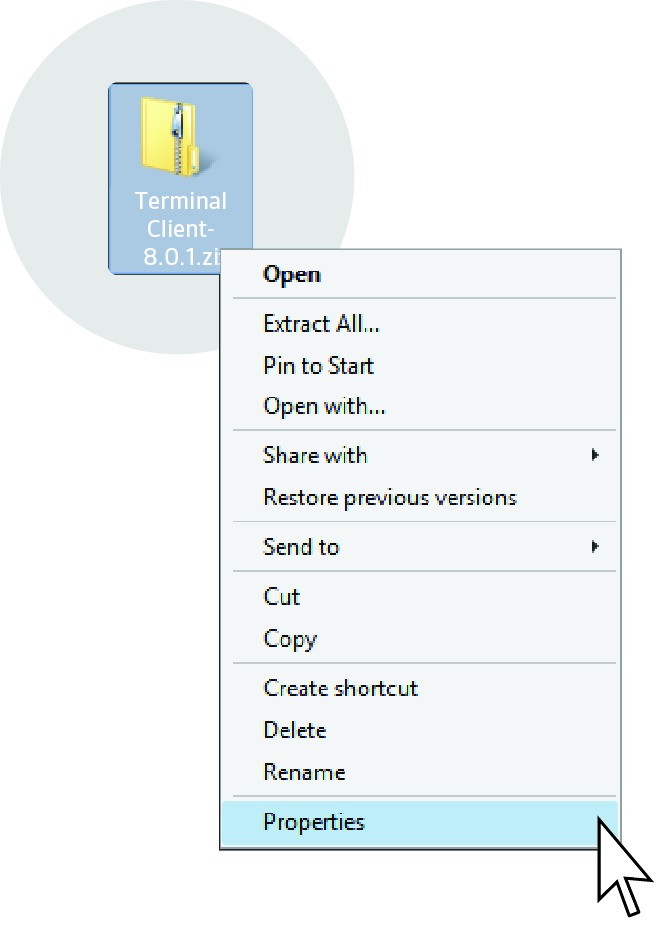
Your first step should be to unblock the file by right clicking onto it and going down the list to ‘Properties’ as shown below:
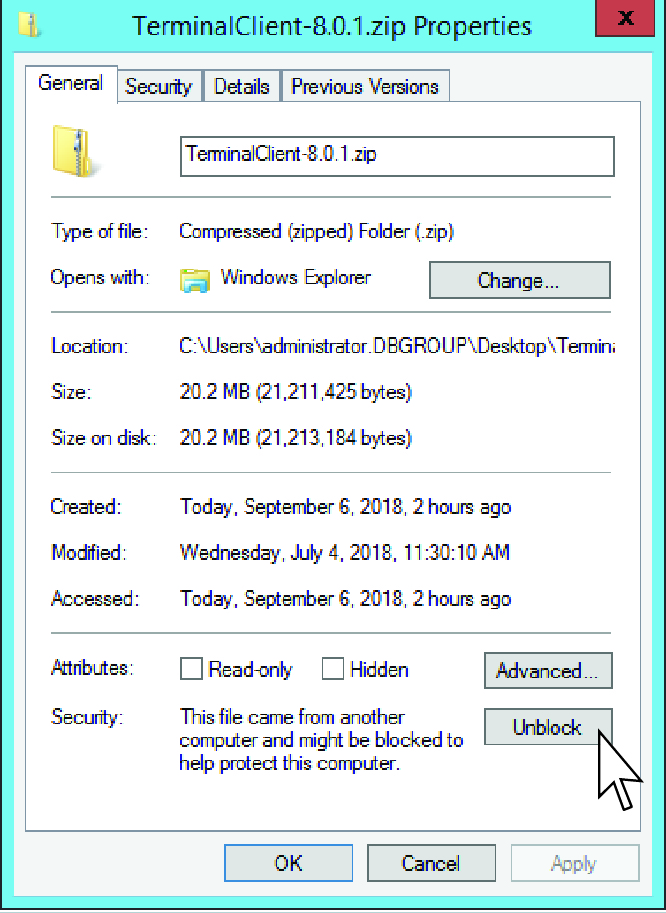
Once you have opened up the ‘Properties’ tab you should then click on the ‘Unblock’ button, press ‘Apply’ then ‘OK’ as you need to both Apply and OK for the change to take place.
This is shown in the below Figure. Unblocking is essential in the installation process as it may cause an issue during the installation or usage process.
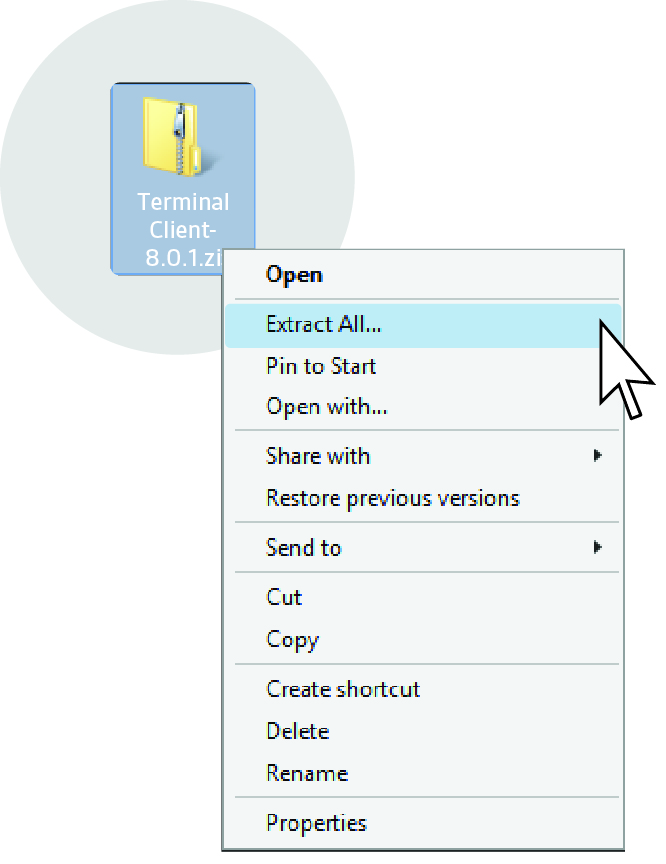
After you have unblocked the file you should now right click again and this time choose the ‘Extract All’ option to begin with your installation as shown below:
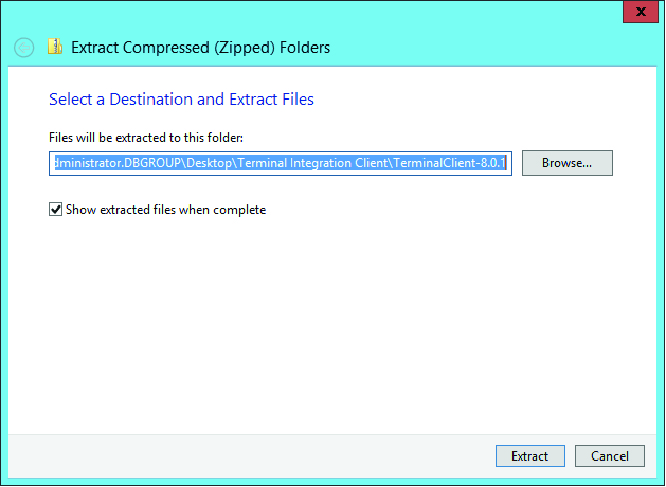
After you have clicked on Extract All you will be asked the destination of the extracted files and must click a final ‘Extract’ button as shown below
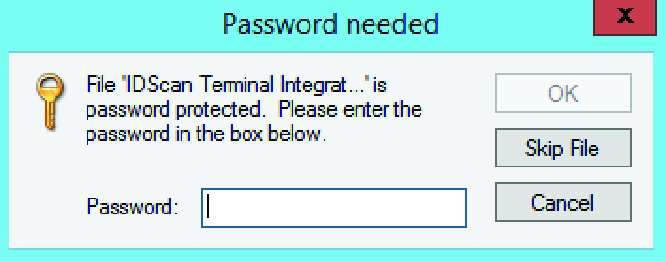
You will then be asked a Password as shown, which would be provided for you within your release email sent by your technical account manager
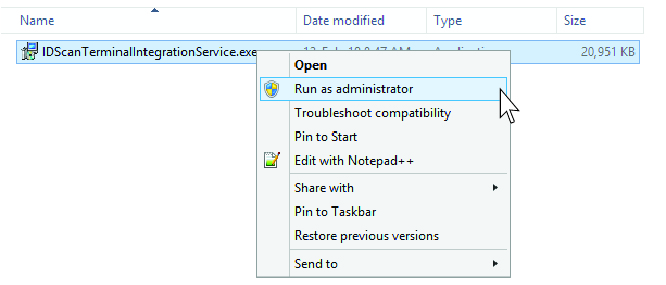
Once you have typed in your password and pressed ‘OK’ you will then be automatically taken to an exe package installation screen as shown below which is essential you install by right click and choosing the ‘Run as Administrator’ option.
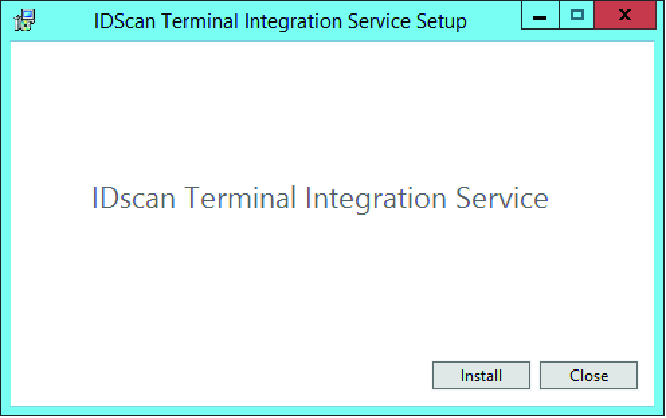
You will then be shown the IDscan Terminal Integration Service Setup Service window screen, which asks you to click ‘Install’.
After this, you will see an automatic window which you should continue by clicking the ‘Next’ button as shown below:

After you click ‘Next’ you will be shown the below screen:

On this page the Port appears as http and 80 as default, however you can choose to change this to https with a Port of 443, if you require it, as shown below:
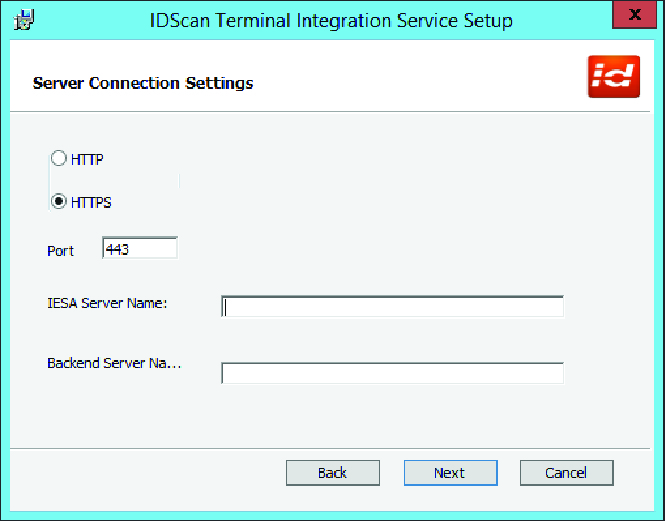
You will also have to type in your IESA and Backend Server Name. As the ability of the Terminal Integration Client is to not require further installation or configuration of IESA you will simply type in your Backend Server Name to both the text boxes.
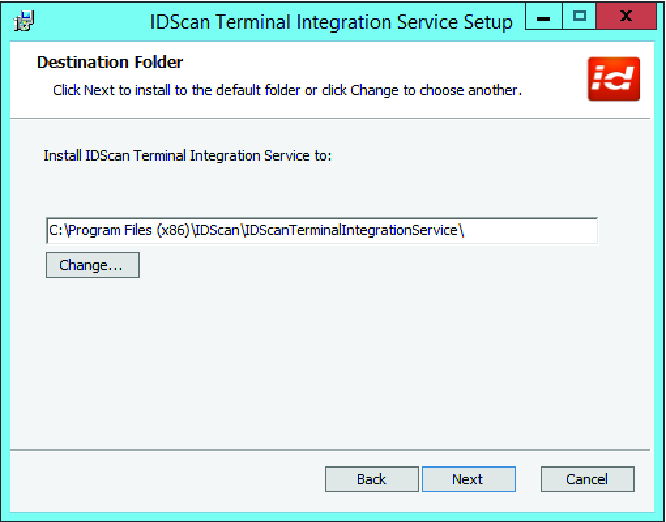
After you have typed in your Backend Server Name in both the IESA Server Name box and Backend Server Name box you should click onto ‘Next’, which will present you with the following screen in with the destination of the folder:
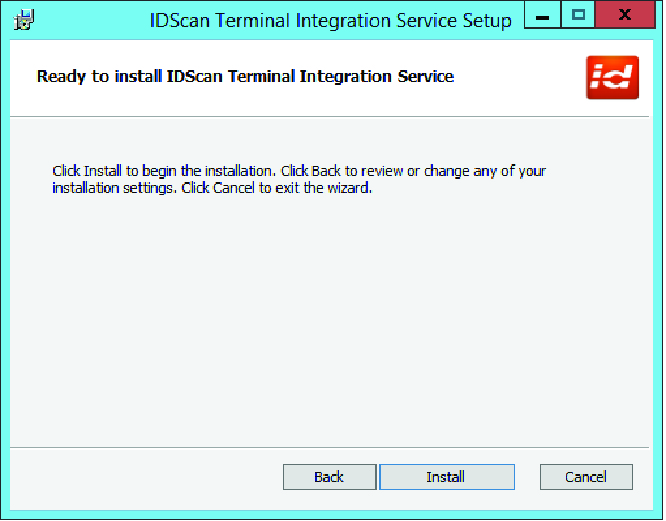
Once you have clicked onto ‘Next’ you will then be prompted to click ‘Install’ as shown below, which would then begin your installation process.
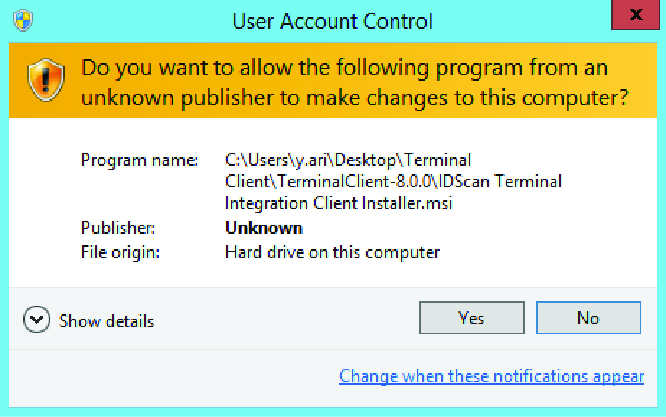
You will then be asked if you allow the program to make the chosen changes to your device in which at this stage you should click ‘Yes’.
After you have clicked onto ‘Yes’ you would be prompted with a final screen as below, in which you would have to click ‘Finish’ to finalise the Terminal Integration Client Installation Package and can start using it how you or your business requires.
You have now finished the installation setup process.