Introduction
This application enables the client’s team to further analyze the captured image and data.
This tool provides more detailed information about the document`s authenticity and information. The ability to search for specific captured images according to, for example the date or reference number of the image.
You will also be able to see the authentication, fields, reference, image, and face view of the captured document once searched.
Login
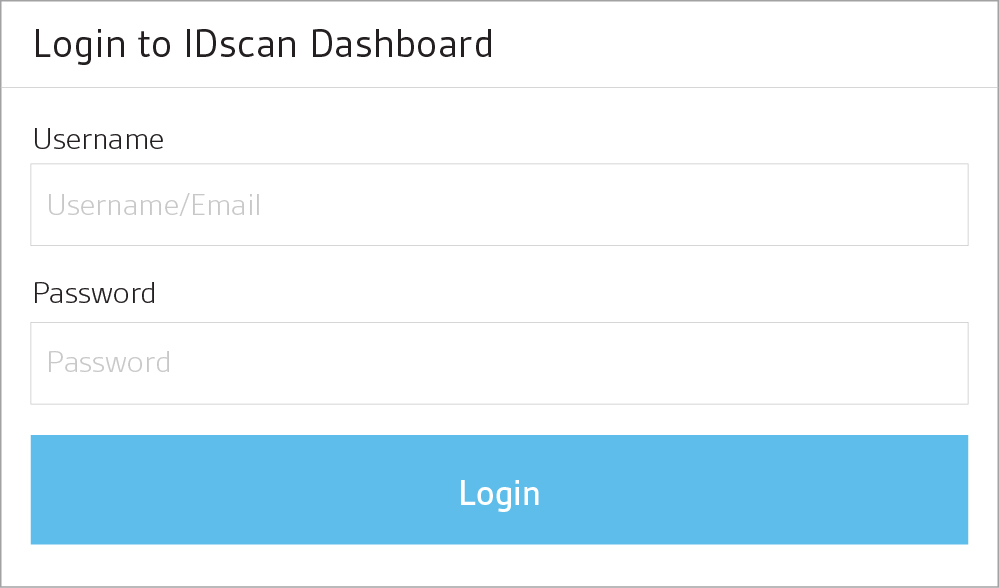
To login to the Investigation Studio use the login path and credentials previously supplied. The user will be presented with a login page as shown below:
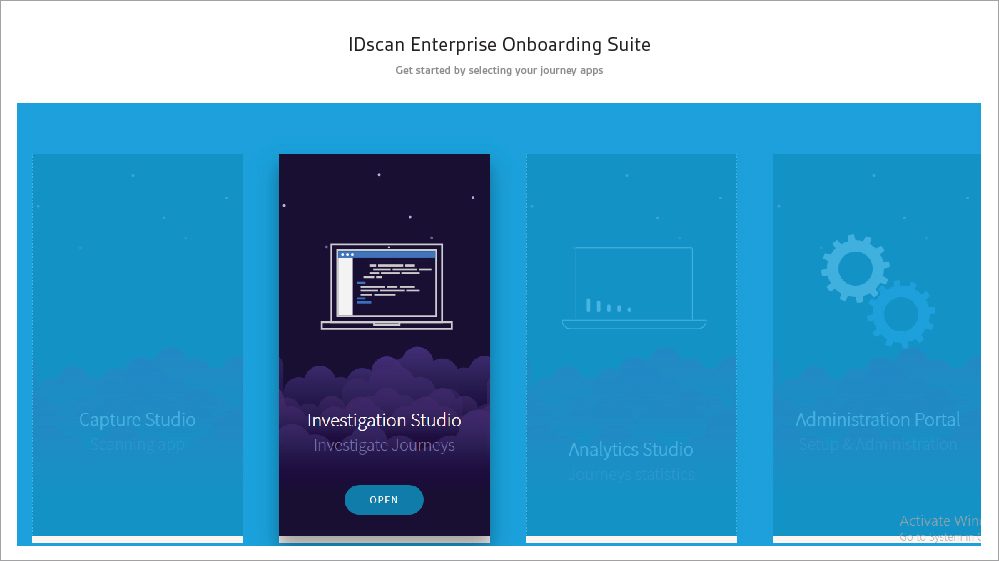
Once you have put in your credentials, role dependent screens will present the user with options. Within ‘Investigation Studio’ click ‘open’ to access it as shown below:
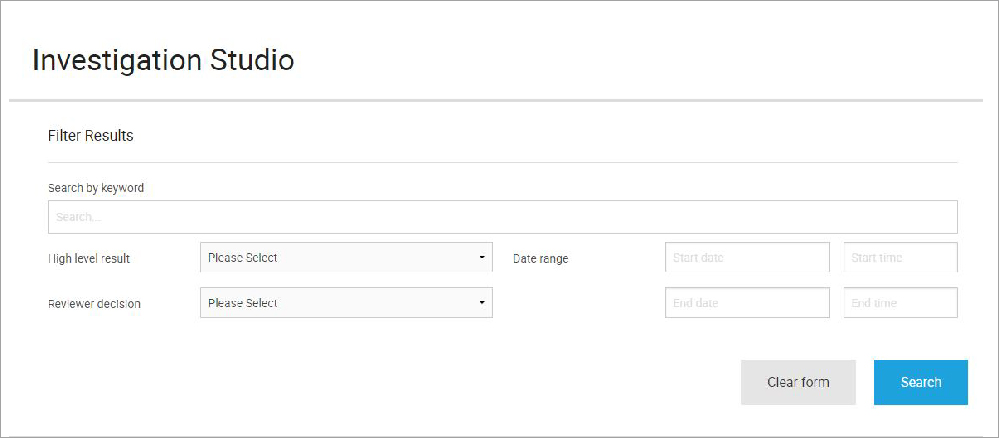
The user will be presented with the Investigation Studio Homepage as shown below:
Search
Sophisticated search queries can be constructed by combining various fields and rules such as Keyword, Status, Date Range (Date and Time), and the Operation Type of specification scans.
- Search by Keyword – is a feature to find out more about the documents for a particular keyword by typing a Name, User, Customer Number, or the Reference Number.
- Search by High Level Result – shows a list of ID information that have the same high level result status as Refer, Expiry, Passed, Not Supported, Not Accepted and Undefined.
- Search by Date Range – lists the classified ID information performed in a certain range of time.
- Search by Operation Type – specifically used to search for A4 document where it gives you the opportunity to choose from Financial and Servicing options between the A4 documents whether it is for example a utility bill, bank statement or any other A4 document.
- Reviewer Decision – allows you to specifically search the result you have overwritten for a high level result. This simply means you may have overwritten a scan to give a ‘Pass’ on a ‘Refer’ result if you believe should have passed.
If you click the “Search” button without filling any search criteria, all the documents performed from the beginning of the first capture to the most recent, which are all saved on the same database as shown below:
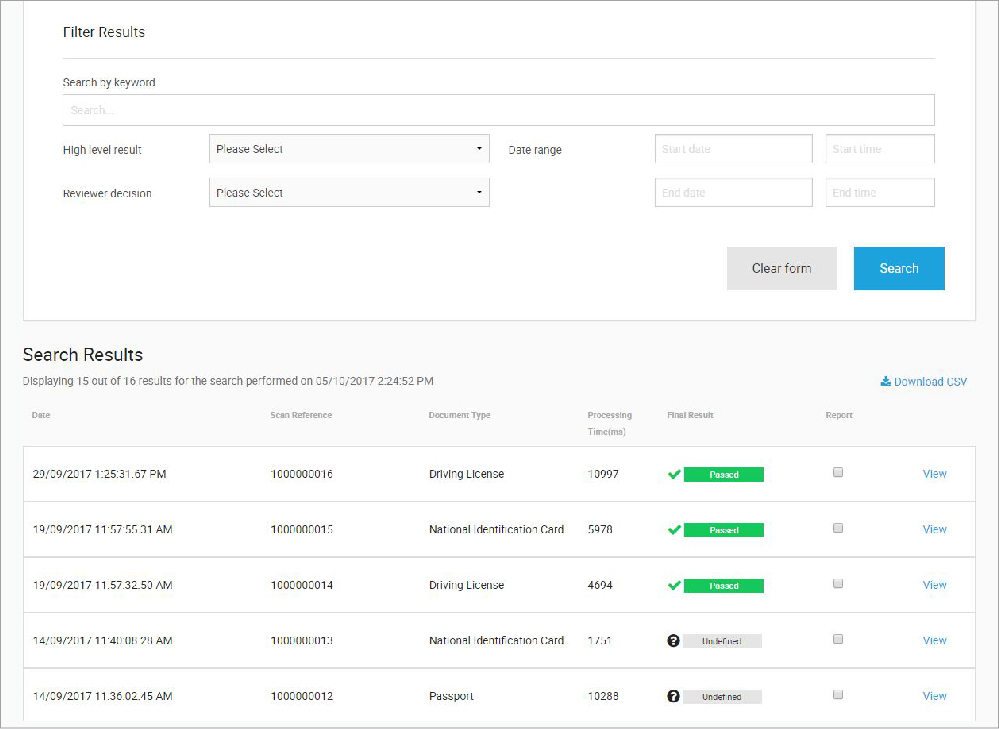
On this page you are able to view the Date and Time, the Scan Reference (unique for every captured image), the Document Type (Identification Card/Passport etc.) and the Final Result (Pass, Refer, Not Supported, or Expired) of the captured image. In order to investigate and analyze the information of the captured document further you can click the blue “View” button on the right hand side of the page under the data segmentation column.
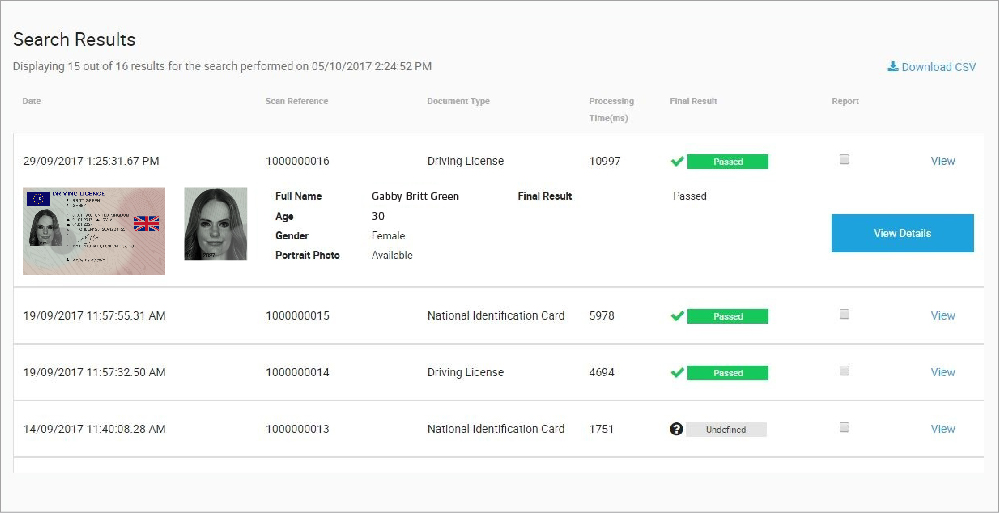
- Once you have clicked on the “View” button you will be shown a similar page as below, which shows a brief summary of the captured document.
- The summary area provides the details extracted from the captured documents and an overall risk factor result calculated by the IDscan engine. It also provides briefly the Full Name, Gender, Age, Document Type, Result, Scan Reference, Date and Time, Portrait Photo and the Face Match description of the captured document.
Available Views
Authentication View
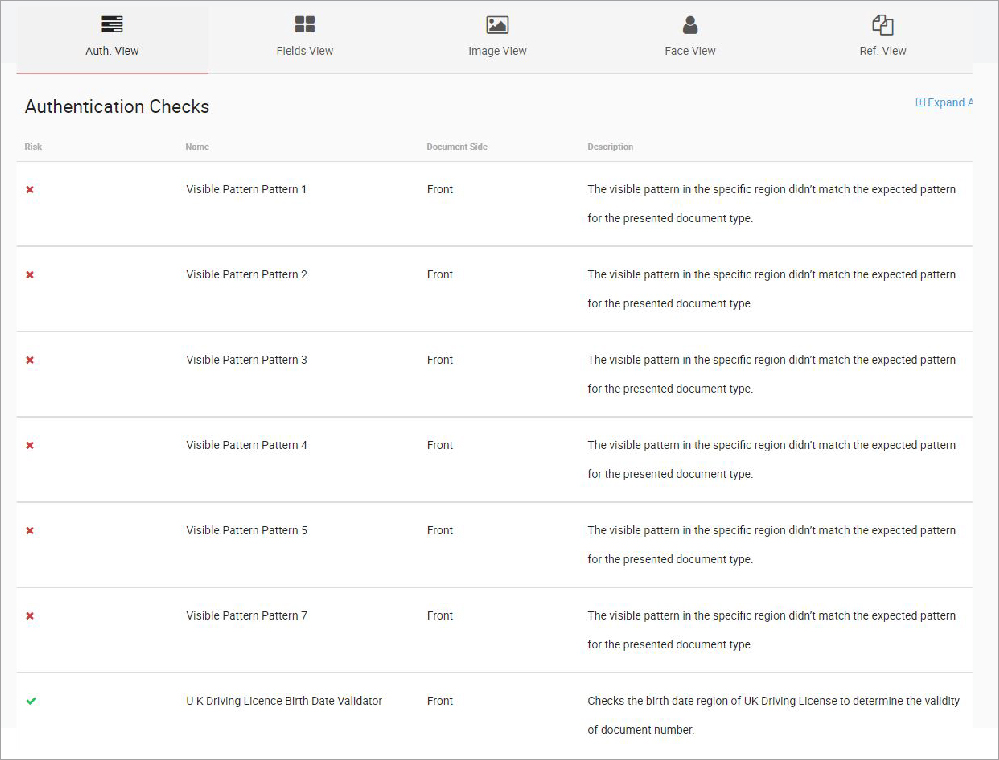
If further analysis is required, click on View Details as you can see below, shows the Authentication Checks of the captured document with the four other viewing options such as the Fields View, Image View, Face View and Reference View.
- The authentication checks area includes a list of all the performed security feature checks together with the description.
- Authentication check provides all the fields that are used to authenticate ID documents with a “Check Mark” section of whether the ID holds a risk or not. If the segment parts have a check mark next to it then this means that the particular pattern of an ID card has passed the authentication checks successfully.
- Alternatively, an “X mark” is designated when it fails to authenticate the pattern of the ID card. Users are able to see the failed segment`s name alongside its description in this field as well as the actual segment image of the ID of where it has passed or failed. By clicking on the name the user can see a section of the document called a segment, an example of the Authentication View page is below. You are also shown a photo of each segment part of the ID including its Name, Document Side (Front or Back) and the Description
Fields View
“Fields View” shows all the information on the captured image of the document. There are four sections such as Segment, Document Side (front or back), Name (Address line, Document number, Full Name, Last Name, Nationality Code, Nationality Name, Expiry date, Issue date) as well as a Value section, which contains the extracted information from the document as can be seen below:
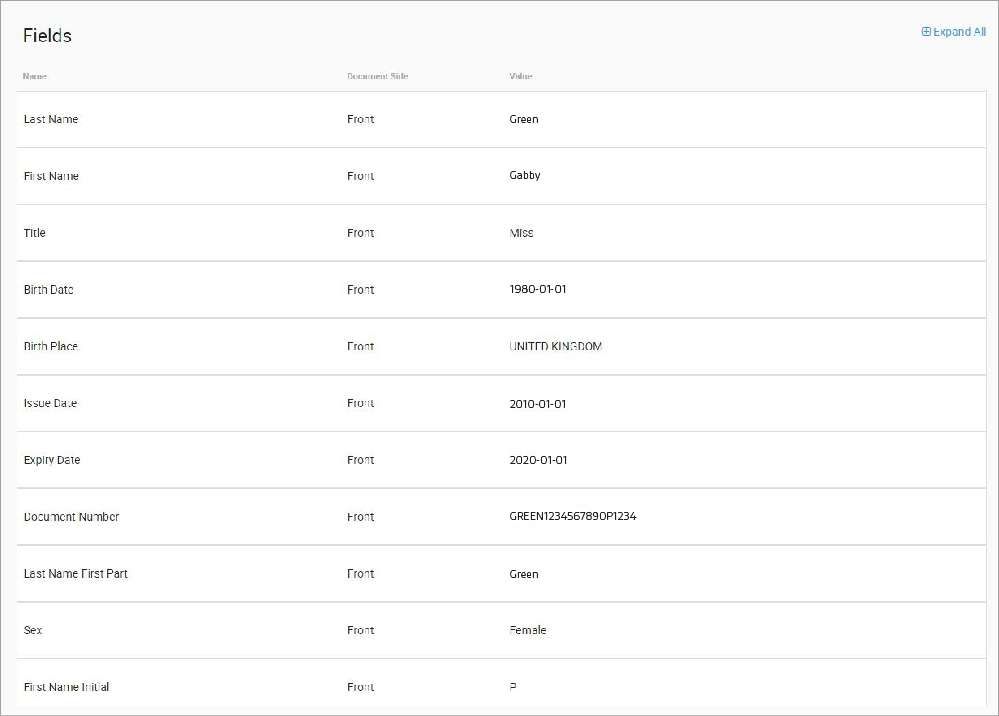
Image View
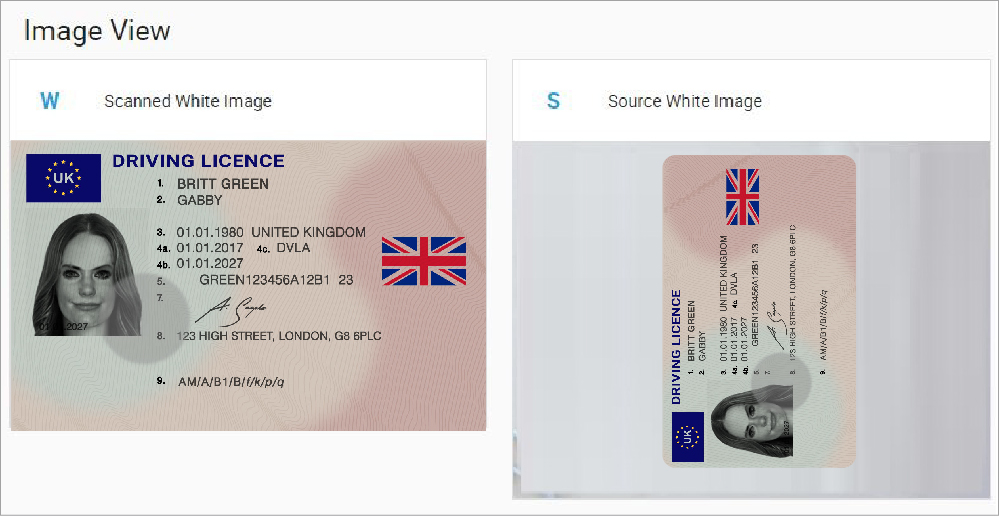
In the Image View section, users have the ability to view the image/document that has been captured, presented as both the scanned white image and source image. In addition the ID Portrait Photo displaying just the face of the person as shown below:
Face View
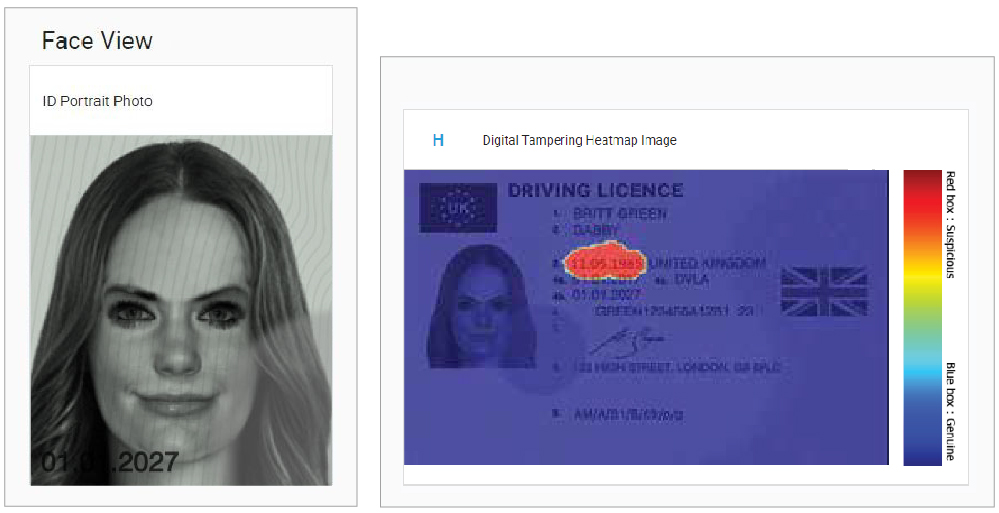
The face view is a new feature showing the face on the captured document as well as the Selfie image, (when the function of IDscan FaceMatch has been enabled). This feature allows you to send your ID alongside a Selfie image for a high level result comparing the faces on the ID and the Selfie image and gives a result accordingly.
If Face Match is not enabled then the user will not see the Face view image as per below:
Reference View
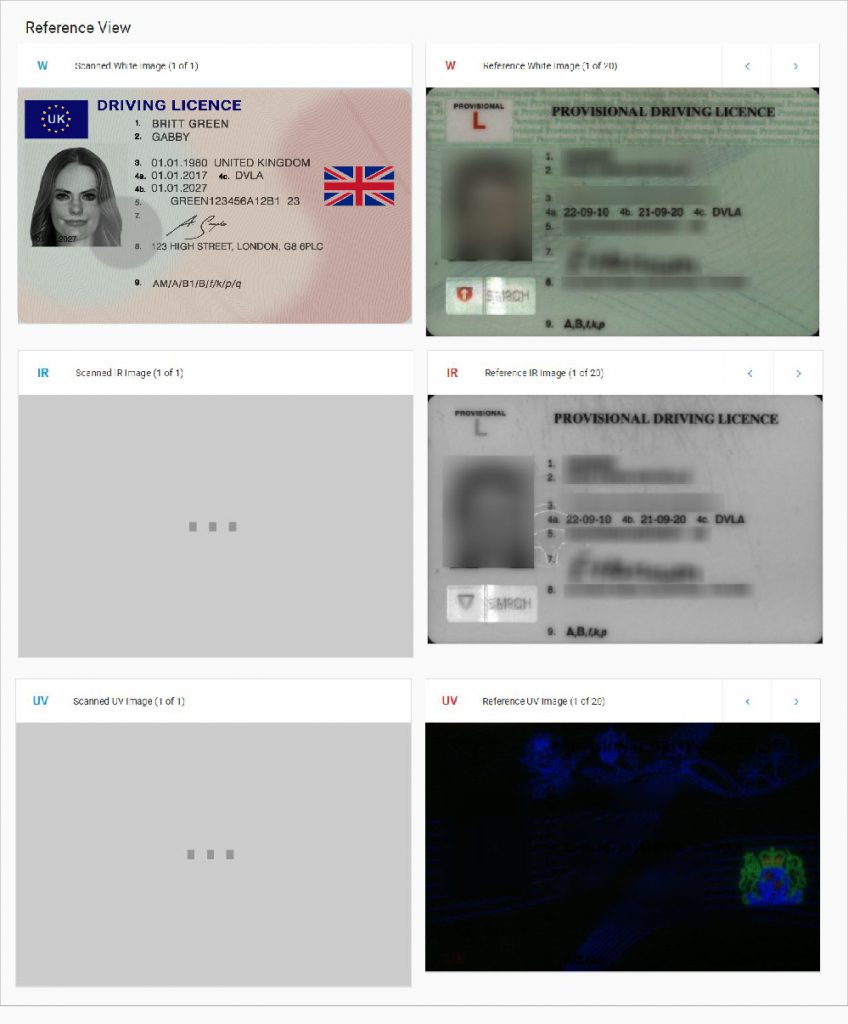
The Reference View section from the Investigation Studio provides a convenient one-to-one comparison between the white image of the current document type. It also shows the scanned IR and UV images and a genuine sample of the same document type, as seen below.
By clicking on the navigation symbol “<” at the lower left corner of the scanned reference white image, you can jump to the different reference images of the captured ID with each click.
