The Investigation Studio enables further analyzes to be performed on the captured image and data.
The Investigation Studio provides more detailed information about the document`s authenticity. The ability to search for specific captured images according to, for example the date or reference number of the image.
You will also be able to see the authentication, fields, reference, image, and face view of the captured document once searched.
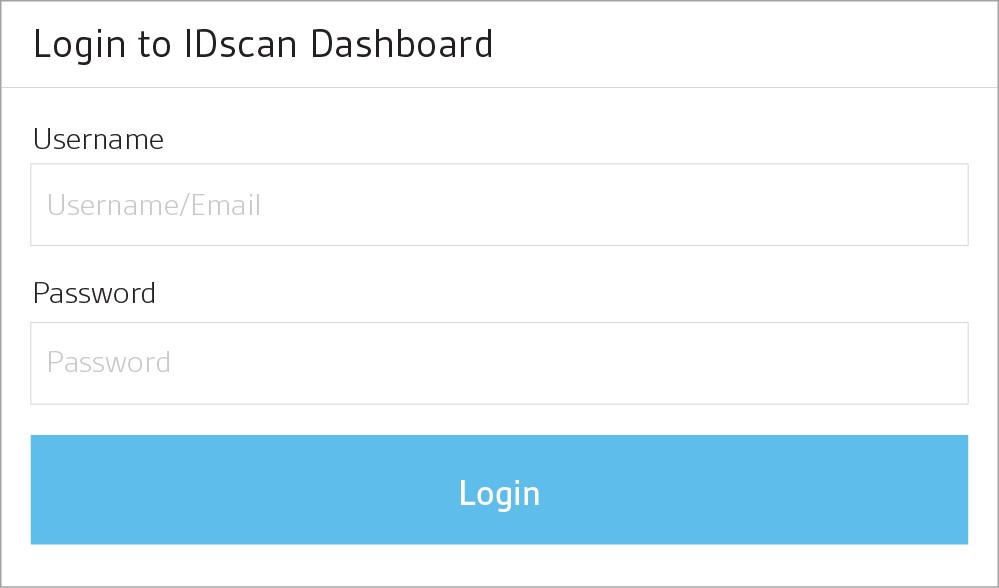
Login using an account that is authorised to view the Investigation Studio section:
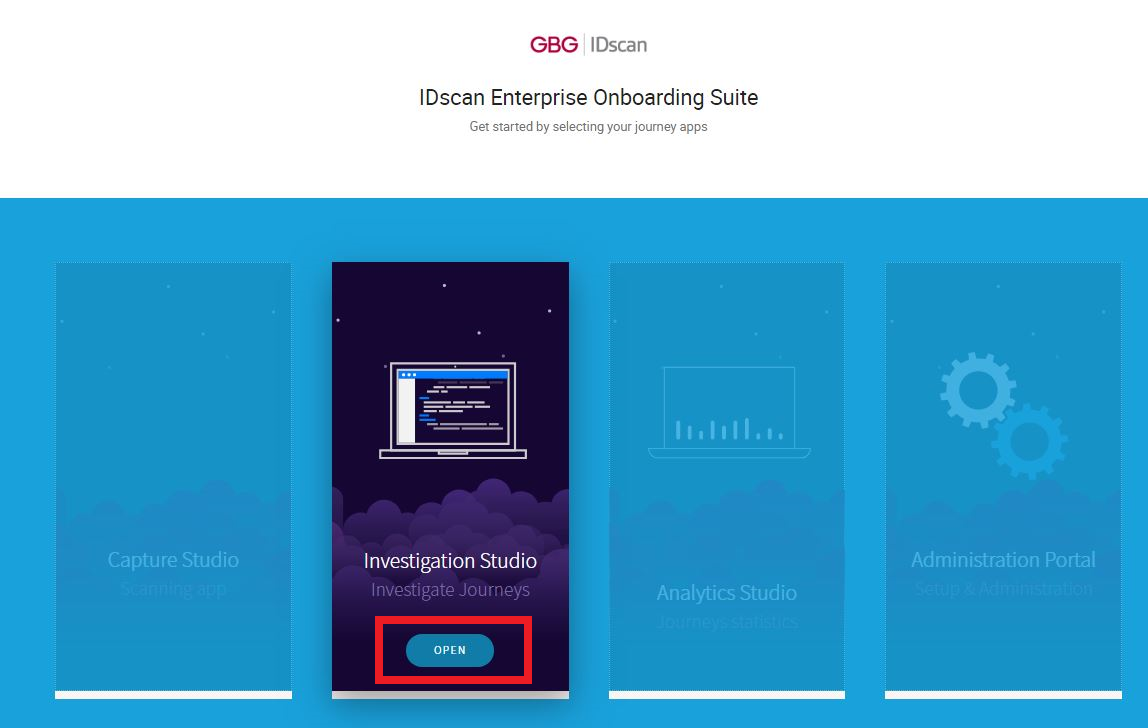
Once you have put in your credentials, role dependent screens will present the user with options. Click the ‘open’ button on the Investigation Studio icon to start:
You will then see the main search screen:
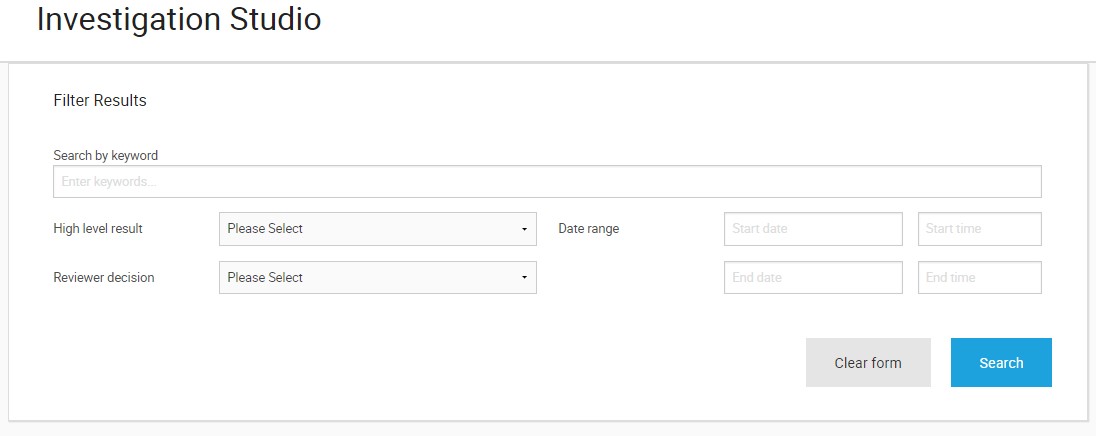
Searching
There are a number of different search queries can be constructed by combining various fields and rules such as Keyword, Status, Date Range (Date and Time), and the Operation Type of specification scans.
- Search by Keyword – is a feature to find out more about the documents for a particular keyword by typing a Name, User, Customer Number, or the Reference Number.
- Search by High Level Result (HLR) – shows a list of ID information that have the same high level result status as Refer, Expiry, Passed, Not Supported, Not Accepted and Undefined.
- Search by Date Range – lists the classified ID information performed in a certain range of time.
- Referral Status – allows you to specifically search the result you have overwritten for a high level result. This simply means you may have overwritten a scan to give a ‘Pass’ on a ‘Refer’ result if you believe should have passed. The options in this criteria:
- Not Referred : shows not overridden journeys.
- Pending Referral Outcome : shows the journeys which need to be reviewed by forensic expert after user hits “forensic expert” button.
- Referral Complete : shows overridden journeys.
If you click the “Search” button without filling any search criteria, all the documents performed from the beginning of the first capture to the most recent, which are all saved on the same database as shown below:
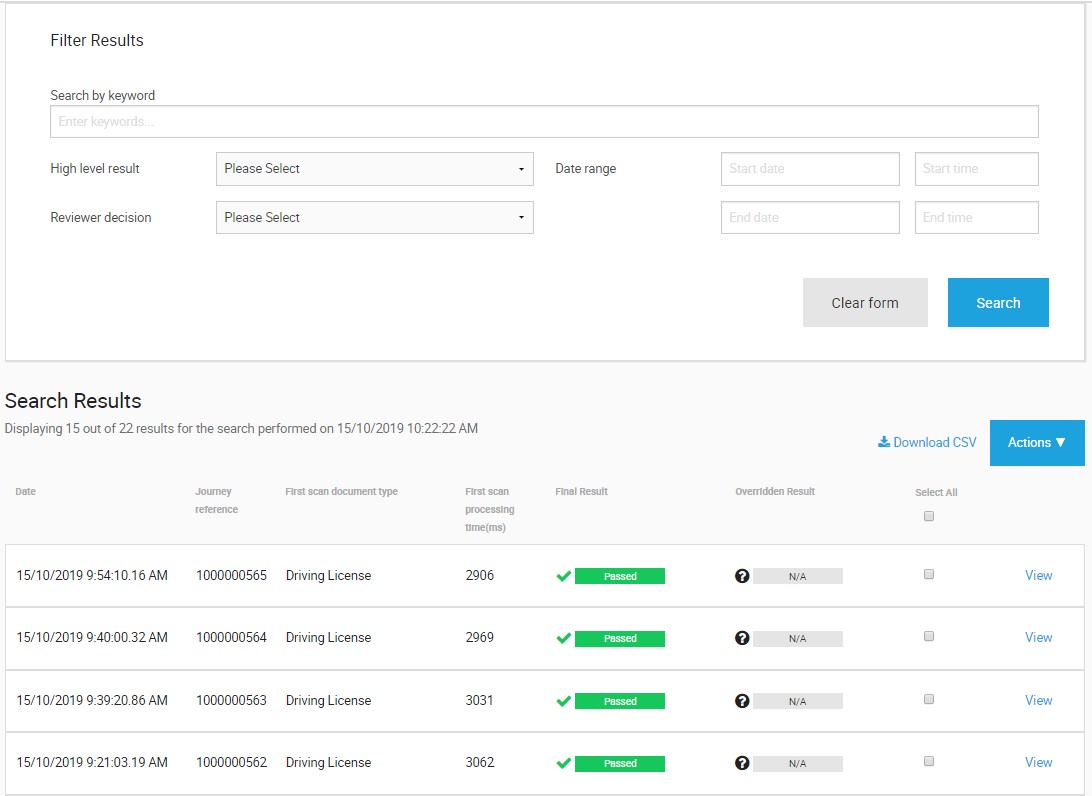
On this page you are able to view the Date and Time, the Scan Reference (unique for every captured image), the Document Type (Identification Card/Passport etc.) and the Final Result (Pass, Refer, Not Supported, or Expired) of the captured image. In order to investigate and analyze the information of the captured document further you can click the blue “View” button on the right hand side of the page under the data segmentation column.
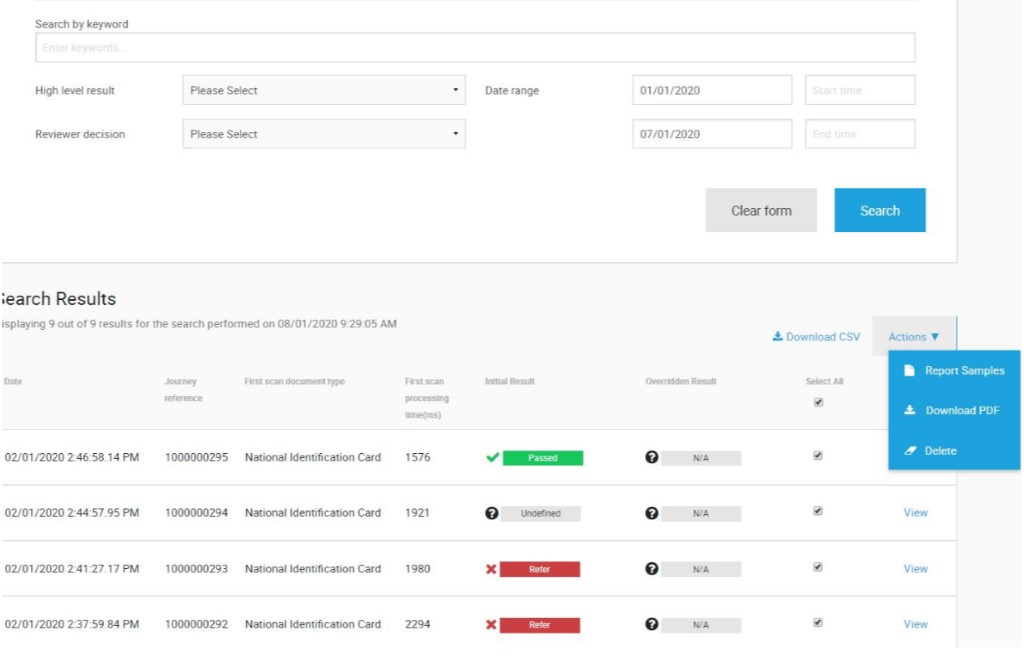
User accounts with SuperAdmin and ReportUser roles are able to download PDF report for multiple journeys in a single click. After a search is performed, SuperAdmin and ReportUser users can select multiple journeys and download the PDF reports.
In order to investigate and analyze the information of the captured document further you can click the blue “View” button on the right hand side of the page under the data segmentation column.
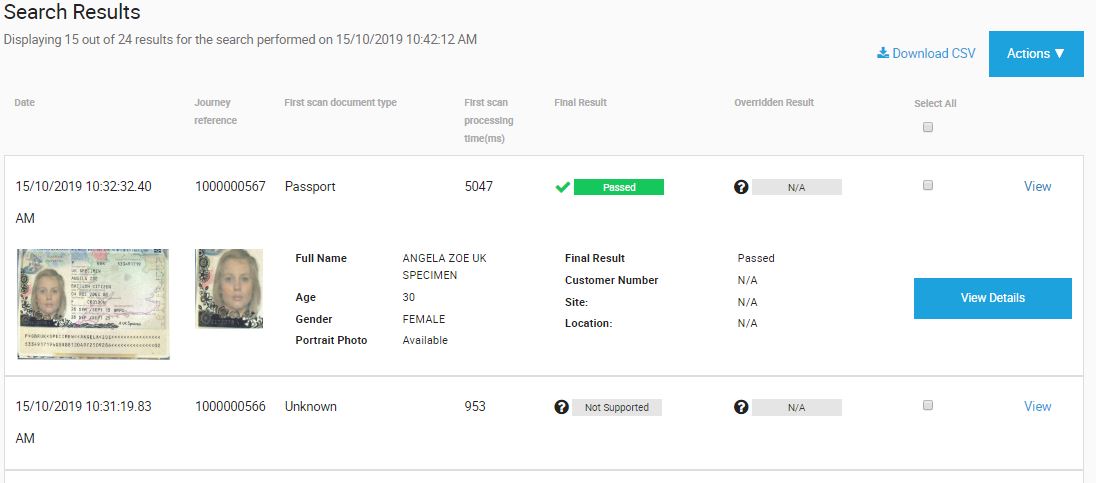
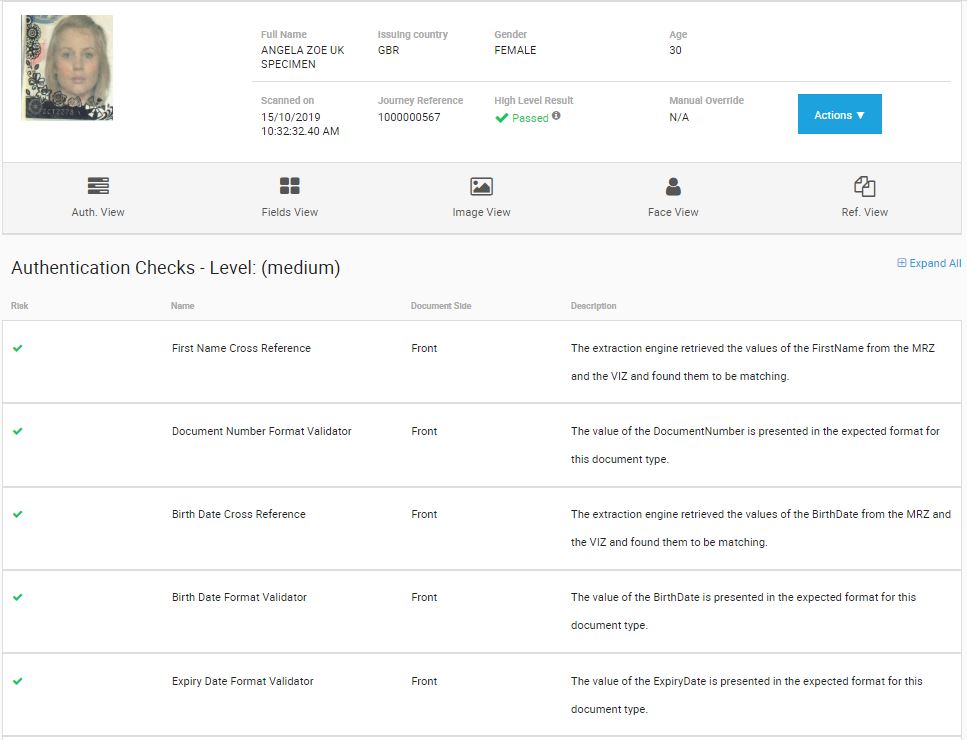
Once you have clicked on the “View” button you will be shown a similar page as below, which shows a brief summary of the captured document.
The summary area provides the details extracted from the captured documents and an overall risk factor result calculated by the IDscan engine. It also provides briefly the Full Name, Gender, Age, Document Type, Result, Scan Reference, Date and Time, Portrait Photo and the Face Match description of the captured document.
In order to make a decision on the referred document, you can click the blue “Actions” button on the right hand side of the page.
If you would like to ask experts to validate the document, you can click “Forensic Expert” button.
Also there are options either to accept it or reject.
If the document is expired also the journey can be overridden with “Expired” option.
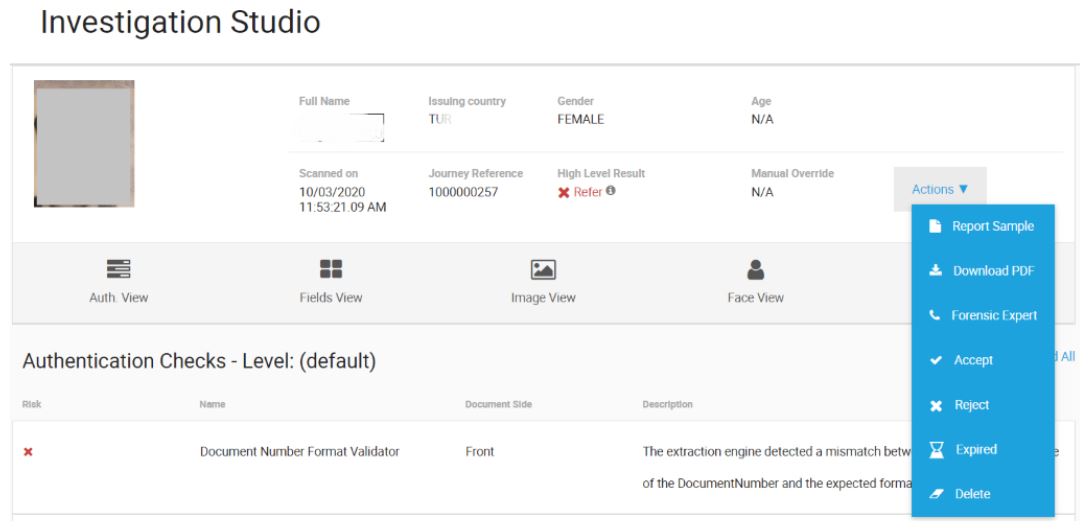
Authentication View
As you can see the below shows the Authentication Checks of the captured document with the four other viewing options such as the Fields View, Image View, Face View and Reference View.
- The authentication checks area includes a list of all the performed security feature checks together with the description.
- Authentication check provides all the fields that are used to authenticate ID documents with a “Check Mark” section of whether the ID holds a risk or not. If the segment parts have a check mark next to it then this means that the particular pattern of an ID card has passed the authentication checks successfully.
- Alternatively, an “X mark” is designated when it fails to authenticate the pattern of the ID card. Users are able to see the failed segment`s name alongside its description in this field as well as the actual segment image of the ID of where it has passed or failed. By clicking on the name the user can see a section of the document called a segment, an example of the Authentication View page is below. You are also shown a photo of each segment part of the ID including its Name, Document Side (Front or Back) and the Description
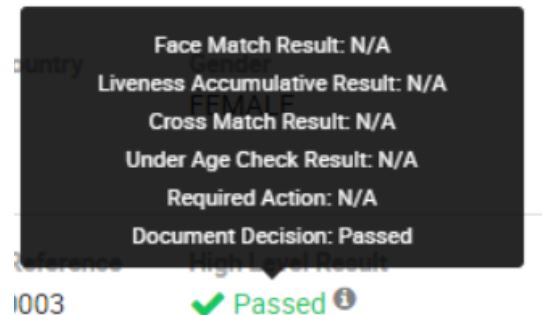
In journey detail view, in High Level Result info box, “Required Action” information will be shown. This information indicates the reason why the journey result comes as “undefined”. For undefined journeys this information shows the step which was required, however not provided.
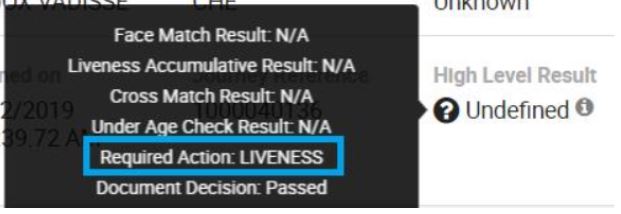
If the journey is not “Undefined” then the value for “Required Action” will be “N/A”.
Quality Checks View
The Quality Checks view shows all the information on the quality of the document. There are four types of quality checks such as Low Resolution Check, Glare Check, Blur Check, Full document in view check, as can be seen below. These checks can be visible for each side of the document separately.

Fields View
“Fields View” shows all the information on the captured image of the document. There are four sections such as Segment, Document Side (front or back), Name (Address line, Document number, Full Name, Last Name, Nationality Code, Nationality Name, Expiry date, Issue date) as well as a Value section, which contains the extracted information from the document as can be seen below:
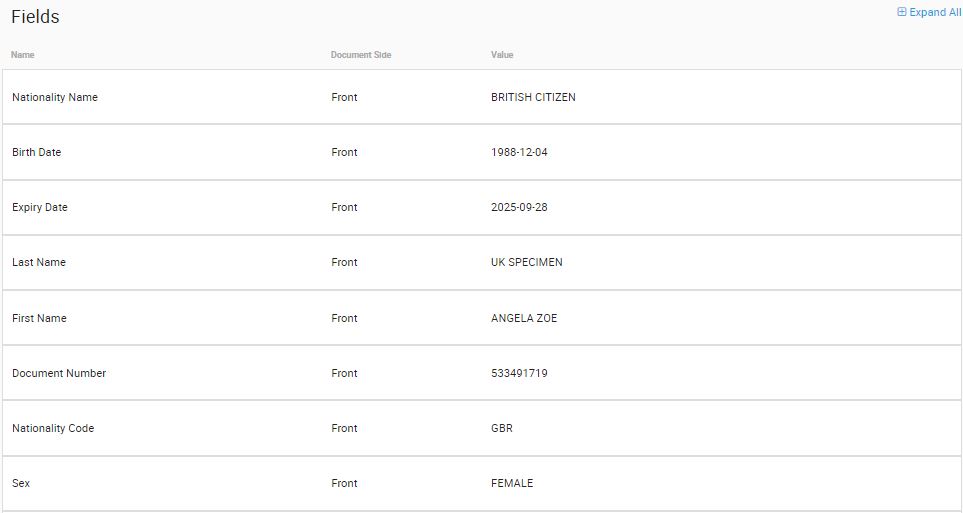
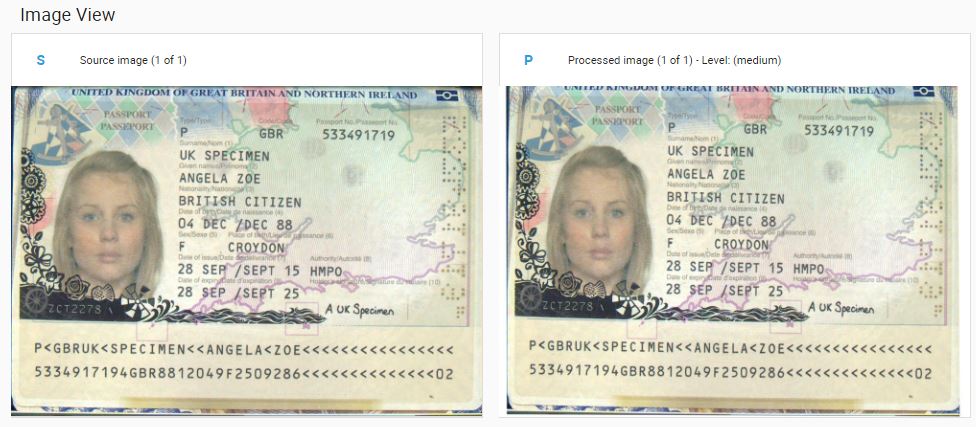
Image View
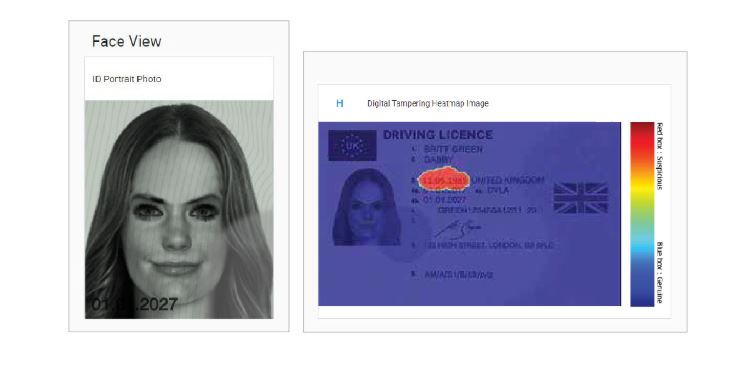
In the Image View section, users have the ability to view the image/document that has been captured, presented as both the scanned white image and source image. In addition the ID Portrait Photo displaying just the face of the person as shown below:
Face View
The face view is a feature showing the face on the captured document as well as the Selfie image, (when the function of IDscan FaceMatch has been enabled). This feature allows you to send your ID alongside a Selfie image for a high level result (HLR) comparing the faces on the ID and the Selfie image and gives a result accordingly.
If Face Match is not enabled then the user will not see the Face view image as per below:
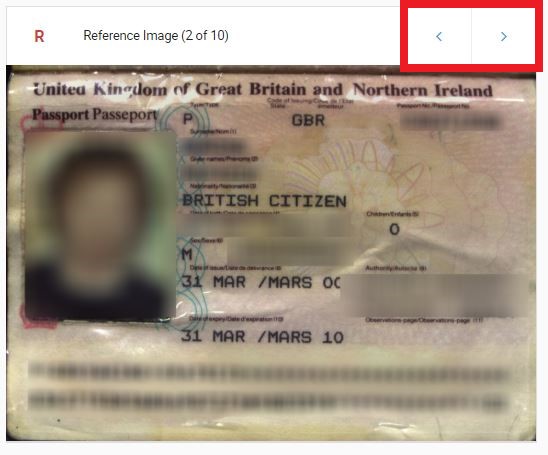
Reference View
The Reference View section from the Investigation Studio provides a convenient one-to-one comparison between the white image of the current document type. It also shows the scanned IR and UV images and a genuine sample of the same document type, as seen below.
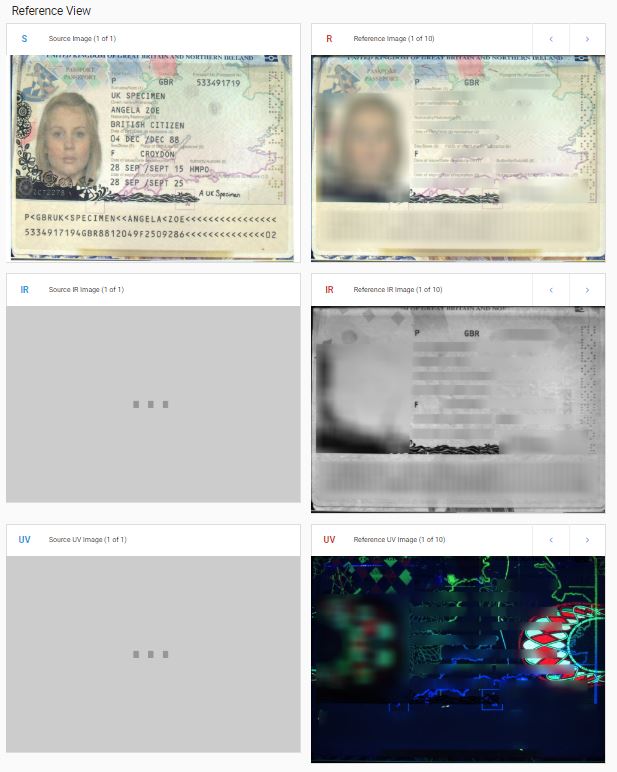
By clicking on the navigation symbols “<” or “>”at the upper right corner of the scanned reference white image, you can jump to the different reference images of the captured ID with each click.