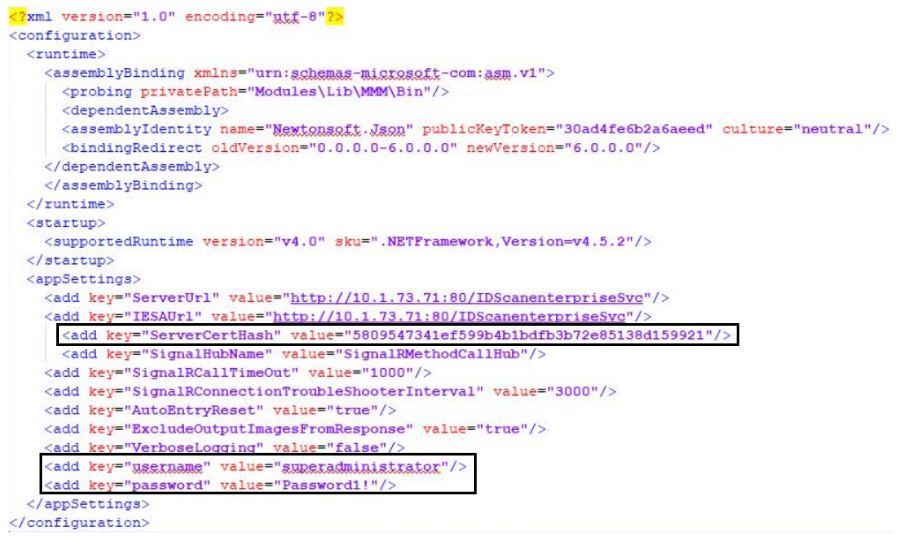
The Terminal Integration Client file is located in the path: C:Program Files (x86)IDscanIDscanTerminalIntegrationServiceIDscan.TerminalIntegration.Service.exe.config
After you locate and open this file, it appears as below:
You then have the option to edit and configure this file to the rules and requirements of your business according to the terminal client service.
If you have any further queries/questions in accordance with the terminal client installation or configuration, please consult with your technical account manager that will help/guide you in the best way possible
In addition to the settings above, the following configurations need to be done:
- Username
- Password
- ServerCertHash
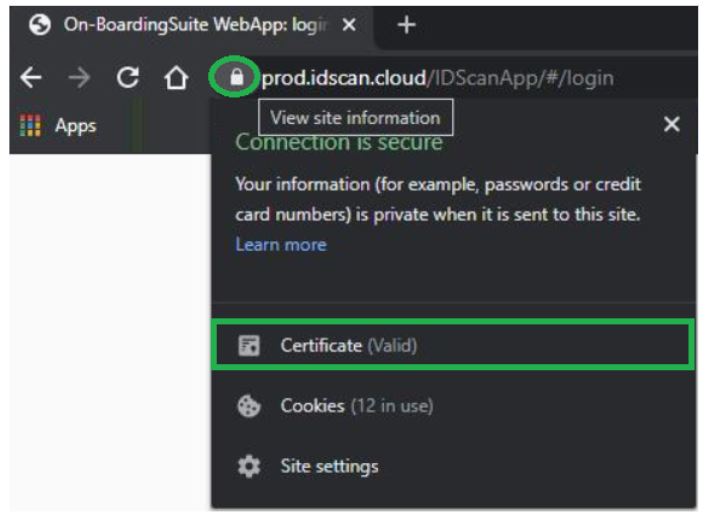
ServerCertHash: The value of this key should be SSL certificate thumbprint code. When the application is opened in the web browser, if the lock icon is clicked, “Certificate” option will be shown on the list.
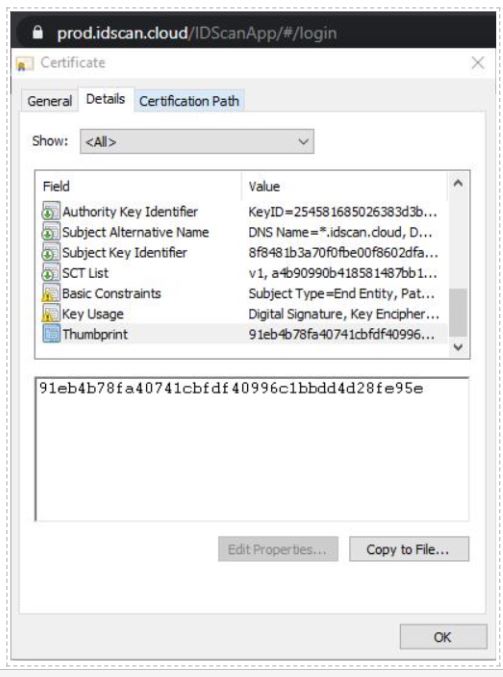
When the “Certificate” option is selected, in “Details” view below, Thumbprint code can be obtained. This code should be put as ServerCertHash key value into the TIC configuration file.
Username and Password: If LDAP authentication is configured on client environment, the following Active Directory structure should be constructed.
There should be one main group which can be seen as “IDscan” on the screenshot below.
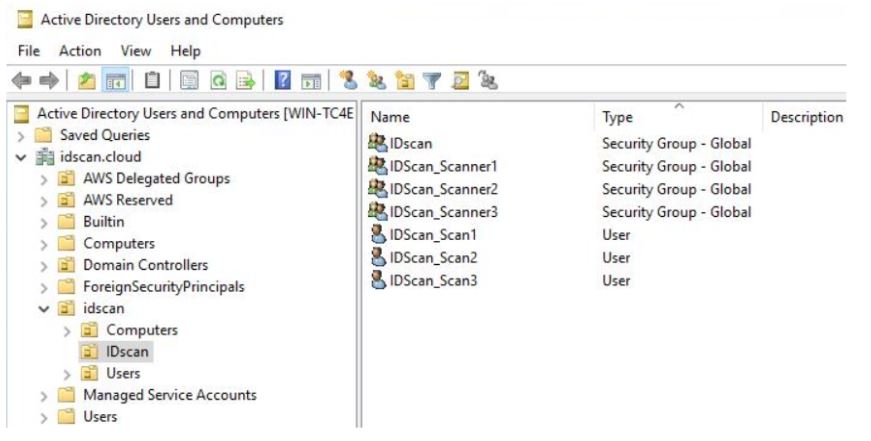
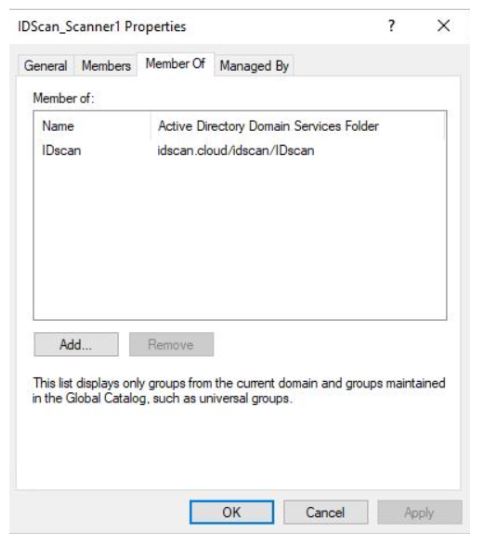
Created user groups which are like “IDScan_Scanner1”, “IDScan_Scanner2” and “IDScan_Scanner3” should be member of the main group which is “IDScan”.
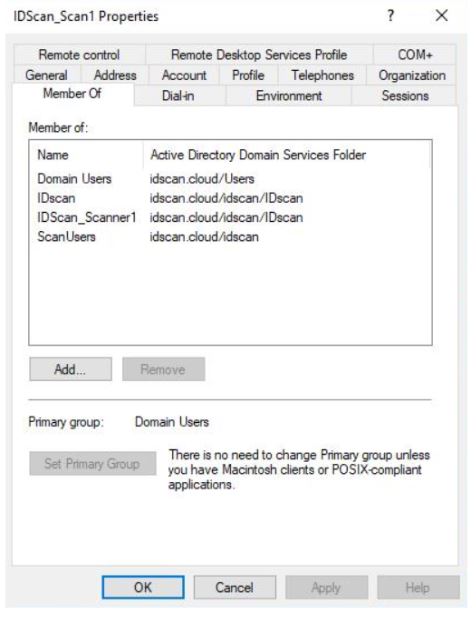
Created users which are like “IDScan_Scan1“, “IDScan_Scan2″ and “IDScan_Scan3” should be member of both main Active Directory Groups, the other sub groups and the regarding RoleName which is specified in RoleMappingFile.xml
One of these configured users should be put into the TIC configuration file as username and password with it’s password.
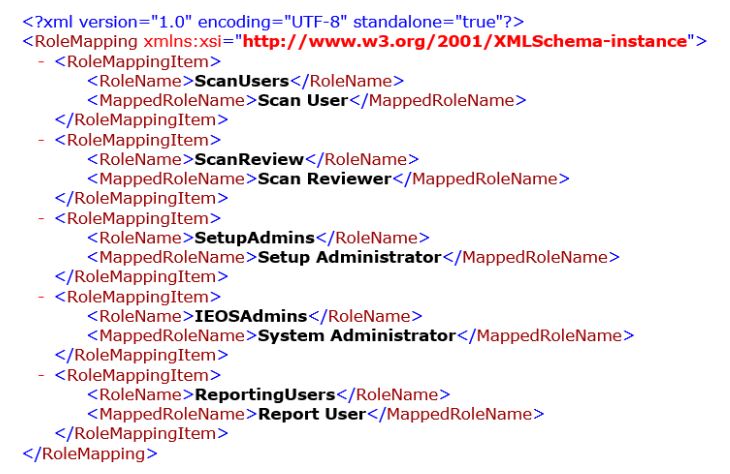
You can locate the required roles within RoleMapping xml file, which is located in the path: C:\ProgramData\IDscan\IDscanEnterprise\RoleMappingFile.xml
After you locate and open this file, it appears as below:
