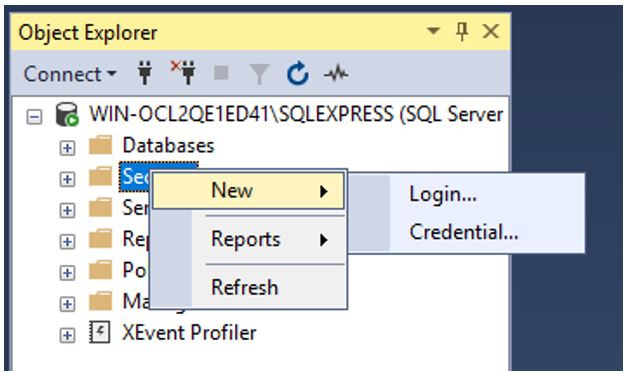
Under the Object Explorer see the ‘Security’ tab and right click onto it to choose the ‘New’ – ‘Login’ options as shown here:

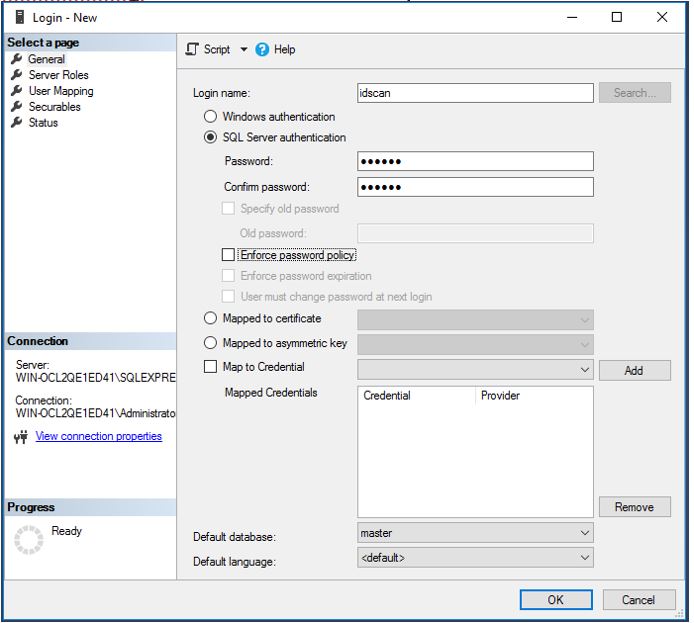
Please enter the Username and Password, which is the same as the Backend Installation in the Connection String as shown below. The Username and password details can be found in the Web.config file located in C:inetpubwwwrootIDScanEnterpriseSvc

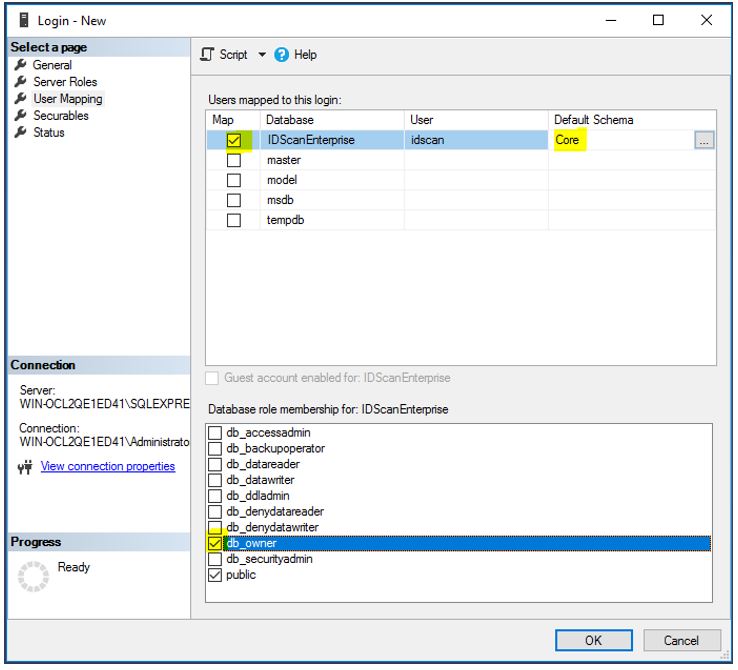
Then go to the ‘User Mapping’ option from the drop down menu on the left hand side under the ‘Select a Page’ pane. Once the page has appeared select the box for ‘IDscanEnterprise’, choose the ‘Default Schema’ as ‘Core’ and Database role as ‘db_owner’ as shown below:

A user who has server level permission ‘Create Any Database’ should create the application database on your enterprise database server.
- Use the database creation script that you have been supplied with by your Professional Services Consultant.
- After creating the database, create a new DB user (Windows user or SQL user) with Read/Write permissions.
- If you used Windows User to access the database, you need to go to IIS and set the application pool identity to the same windows account credentials.
- Grant this windows account read permissions at:
- “C:inetpubwwwrootIDscanApp”
- And “C:inetpubwwwrootIDscanEnterpriseSvc”
- And also “C:WINDOWSMicrosoft.NETFramework4.0.30319 Temporary ASP.NET Files”